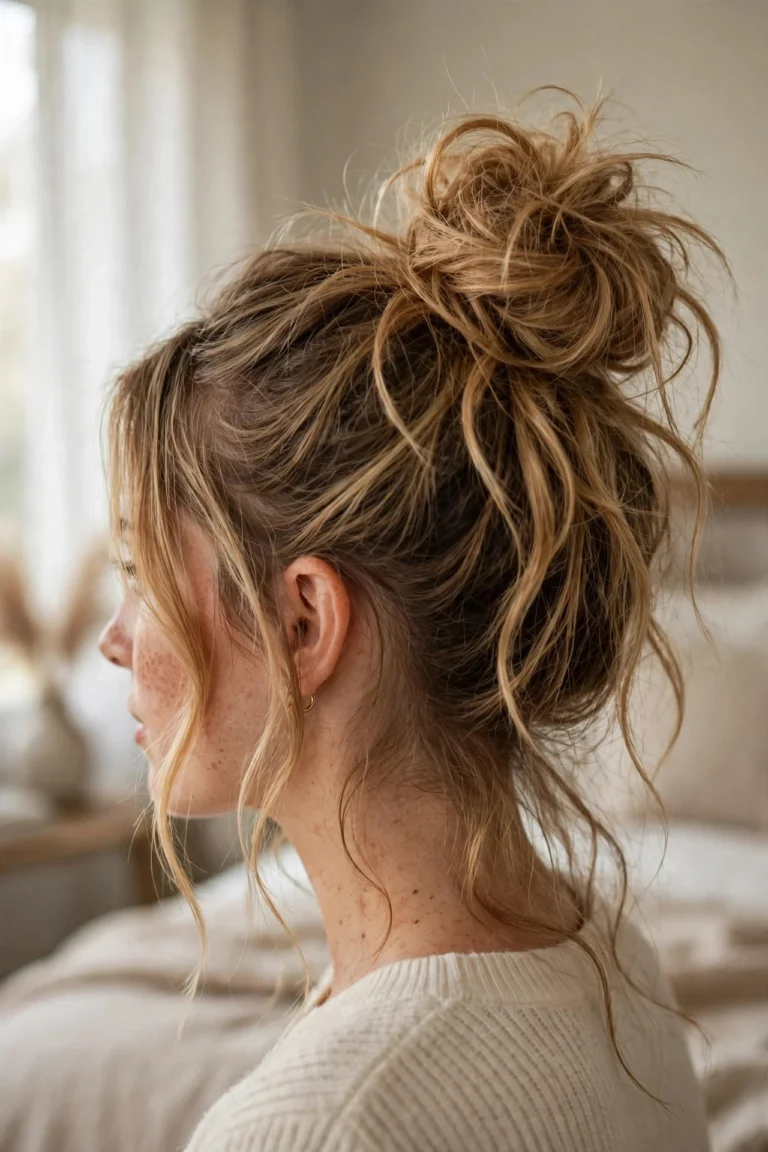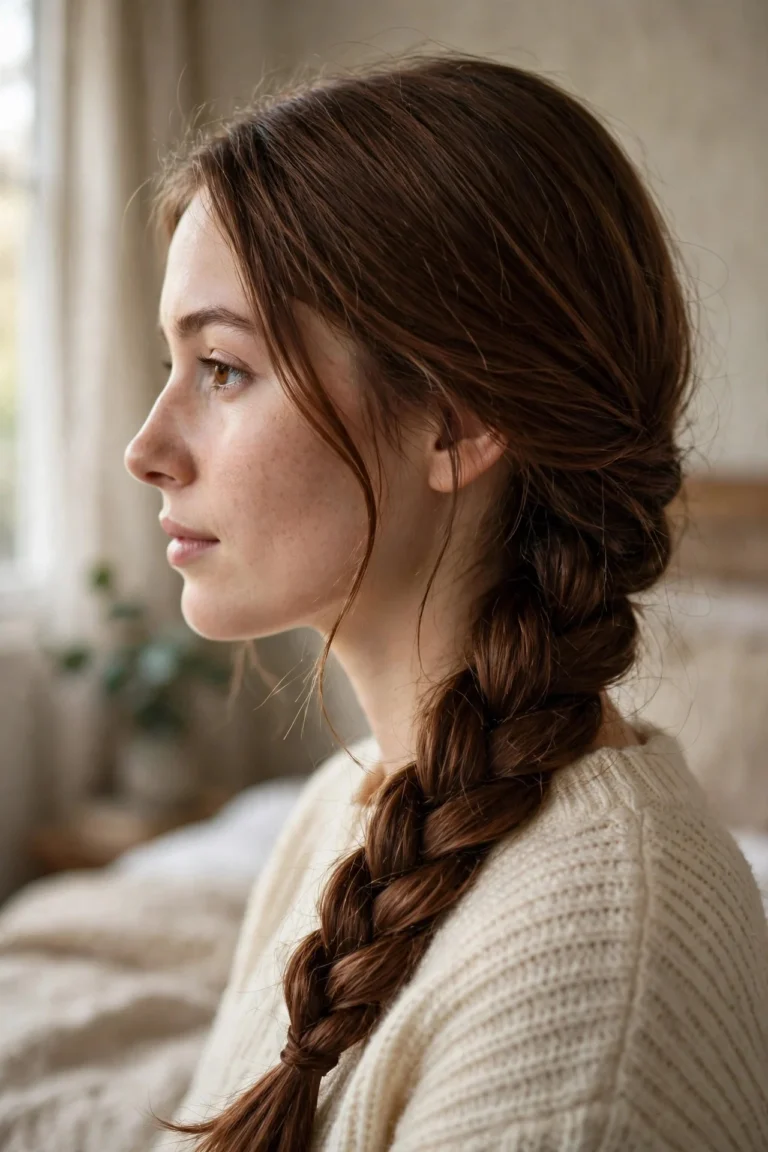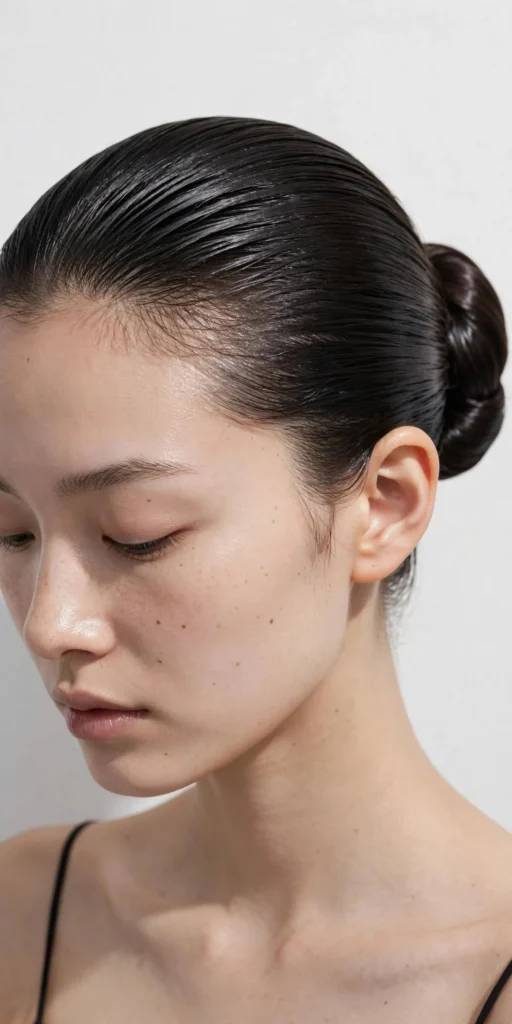
The slicked-back bun looks effortless but runs on technique. Get it right and you have a polished look that works for the office, a wedding, or a night out. The secret is prep: the right products, a decent brush, and knowing the order of operations. These twelve tutorials cover every version worth trying, each with what you need, who it suits, and the honest truth about upkeep.
1Classic Center-Part Slick Bun
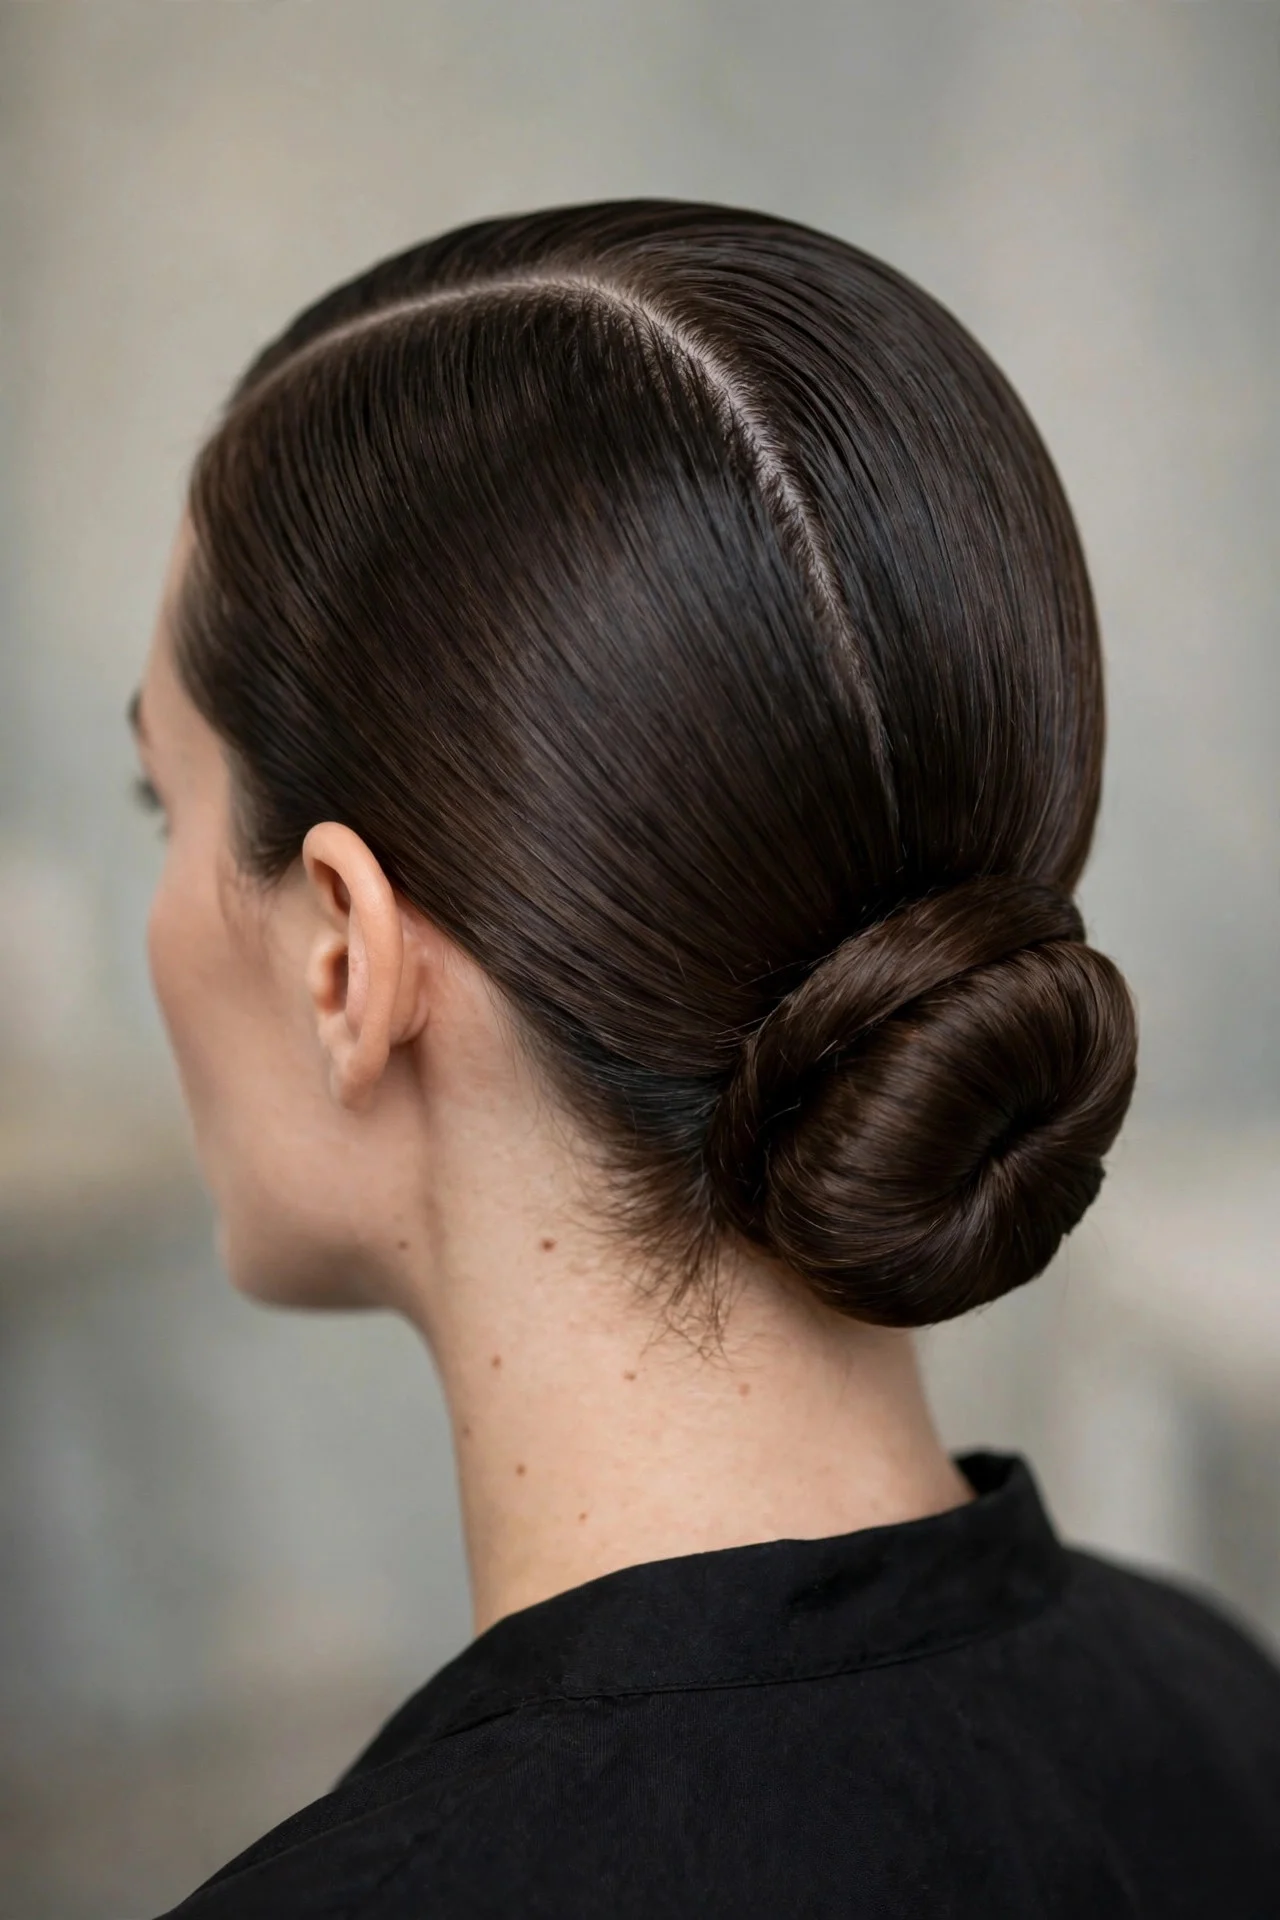
Start on damp hair, which gives you the most control. Part cleanly down the center, then work a palmful of strong-hold gel from roots to mid-lengths, combing everything straight back and down toward the nape. Gather into a low ponytail, secure with a no-slip elastic, twist the tail, and wrap it around the base. Pin with bobby pins pushed through the bun's center, not just the edges. Finish with hairspray and a light boar-bristle pass over the surface. This suits oval and heart faces best, since the center part opens the face symmetrically. Upkeep is easy: it holds all day and refreshes with water and a quick re-comb. The drawback is product weight. Too much gel and it reads greasy by evening, so go lighter than you think.
2Low Slicked Bun with a Soft Side Part

A side part makes the slicked bun feel a little softer and more editorial. On dry or slightly damp hair, part deeply to one side, then smooth a quarter-size amount of smoothing cream through the roots. Brush everything back and down, keeping the hair hugging close to the head, and collect it into a low ponytail just above the nape. Twist and coil into a flat bun, pinning as you go. Mist with flexible-hold hairspray so the sides do not look shellacked. Round faces love this one because the asymmetry breaks up fullness. It takes about ten minutes once you have the part down. The honest downside is part maintenance. Humidity and movement will blur a deep side part within hours, so carry a comb for touch-ups.
3High Polished Ballerina Bun

The high slicked bun sits right at the crown and reads instantly formal. Flip your head upside down, brush everything toward the crown over gelled roots, and secure a high ponytail with two elastics. Smooth the tail, twist it tightly, and coil around the base, pinning every quarter turn. A final pass of edge-control gel on a toothbrush handles the hairline. For extra polish, wrap a small ponytail section around the elastic before pinning. Long necks and oval faces carry this beautifully. It survives dancing, wind, and long dinners. The cost is tension: worn too tight or too often, a high bun can stress the hairline, so loosen it slightly and take rest days between wears. For more formal bun variations, see these ballerina bun tutorials.
4Slicked Bun with a Wispy Front Frame
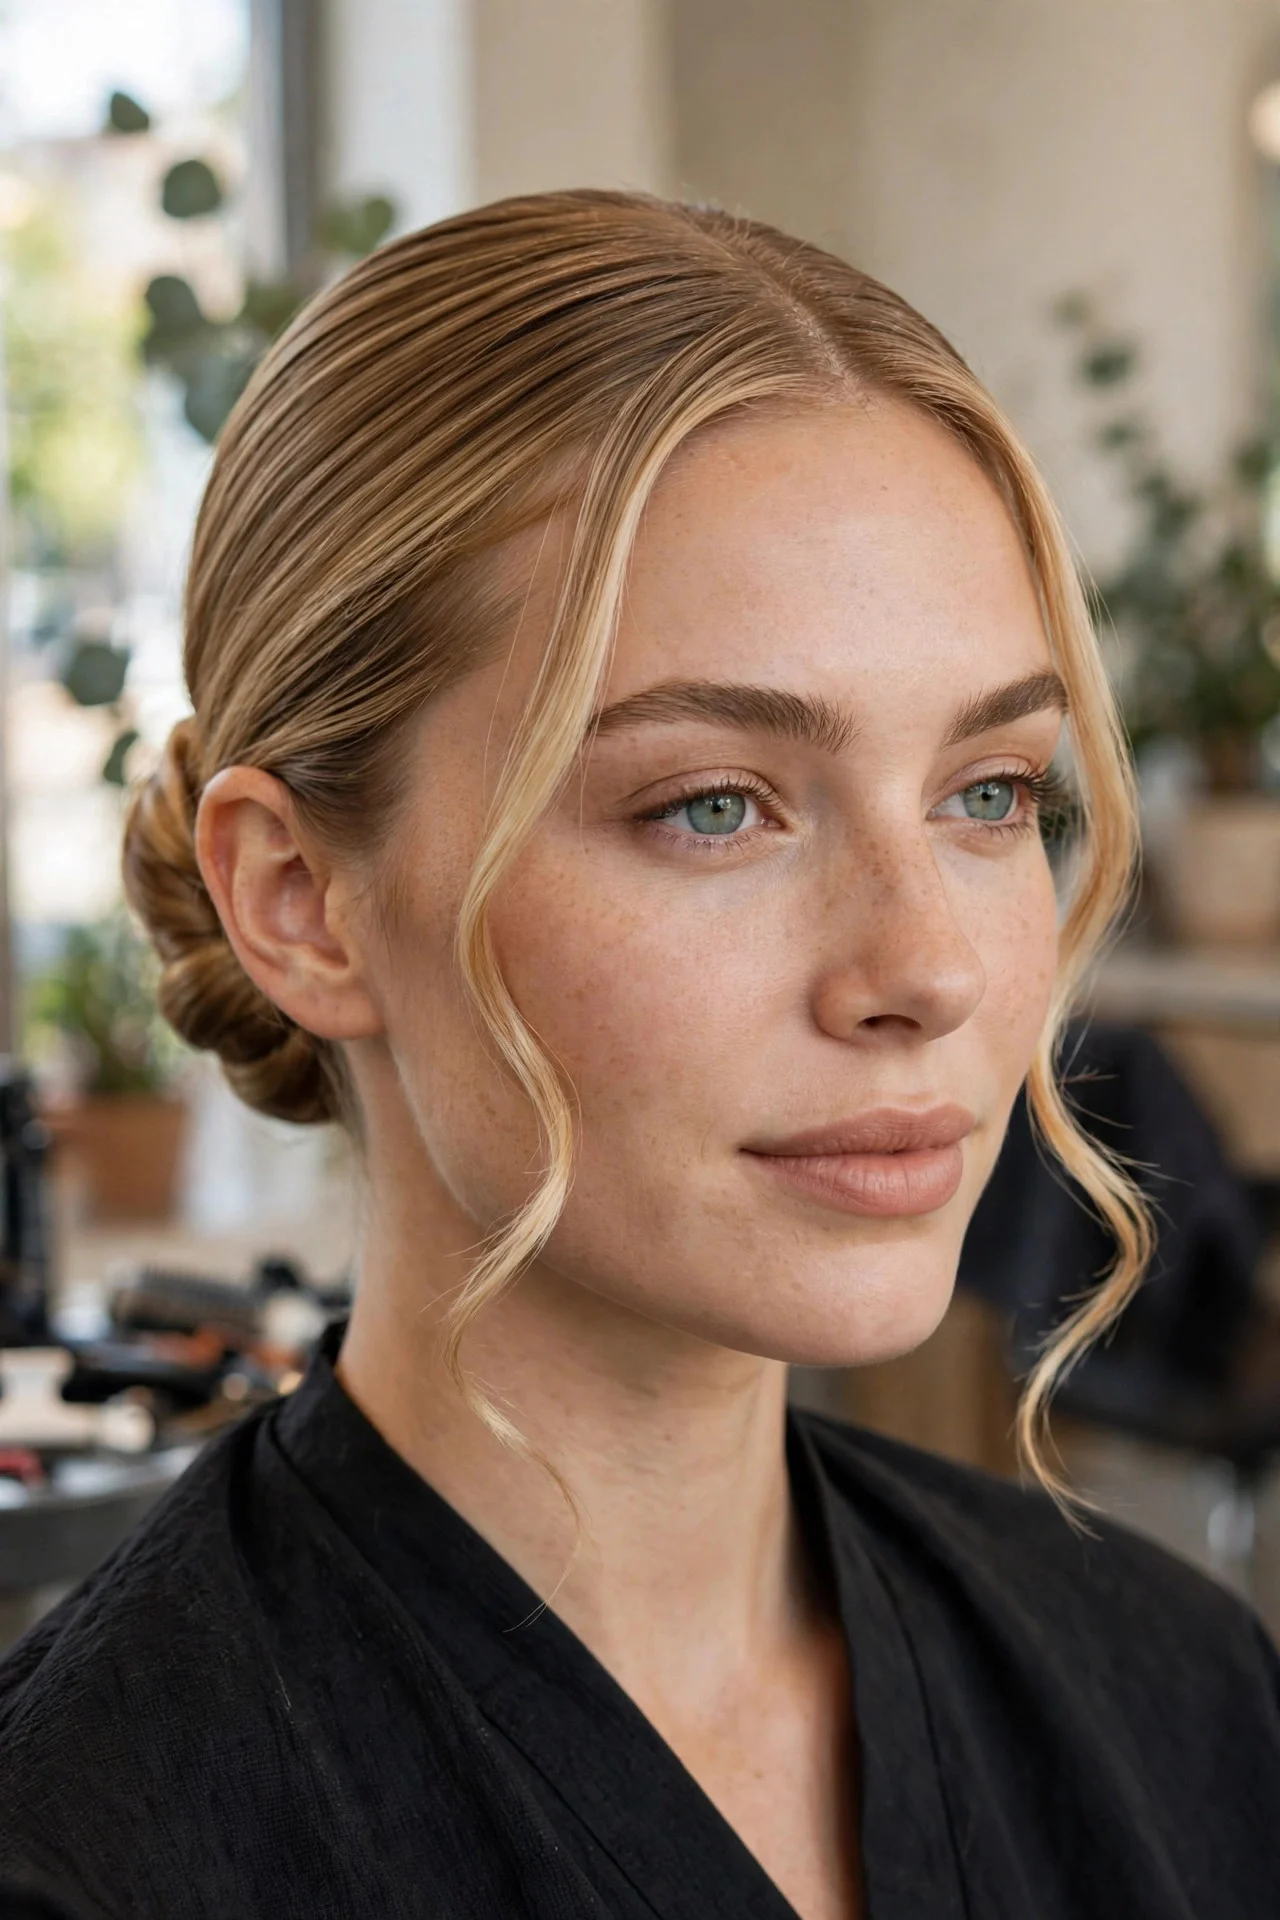
If a fully scraped-back look feels too severe, leave two thin front sections out before you start slicking. Gel and brush the rest into your bun as usual, keeping the roots smooth and flat. Then go back to the front pieces: curl them loosely with a 1-inch iron, or leave them straight for a sleeker finish. They soften the whole style while the back stays fully polished. This is the friendliest version for square jawlines and wider foreheads, since the pieces create curves where there were angles. It photographs beautifully. Upkeep is moderate. The loose pieces need a touch of heat or a re-curl by afternoon, and wind will do what wind does. The trade-off is worth it if you want polish without the severity.
5Wet-Look Slicked Bun
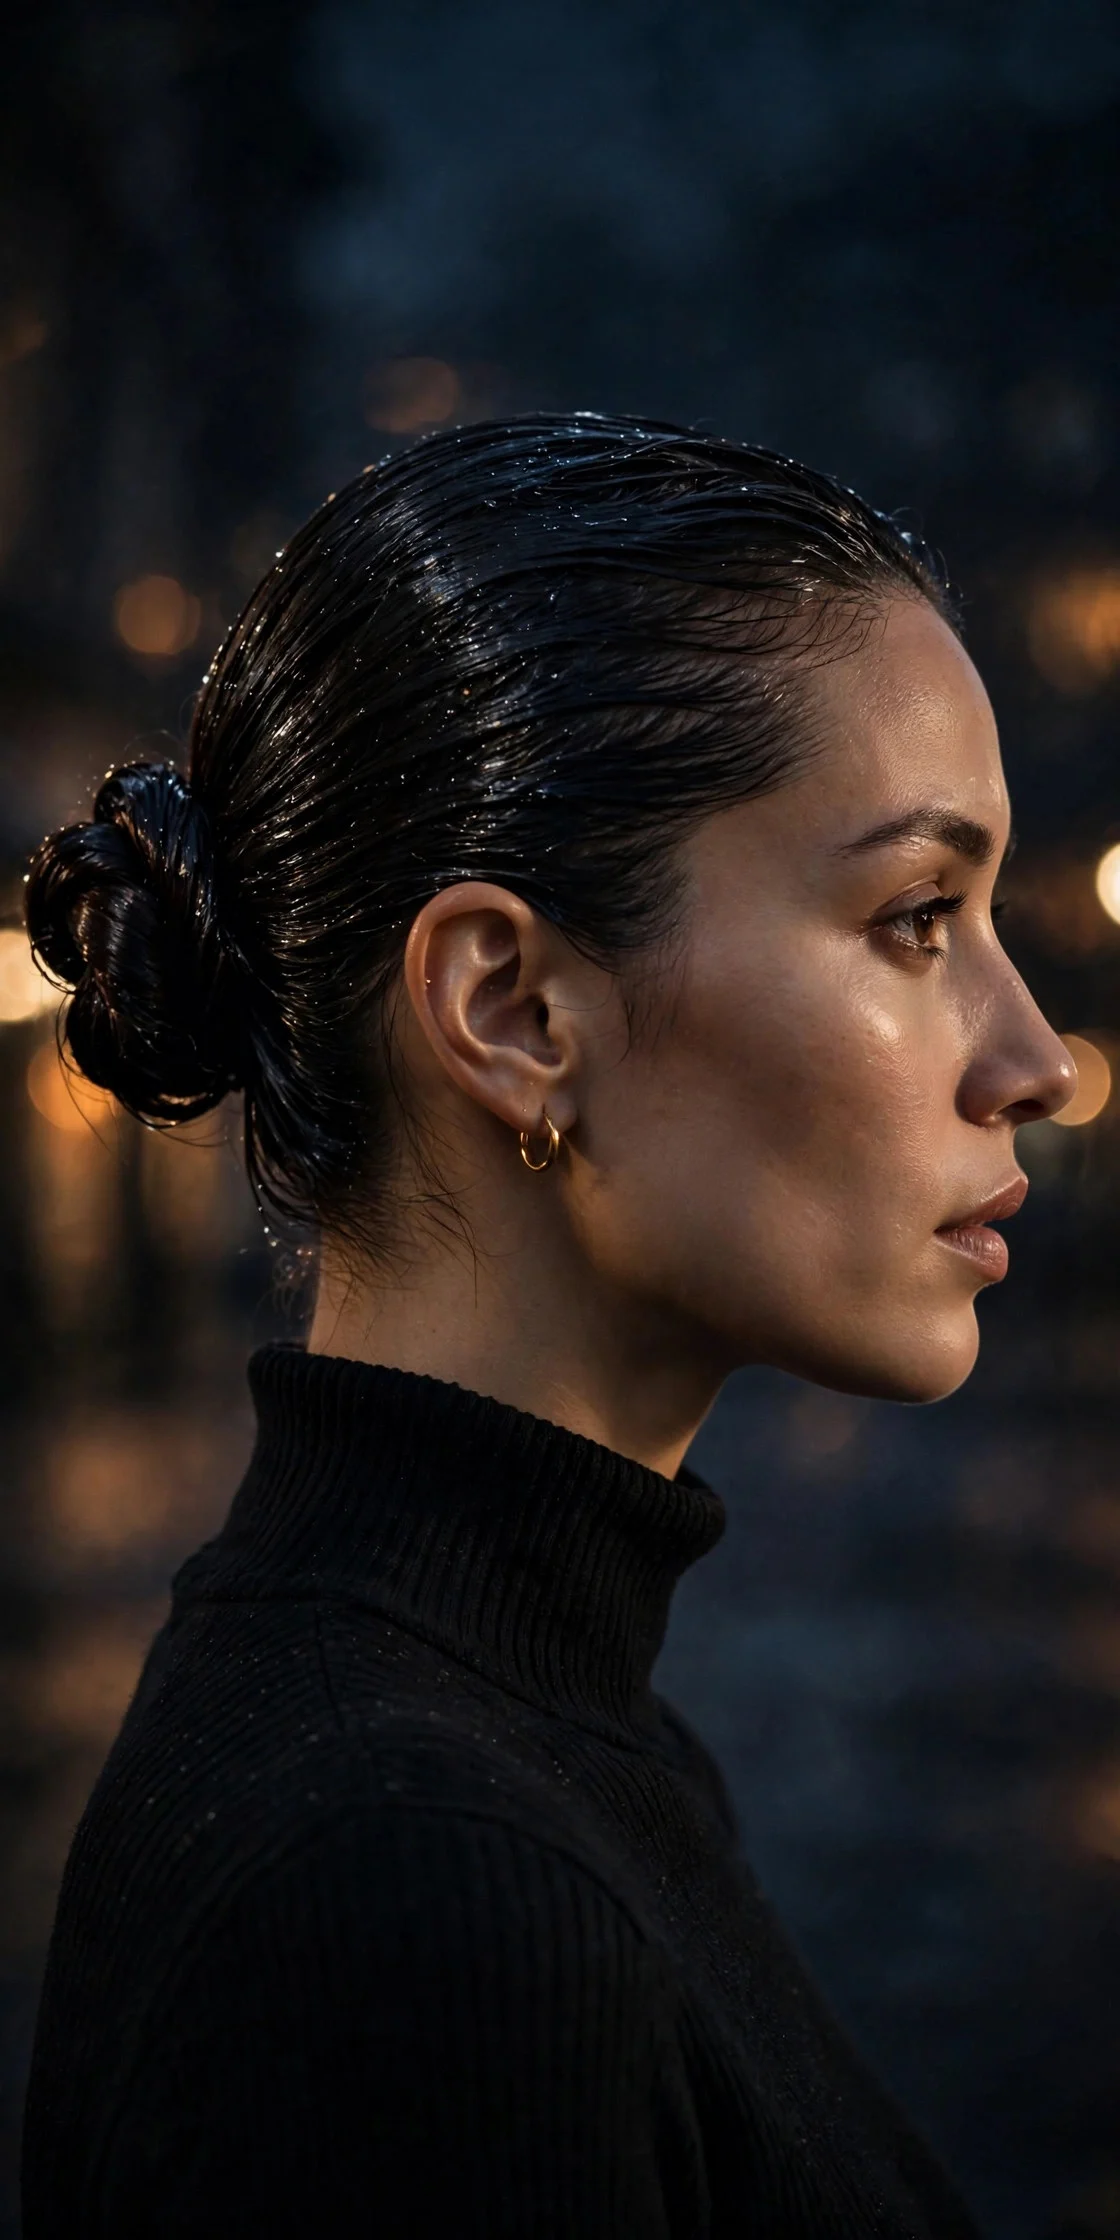
The wet-look bun skips the blowout entirely. On soaking wet hair, rake a generous amount of wet-look gel or pomade through from root to tip, comb everything straight back with no part, and twist into a mid-height bun. The key is not letting it dry before you shape it: work fast and use enough product that the hair looks lacquered. This style suits short-to-medium hair lengths especially well because there is less weight pulling the shape down. It is a genuinely low-effort evening look that takes five minutes. The honest drawback is transfer. Wet-look product rubs off on collars, scarves, and pillows, and the style only lasts until it dries. Plan to wash it out the same night rather than sleeping in it.
6Braided-Base Slicked Bun
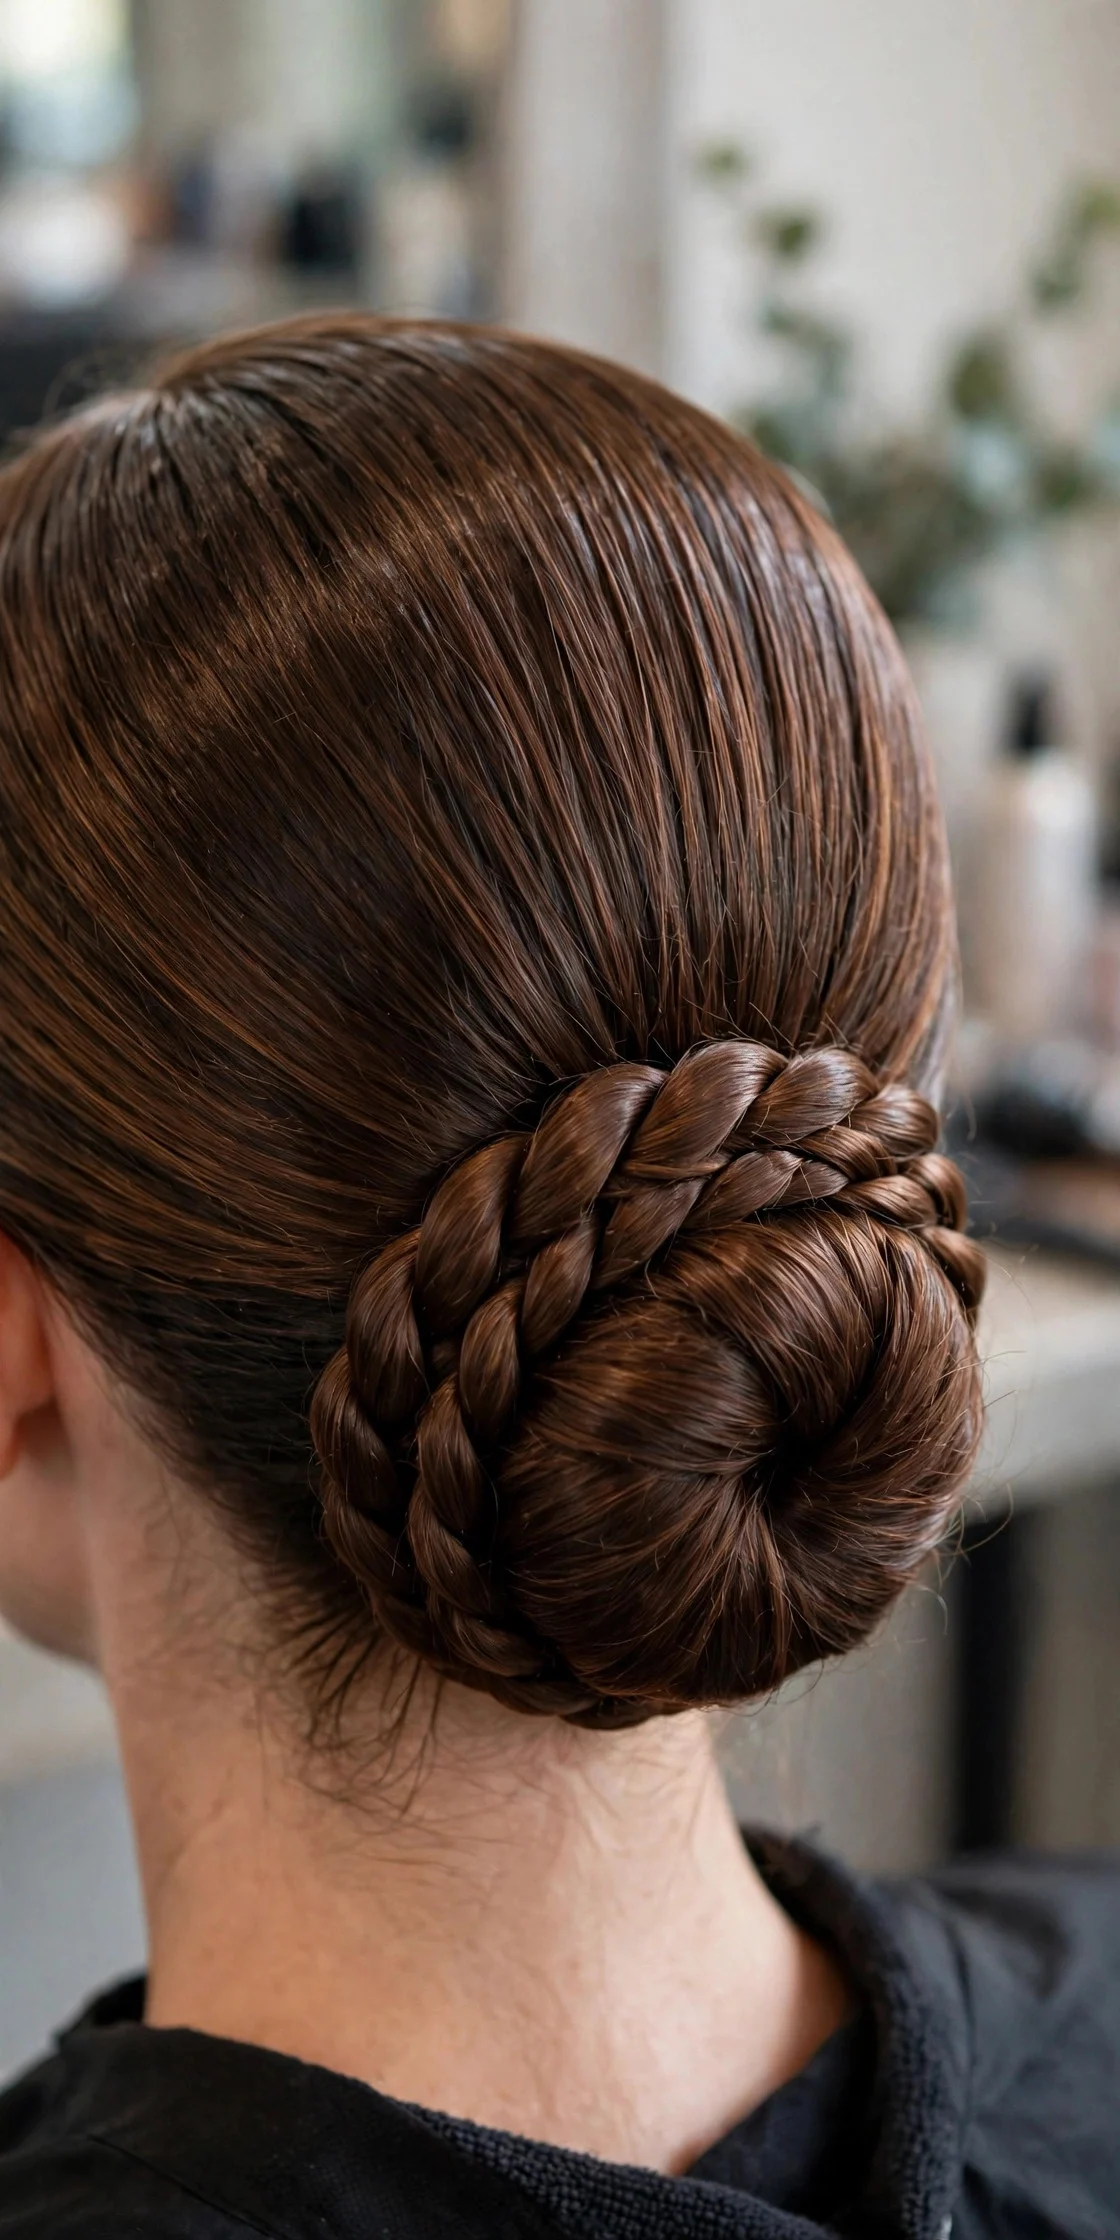
Adding a braid at the base gives the slicked bun texture and grip, which is perfect for thick hair that fights a plain twist. Gel the roots as usual, divide the ponytail into three, and braid it tightly to the ends. Coil the braid around the base and pin through the braided sections, which grab pins far better than loose hair. The result has a woven, rope-like finish that looks expensive. This suits thick, long hair that slips out of standard buns, and it holds through workouts. Maintenance is straightforward but the build takes longer, around fifteen to twenty minutes. The braid also means more pinning points and a slightly heavier feel at the back of the head. Worth it for hair that refuses to stay put otherwise.
7Slicked Top Knot Bun
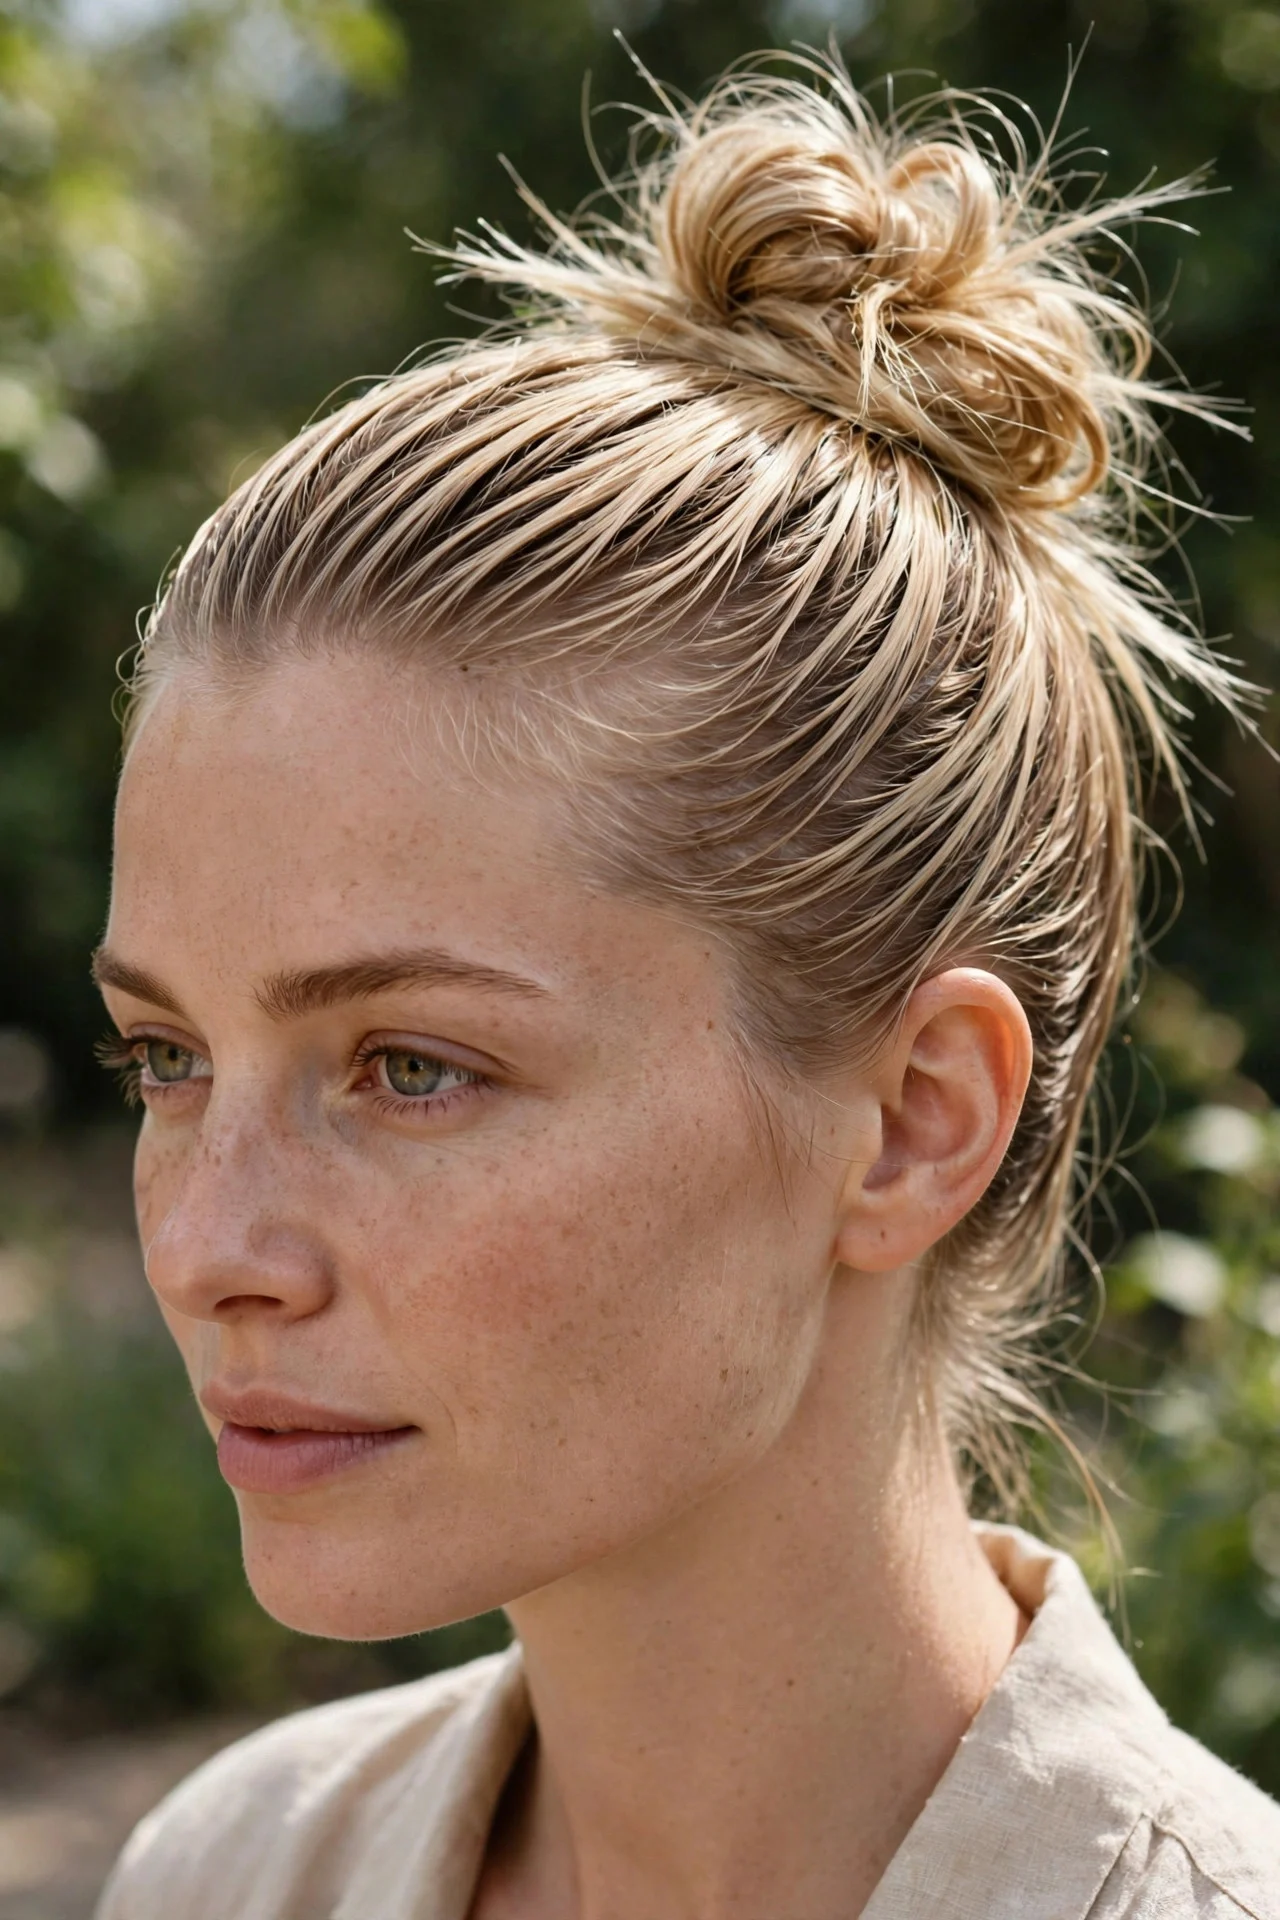
The top knot version sits higher and looser than the ballerina bun, with a deliberately undone finish. Smooth the sides and roots with a medium-hold pomade, gather into a high ponytail, and twist into a knot rather than a neat coil. Tug gently at the knot to create fullness, and let the ends stay a little textured. Leave the hairline soft instead of razor sharp. This flatters petite features, adds height, and forgives fine hair because the tugging creates volume. It reads casual, so skip it for black-tie events. Upkeep is minimal, but the honest catch is that it loosens fast on slippery hair. A texturizing spray before you start makes a real difference. Browse more high-up styles with these sleek top knot ideas.
8Slicked Bun with a Twisted Front Detail
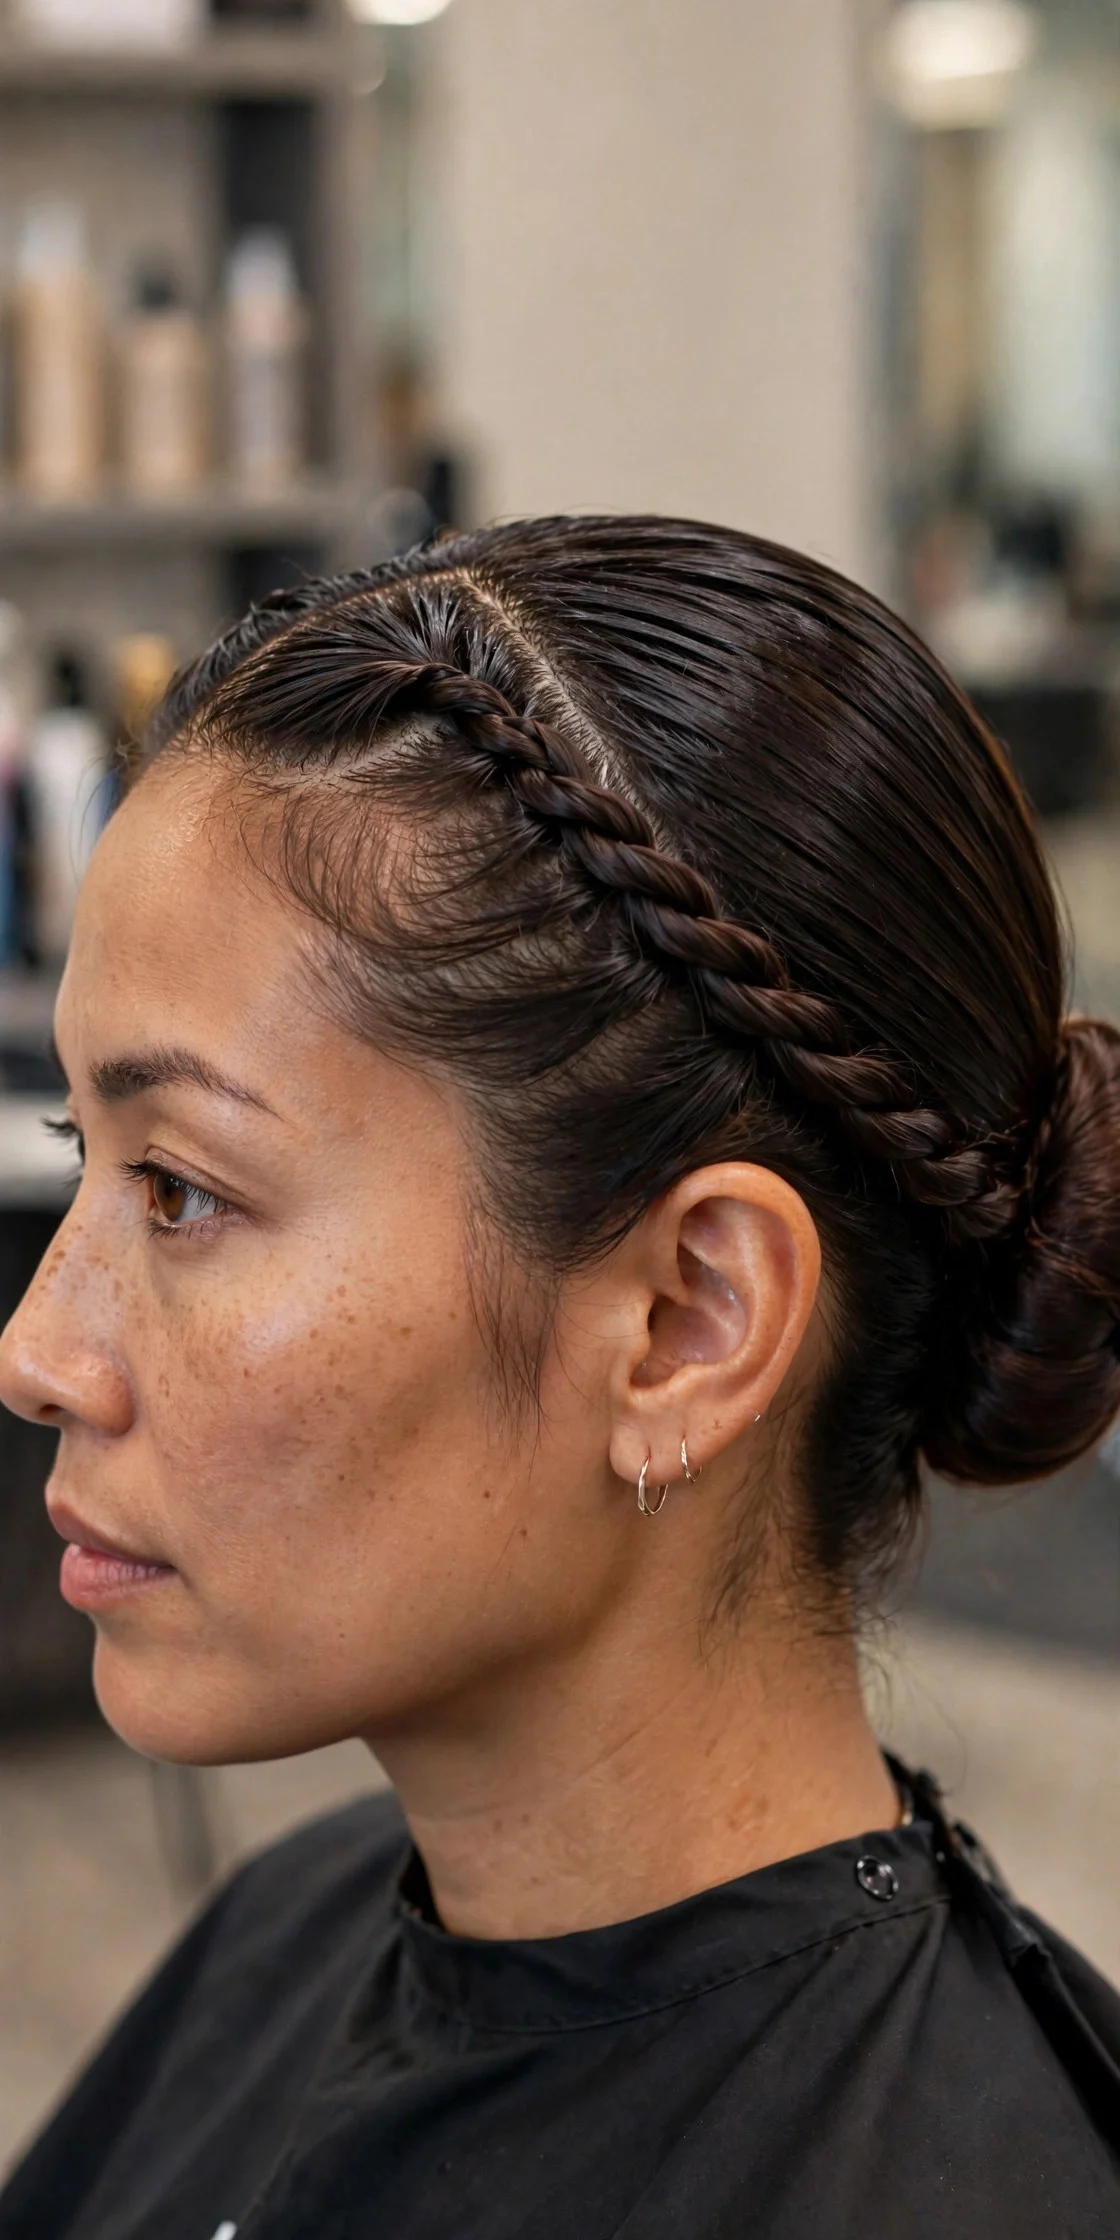
Before slicking everything back, take a two-inch section from the front hairline and twist it back along the scalp toward the crown, securing it invisibly with pins. Then slick the remaining hair back over the pin work and form your bun as normal. The twist adds a subtle rope detail that lifts the whole style without changing the silhouette. This works best on medium to long hair where the front section is long enough to twist cleanly. It suits formal occasions and photographs well from the side. The build takes an extra five minutes and the pinned twist needs checking after a few hours, since it can lift if your hair is freshly washed and slippery. Use day-old hair for the best grip.
9Bubble-Section Slicked Bun
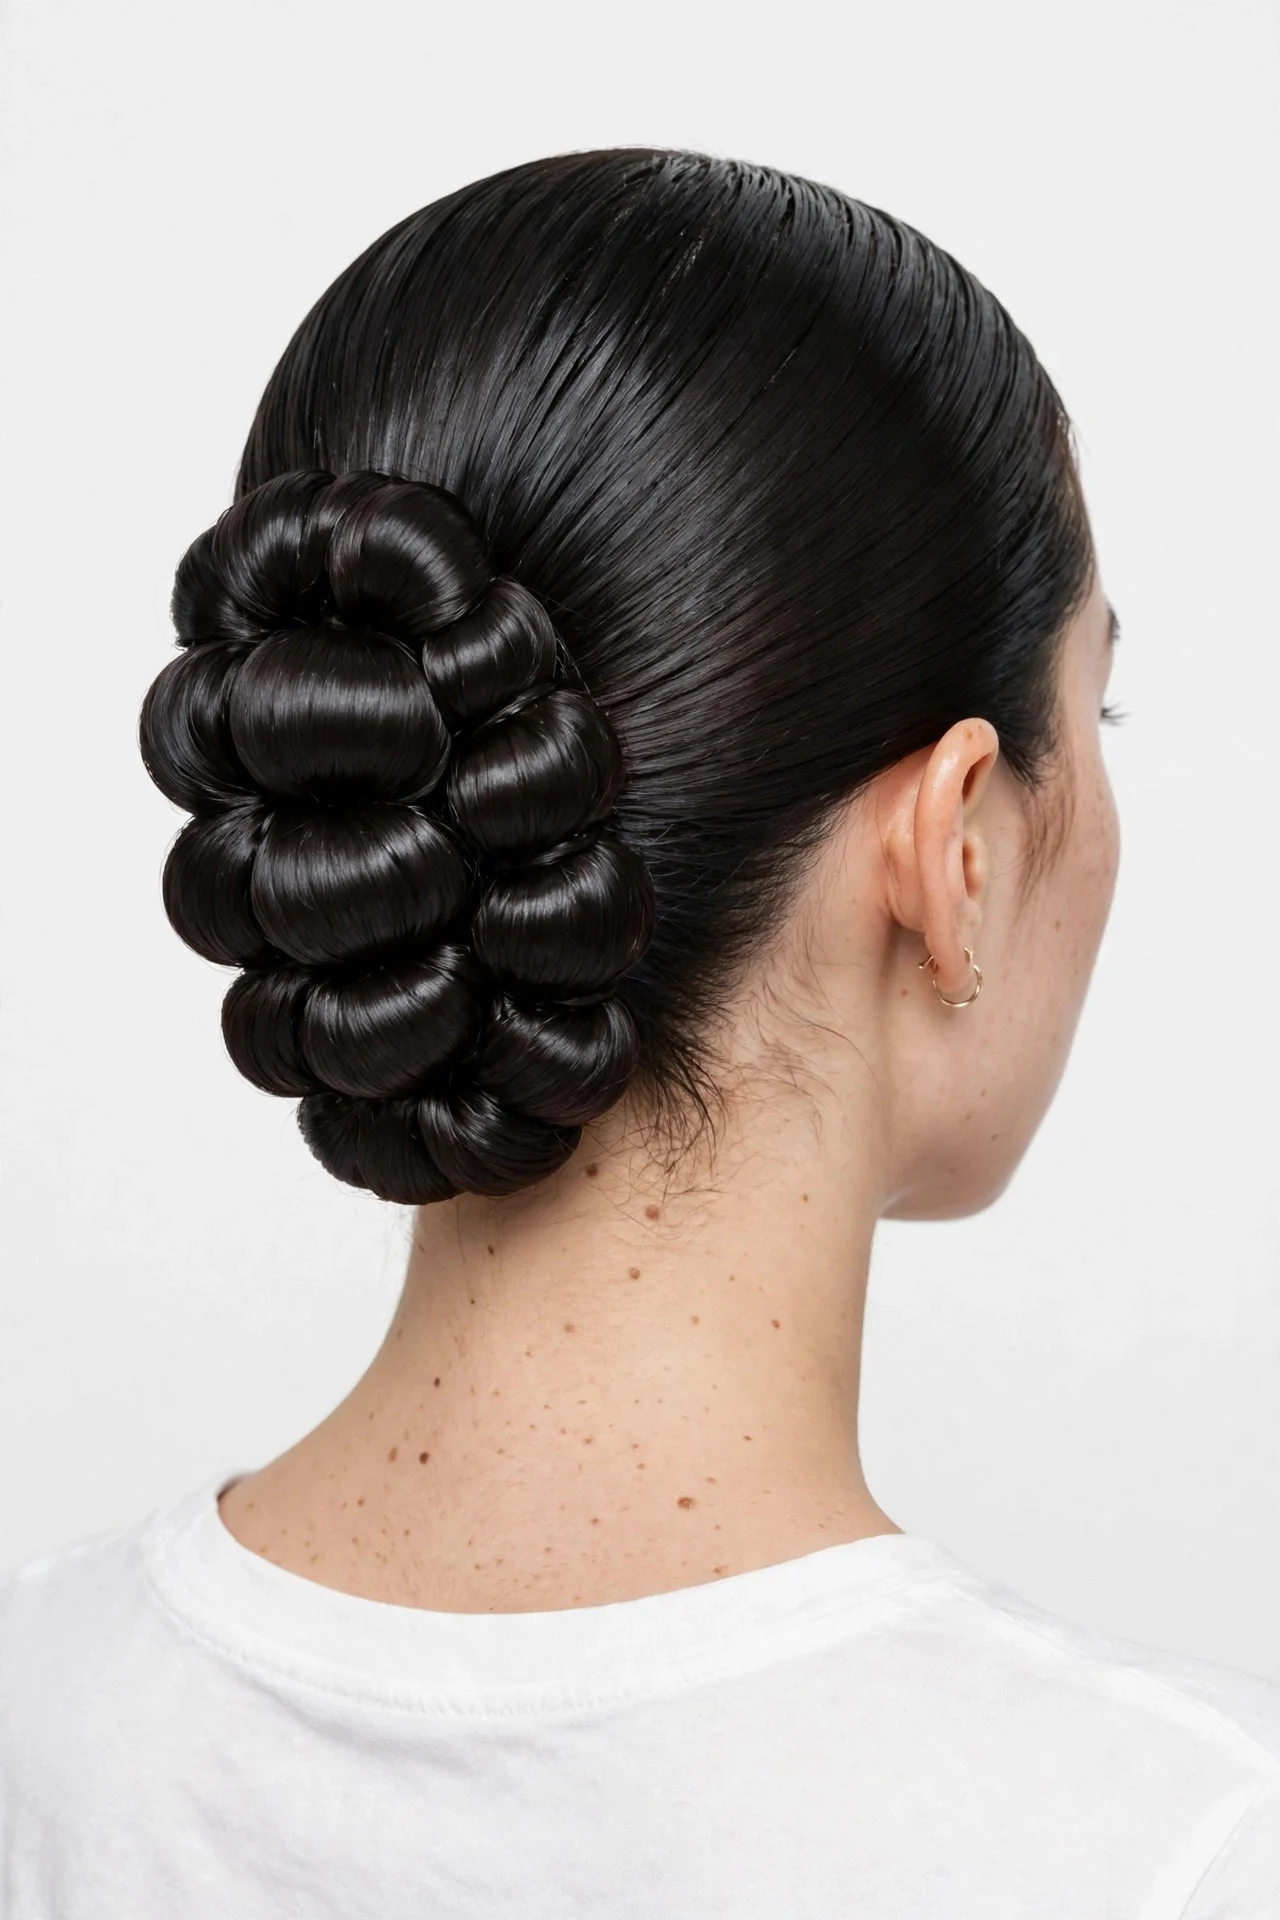
This playful version replaces the twist with stacked sections. Slick the hair back into a ponytail at your chosen height, then place small clear elastics every two inches down the tail. Gently pull each section outward to create rounded bubble shapes, then coil the whole thing into a bun and pin. The bubbles give the bun a sculptural, modern finish that stands out in photos. It suits younger faces and creative dress codes, and it is a genuine conversation starter. The downside is time and elastics: you need six to eight clear bands and about twenty minutes, plus a careful hand when pancaking the sections. Fine hair may need teasing between elastics to get the bubbles to show. Expect to redo it after sleeping or long wear.
10Half-Up Slicked Bun
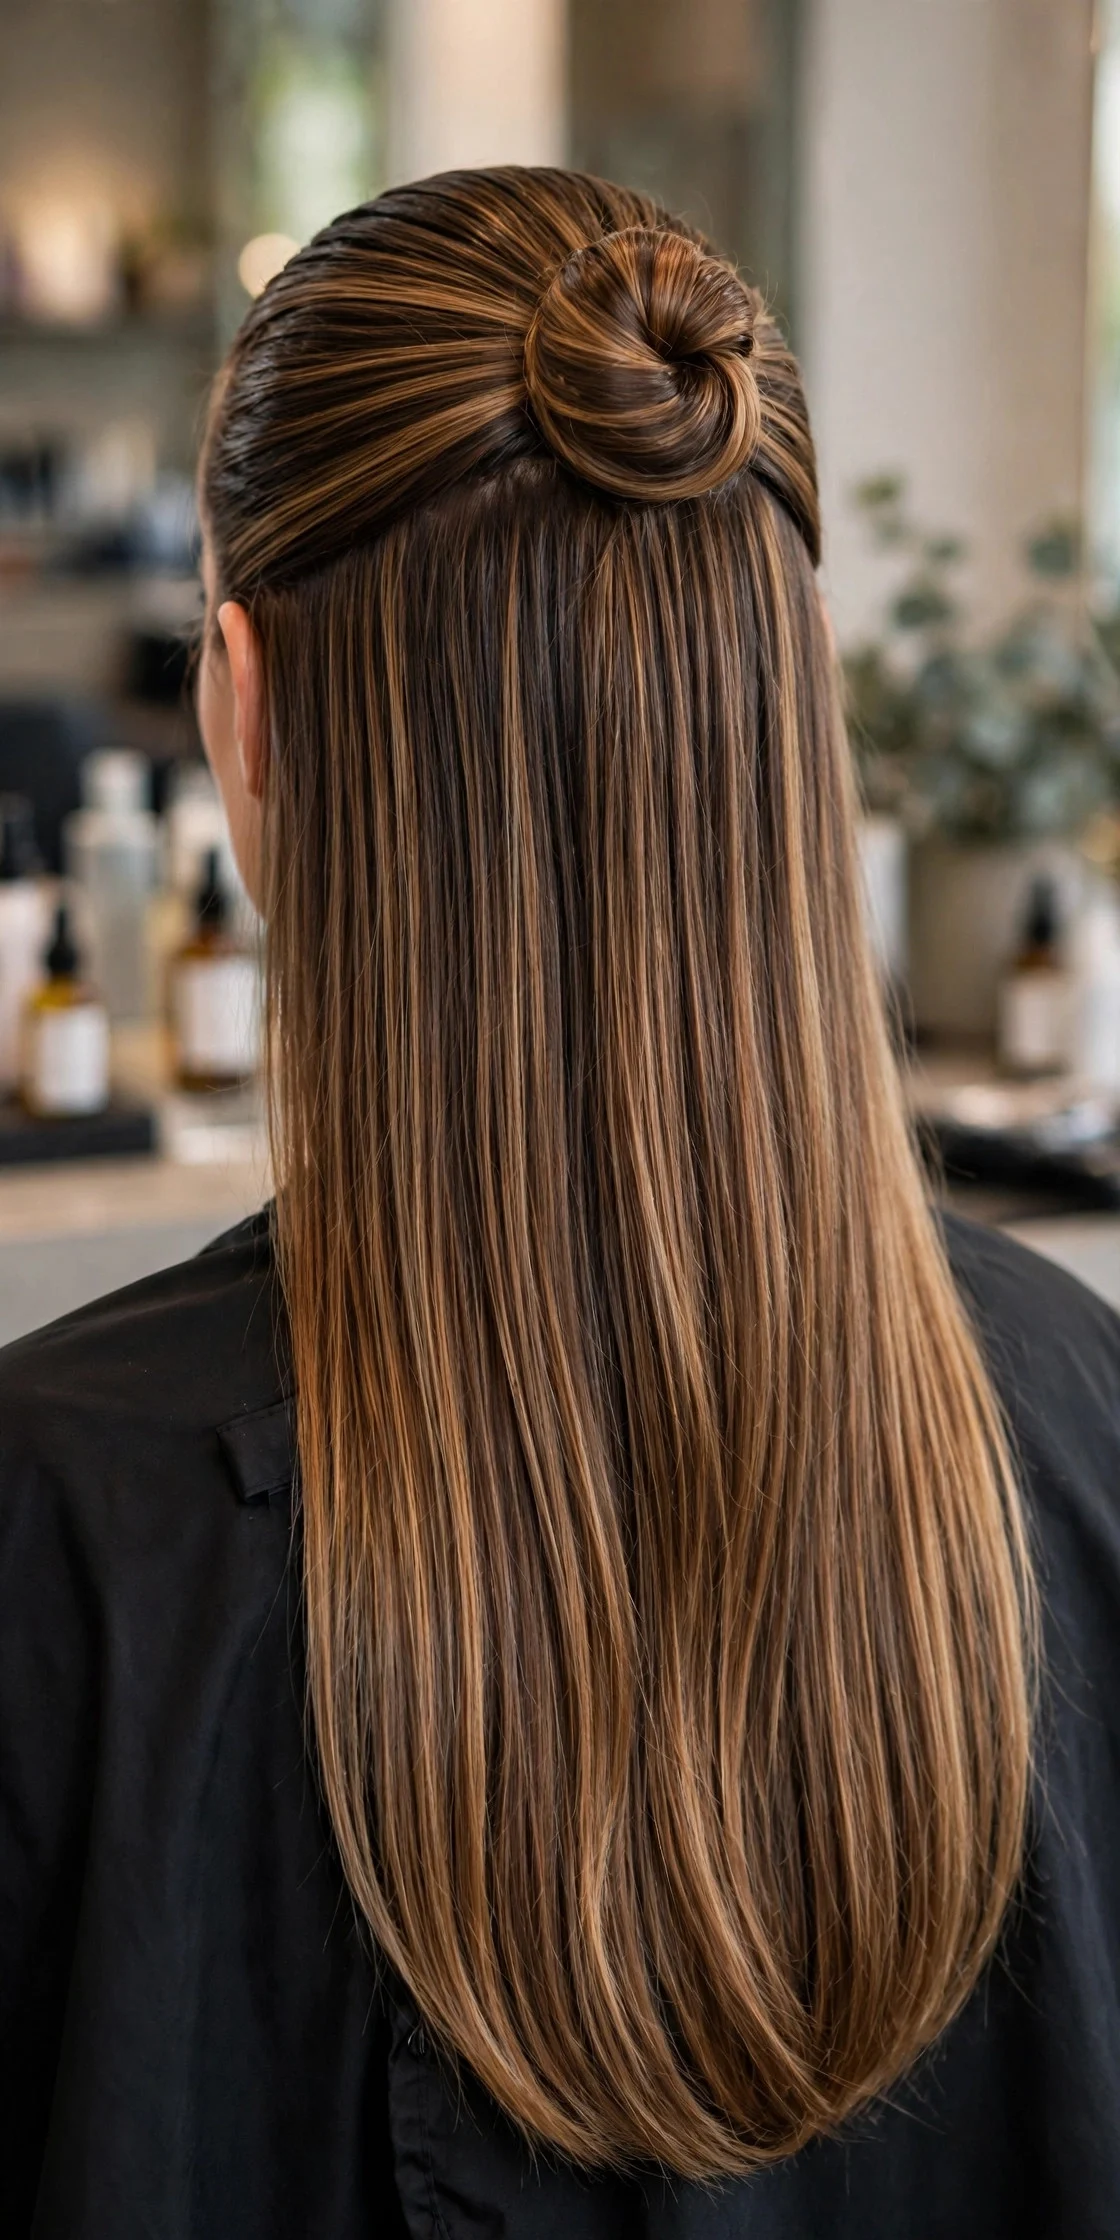
The half-up version gives you the polished crown of a slicked bun while keeping length down. Slick the top half from temple to temple with gel and twist it into a small bun at the crown. Leave the bottom half smooth and straight or softly curled. This suits long hair and anyone who finds a full bun too severe, and it takes under ten minutes. It works beautifully for everyday wear. The honest drawback is balance: if your hair is very thick, the bun can look small against the volume below, and the style loses its point on shorter hair. Pair it with sleek ends for the full effect, and check out these half-up claw clip hairstyles for more ways to style the top half.
11Donut-Form Slicked Bun
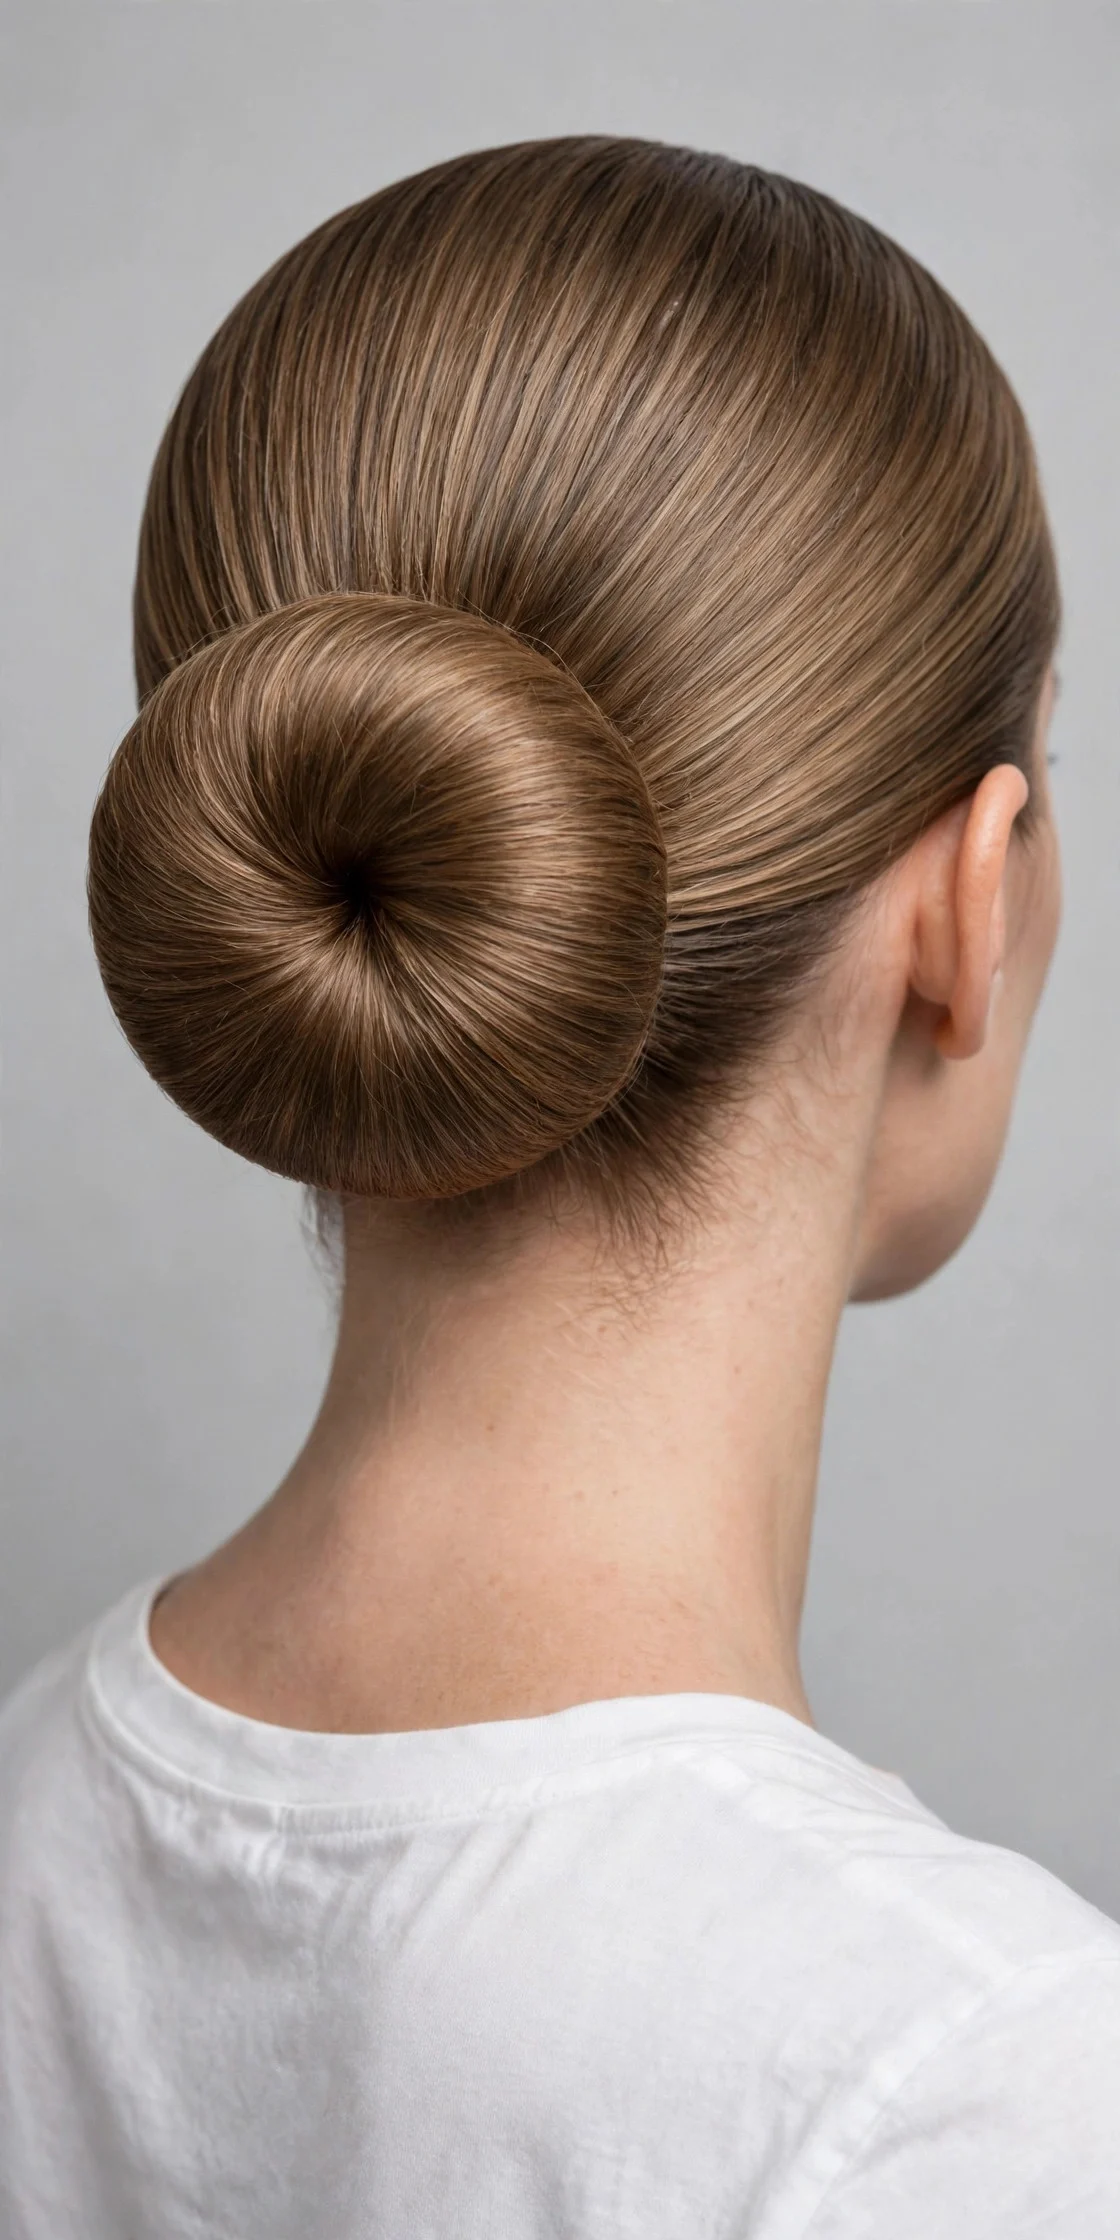
A foam donut form is the cheat code for a perfectly round, full bun. Slick the hair into a ponytail, pull the tail through the donut, spread hair evenly over the form, and secure with a second elastic. Tuck the ends underneath and pin. The result is flawlessly round with zero lumps, which is nearly impossible freehand. This is ideal for fine hair that cannot fill out a bun alone, and for brides who need photographic symmetry. A donut costs a few dollars and lasts years. The real drawback is comfort: the form adds weight and can feel bulky, and very short hair may not cover the foam completely. Match the donut to your hair color for insurance.
12Curly-Textured Slicked Bun
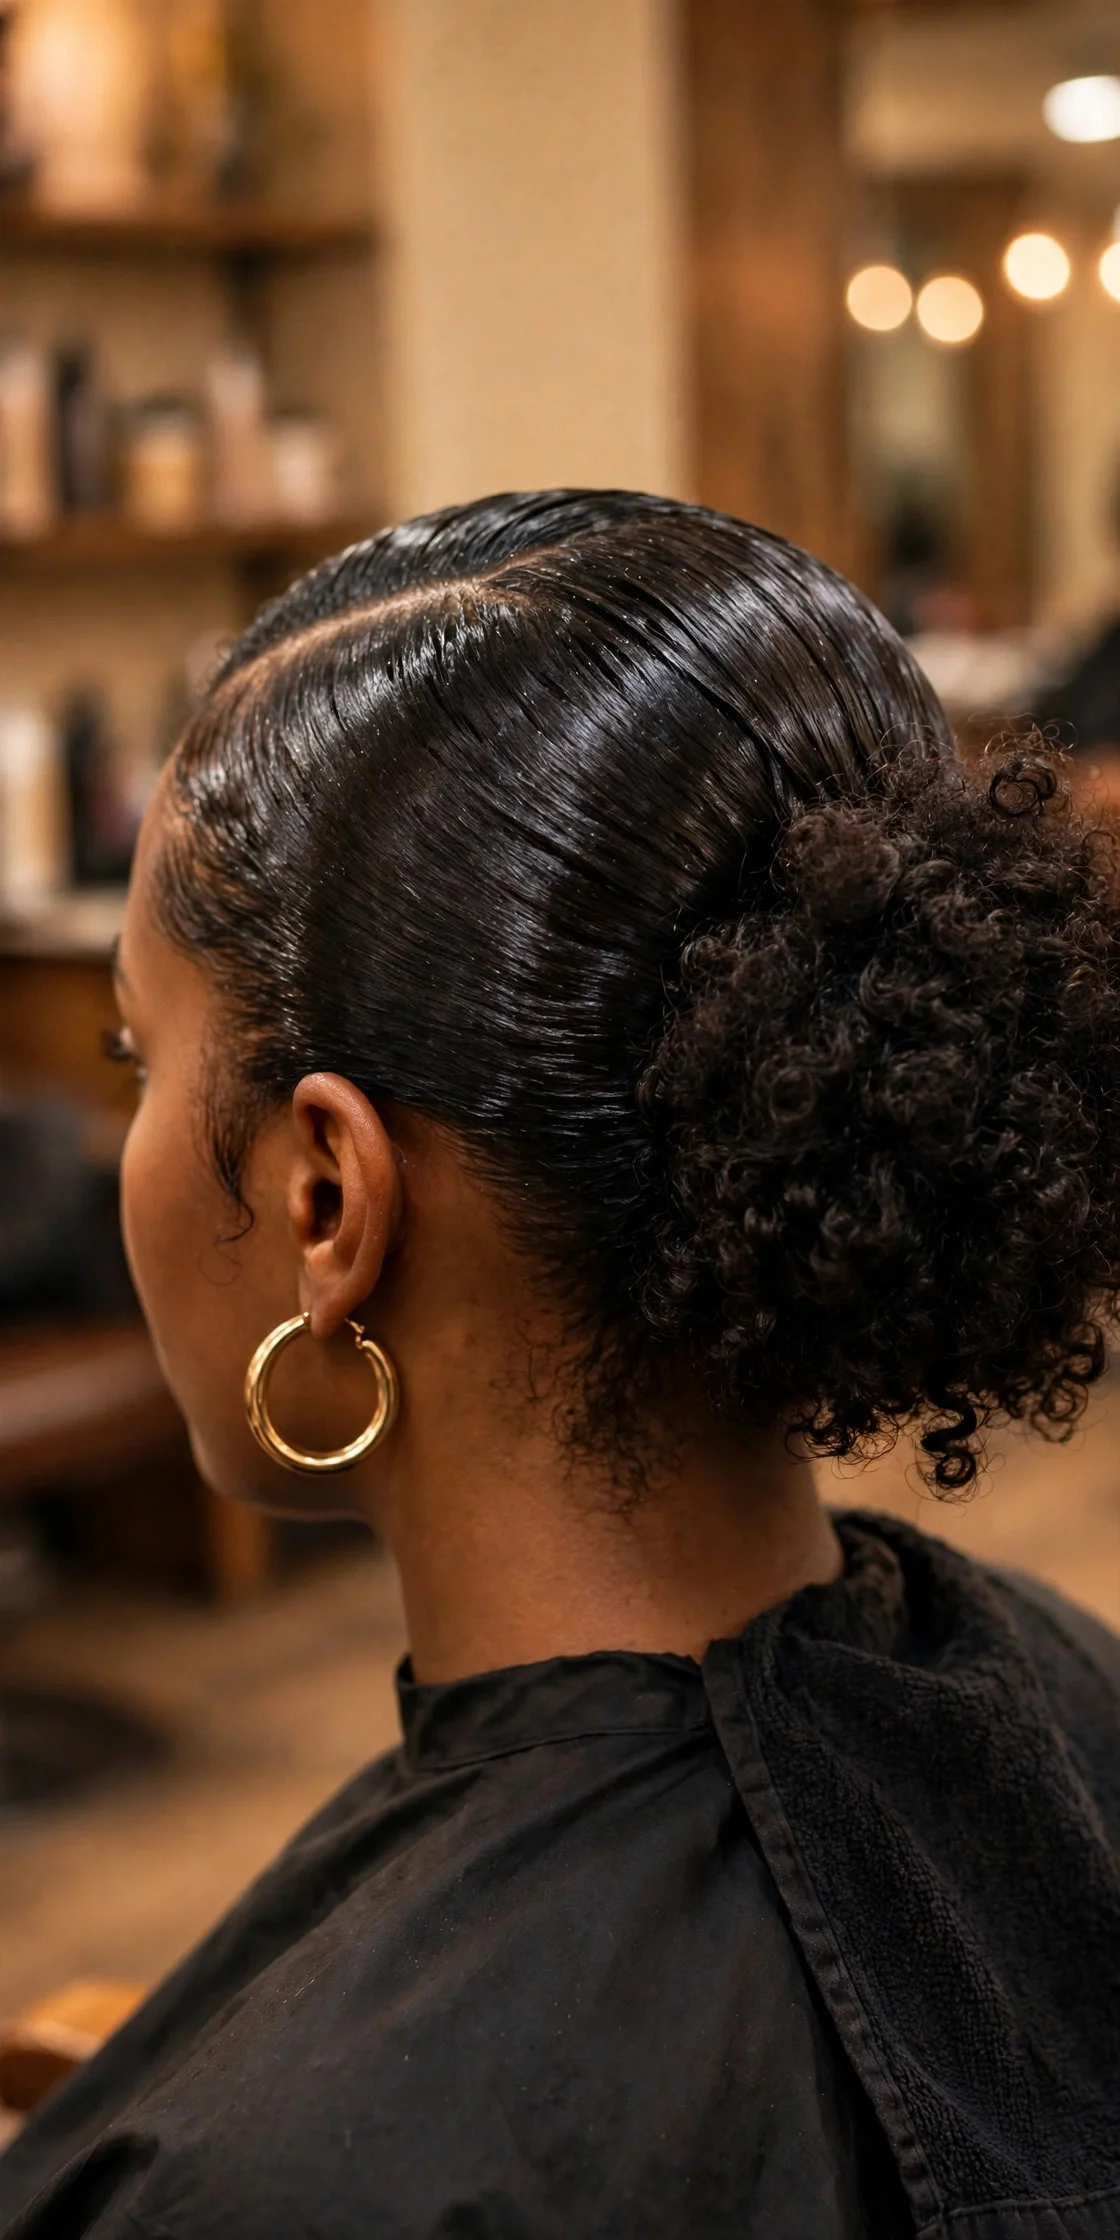
Curly hair gets its own slicked-bun method because fighting the texture never works. On damp curls, apply curl-defining cream then strong-hold gel, and brush the roots smooth while leaving the lengths in their natural curl pattern. Gather into a bun and let the ends stay curly and full rather than twisting them flat. Use a silk scarf tied around the hairline for ten minutes to set the roots glassy smooth. This suits type 3 and 4 curls beautifully and the bun has natural volume no form can fake. Upkeep means protecting it at night with a satin bonnet. The honest catch is shrinkage: the bun will look smaller as the curls dry and draw up, so start with more hair gathered than you think you need.
How to Care for a Slicked-Back Bun (and Your Hair Underneath)
A slicked bun looks after itself during the day, but prep and removal are where hair health is decided. Always start on damp or product-prepped hair, because brushing dry hair flat causes breakage. Use a boar-bristle brush for the smoothing pass. At night, take the bun down completely, detangle from ends to roots, and wash out heavy gel rather than sleeping in it. Product buildup is the top complaint with daily slicked styles, so clarify once a week. Rotate the position too: low one day, mid the next, high after that. Repeating the exact same tension point is what thins the hairline over time. Use snag-free elastics: cheap ones with metal joins snap hair. For more low-position inspiration, these low sleek bun hairstyles show how a lower bun changes the whole feel.
Frequently Asked Questions
How do I keep flyaways down in a slicked-back bun?
Layer your products: smoothing cream on damp hair first, gel combed through second, light hairspray once the bun is formed. Finish with a clean mascara wand or toothbrush dipped in edge control along the hairline. If flyaways appear by afternoon, a tiny amount of pomade smoothed over the surface resets the look without redoing the bun.
What products do I actually need for a slicked-back bun?
Fewer than you think. A strong-hold gel is the non-negotiable core, plus a boar-bristle brush, no-slip elastics, and bobby pins in your hair color. A smoothing cream helps on thick or frizzy hair, and edge control or a wax stick handles the hairline. Hairspray seals everything. Buy the gel and the brush first; those two do most of the work.
Will a slicked-back bun work on short hair?
Chin-length bobs can manage a small low bun or a half-up version with extra pins and strong gel. Pixie cuts cannot gather enough hair for a true bun, but a slicked-back style with the sides pinned flat gives a similar polished effect. The slicked look works at almost any length; only the bun portion needs enough hair to wrap once around two fingers.
How long does a slicked-back bun last?
A well-built one lasts eight to twelve hours on most hair types. Thick hair holds longest; fine or freshly washed hair loosens fastest, which is why day-old hair is the classic recommendation. Humidity is the main enemy. For an all-day event in humid weather, choose maximum-hold gel and carry three bobby pins for emergency fixes.
Can I wear a slicked-back bun every day without damaging my hair?
Yes, with two rules. Vary the position and tension: the same tight high bun daily stresses one hairline, which can cause breakage over time. Alternate low, mid, and high placements and keep the tension snug, not painful. Second, wash out heavy product regularly and take the style down every night. With those habits, a daily slicked bun is no harder on hair than most updos.
Keep exploring
If the slicked-back bun has earned a spot in your rotation, try these next: the low sleek bun hairstyles for a softer, lower placement; the ballerina bun tutorials for formal evenings; and the half-up claw clip hairstyles for a pin-free top half.
—