
# How to Trim Your Own Split Ends at Home (2026)
You do not need a salon appointment every time your ends start to fray. Learning how to trim split ends at home is a skill every long-haired person picks up eventually, and once you learn a couple of techniques, you can keep your hair looking tidy between professional cuts.
This guide covers ten techniques, from simple dusting that removes barely anything to the search-and-destroy method that targets individual splits. Some work best on straight hair, some are made for curls and coils. All of them are beginner friendly if you follow the steps slowly and use the right tools.
1Dusting

Dusting is the lightest trim method there is, and it is the one most stylists recommend for at-home maintenance. The idea is simple: you remove roughly a quarter of an inch (or less) from the very tips of your hair, nothing more. Work on dry, detangled hair in sections, and use real hair-cutting shears, not kitchen or craft scissors, which crush the hair shaft and cause more splits.
Hold a section between your index and middle fingers, slide them down to the ends, and snip off the frayed tips sticking out past your fingers. Take your time and check your work in good lighting. The honest drawback: dusting only fixes the very ends, so if splits have traveled up the strand, you will need a deeper method or a real trim.
2Search and Destroy

Search and destroy is exactly what it sounds like. You sit down with good lighting and a pair of sharp shears, then inspect your hair strand by strand, snipping only the individual splits you find. Do this on clean, dry, freshly straightened hair (even curlies do this one on straightened hair) because you need to see the split clearly.
Bend each strand into a tiny loop so splits pop out, or just hold sections up to a bright window or ring light. Snip about a quarter inch above the split, at a slight angle, and drop the strand. This takes the longest of any method here, anywhere from 30 minutes to over an hour for thick hair, but it removes zero length from healthy strands. The caveat: it is tedious, and it is easy to get carried away and over-snip. Set a time limit and stop when it runs out.
3The Twist Method
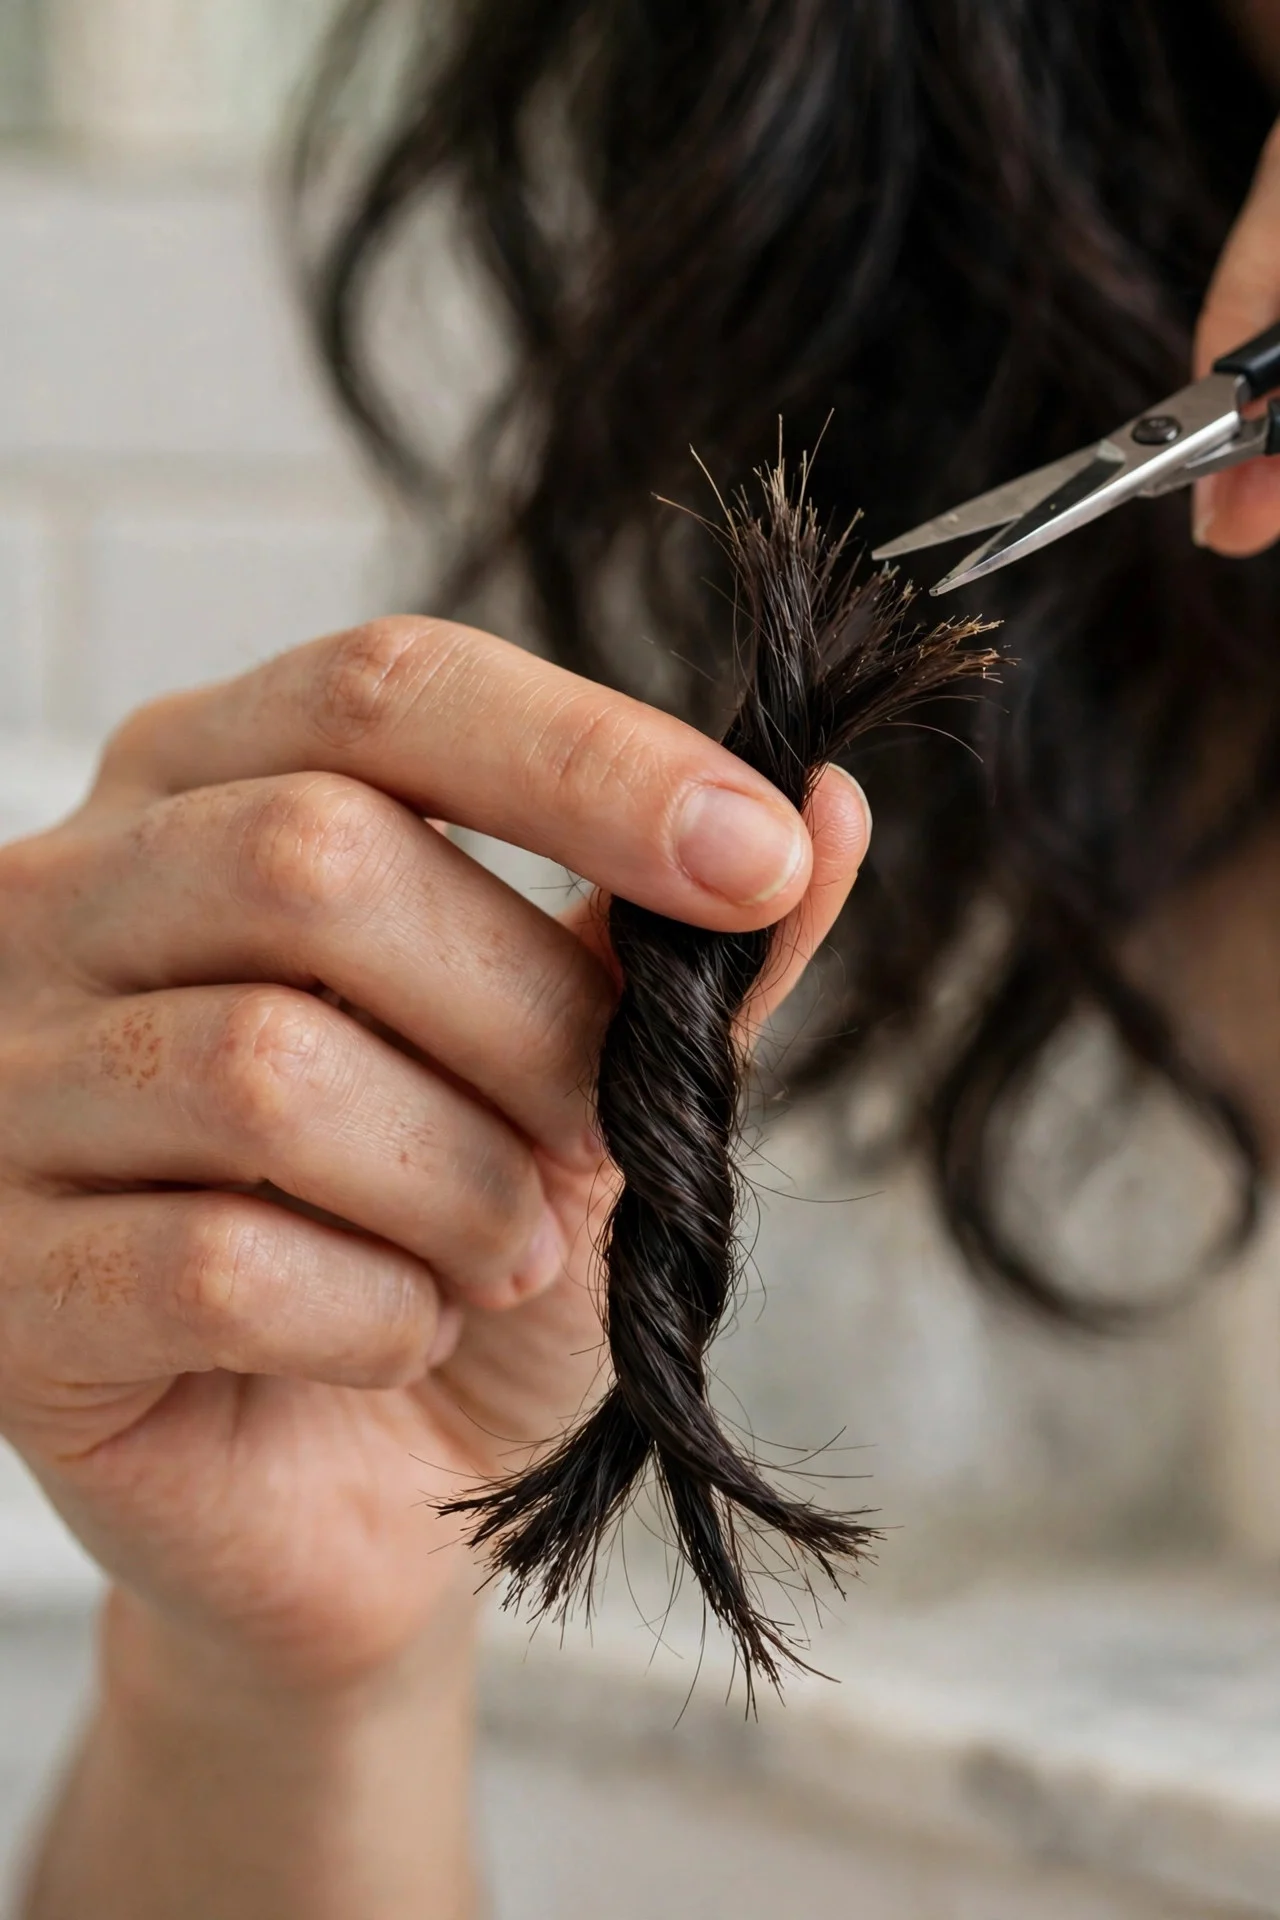
Twisting reveals splits the way nothing else does. Take a one-inch section of dry hair and twist it tightly from mid-length to the ends. Damaged strands and split tips will stick out from the twist like tiny branches. Snip those off carefully with your shears, working your way around the section.
This method works beautifully on medium to long hair, straight or wavy, and it is one of the fastest options, around 15 to 20 minutes for a full head. You keep all your length because you only cut the damaged pieces that stick out. The drawback is precision: if you twist loosely, healthy strands poke out too, and you can accidentally cut good hair. Twist firmly and only snip what is clearly frayed or has a visible split.
4The Two-Strand Twist (for Curls and Coils)
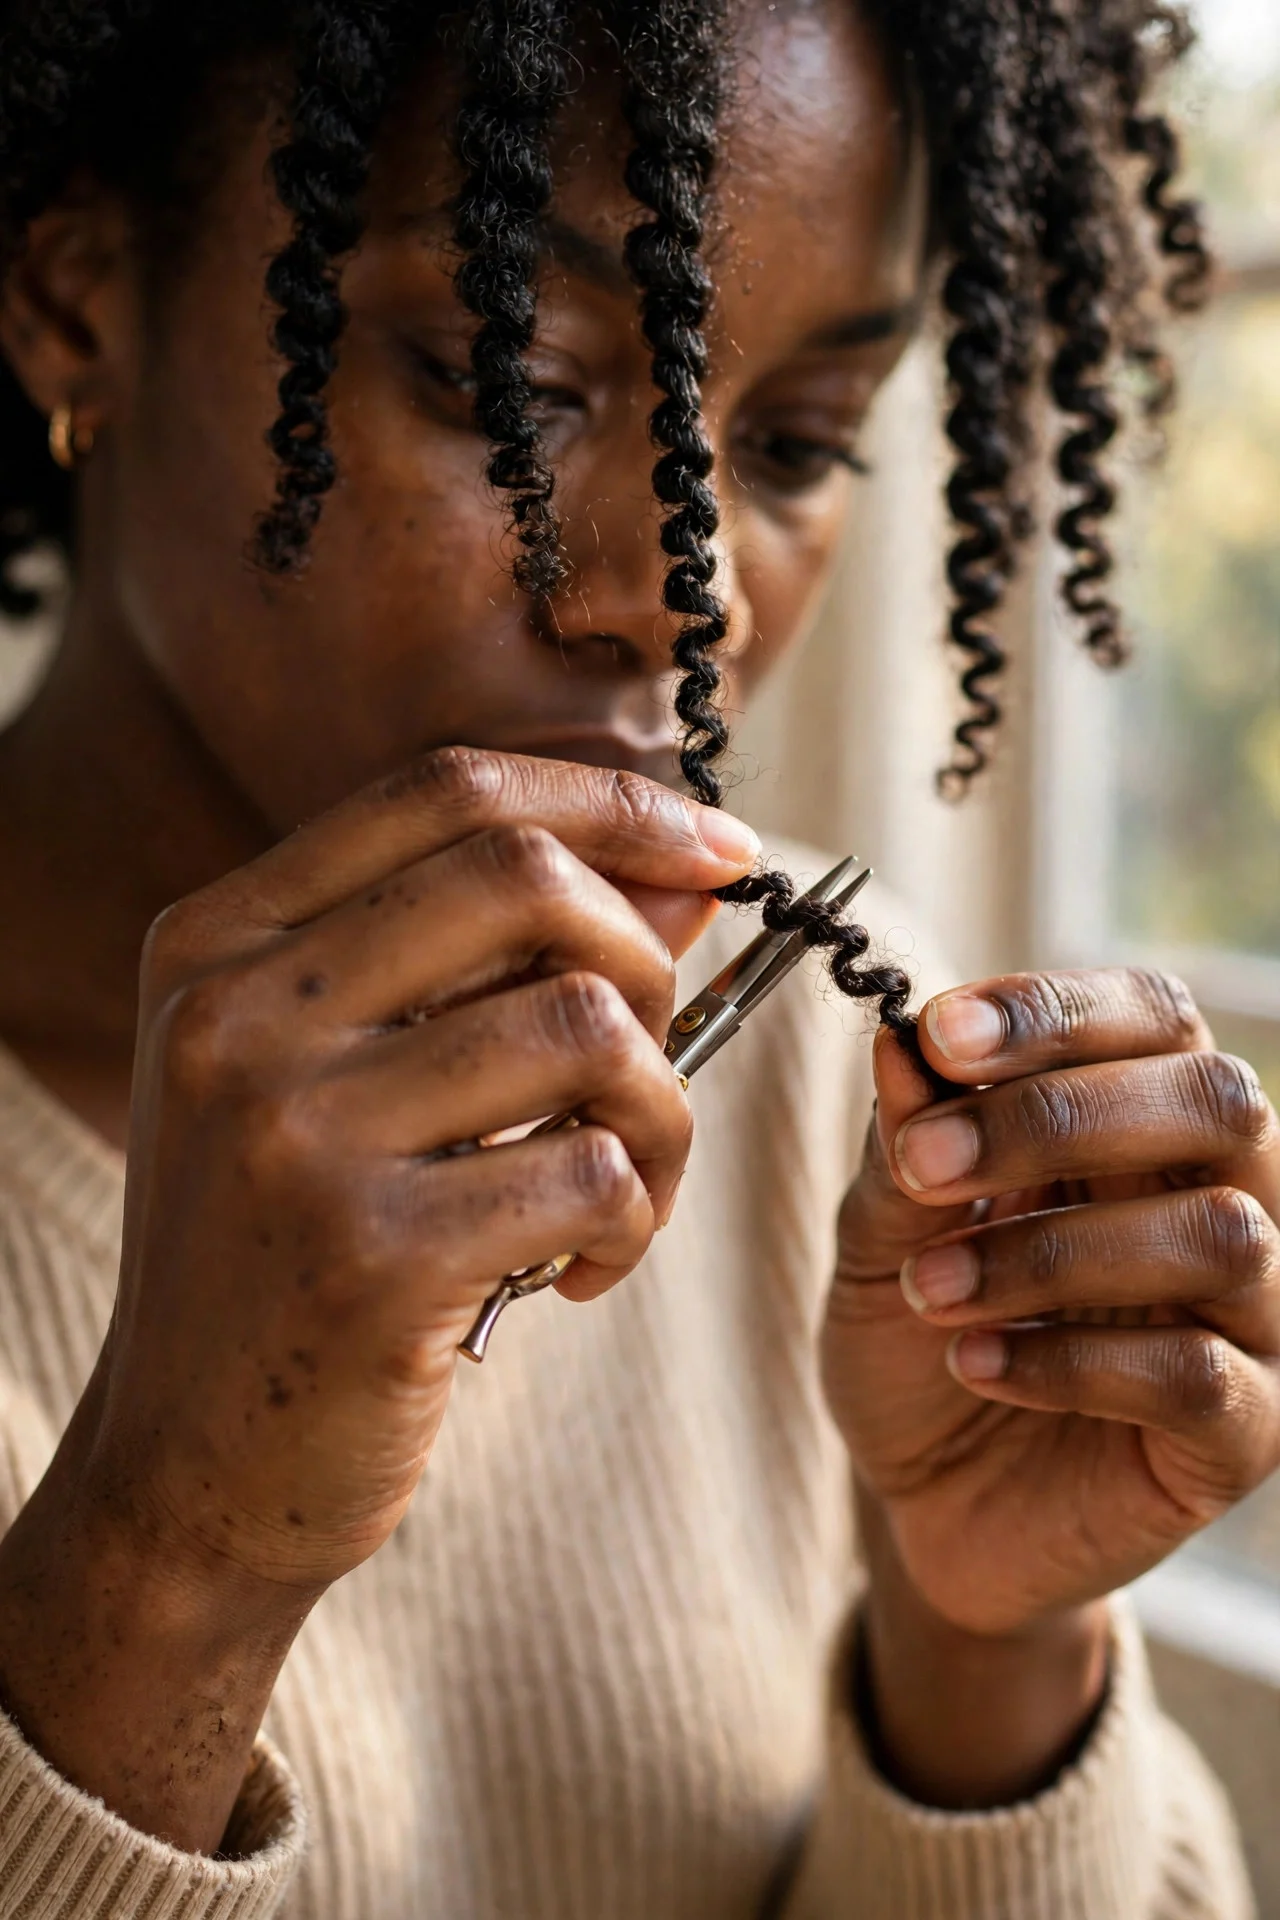
The classic twist method can be tricky on curly hair, so textured-hair stylists use a variation: divide dry, stretched hair into small two-strand twists, then inspect each twist and snip the split ends that poke out. Working on stretched (blown-out or banded) hair makes the ends far easier to see and keeps your curl pattern out of the way.
Take your time on each twist, snipping only the clearly damaged tips, about an eighth to a quarter inch. A full head takes 30 to 45 minutes, but you keep your curl definition intact and lose no length where it is healthy. This method suits curl types 3A through 4C best. The honest caveat: stretching curly hair to trim means the curls will spring up shorter than where you cut, so cut conservatively. If you are new to this, take off less than you think you should.
5Section-by-Section Straight Cut

If your ends are fairly even already and you just need a light refresh, a straight-across section cut is the simplest approach. On dry, straight hair, part it down the middle, bring all the hair forward over your shoulders, and divide it into four to six sections. Clip each section and work one at a time.
Hold a section taut between your fingers, comb it straight down, and trim straight across, removing no more than half an inch. Check each new section against the previous one for evenness. This takes about 20 minutes and suits straight or wavy hair best. The big caveat: straight hair shows unevenness immediately, and cutting wet hair (a common beginner mistake) leads to surprises when it dries and shrinks up. Keep it dry, keep it small, and when in doubt, cut less.
6The Ponytail Method

The ponytail method is the easiest way to trim split ends on longer hair without worrying about perfect sectioning. Flip your head forward, gather all your hair into a smooth ponytail at the top of your forehead, and secure it with an elastic. Comb the ponytail straight up and trim the ends, removing a quarter to a half inch.
This creates soft, face-framing layers rather than a blunt line, which is actually a nice bonus if you like a bit of movement around your face. It takes about 10 minutes total and suits long, straight to wavy hair. The honest drawback: it is not a precise cut. The layers it creates can be uneven if you are heavy-handed, and it does not work well on short hair or tight curls (curl shrinkage makes the result unpredictable). Think of it as maintenance, not a haircut.
7Braid and Snip

Braiding before trimming keeps every strand under control, which is great if your hair tangles easily or you are nervous about cutting free-flying sections. Work on dry, detangled hair: create two loose three-strand braids (one on each side), then inspect the last few inches of each braid. Splits and frizzed tips will poke out from the braid or hang ragged at the tail.
Snip the damaged pieces off the braid’s edges and trim the tail end by about a quarter inch. Undo the braids, shake your hair out, and check for balance. This method takes about 20 minutes and suits wavy, curly, and thick hair especially well, since the braid keeps everything contained. The caveat: you can only reach the ends and the braid’s outer surface, so mid-shaft splits deep inside the braid will be missed. Pair it with search and destroy for a thorough job.
8Sliding Cut (Feathering the Ends)

A sliding cut softens blunt, thick ends without removing much length. Hold a one-inch section of dry hair out from your head at a slight angle. Open your shears and, instead of closing them fully, glide the open blades down the last two inches of the section with a gentle slicing motion. The blades shave off tiny amounts of hair as they travel, feathering the ends.
This technique works best on thick, straight or wavy hair that feels bulky or blunt at the bottom, and it takes about 20 minutes for a full head. It creates soft, piece-y ends that move nicely. The serious caveat: this is the riskiest method on this list. A heavy hand or dull shears will chew the hair up and create more splits than you started with. Practice on one small section first, keep the motion light, and stop immediately if the ends look rougher than before.
9The Mirror Check Trim

One of the hardest parts of trimming your own hair is seeing the back. The two-mirror method solves it: set up a large mirror in front of you and hold a hand mirror behind your head (or hang a second mirror on the wall behind you). Work on dry, detangled hair in good light.
This is less a cutting technique and more a setup that makes any of the other methods safer. Section the back of your hair, bring it over your shoulder or work it in the mirrors, and trim with shears while watching the reflection. It adds 5 to 10 minutes to whatever method you pair it with, and it suits all hair types and lengths that reach the nape or beyond. The honest drawback: working in a mirror reverses your movements and feels awkward at first. Go slow, make small cuts, and accept that your first attempt will feel clumsy.
10The Quarterly Maintenance Trim

This last one is a habit, not a technique: schedule a real maintenance trim every 10 to 12 weeks and combine it with light dusting between appointments. On trim day, wash and dry your hair, then remove a quarter to a half inch all around using whichever method from this list you trust most. Mark it on your calendar like any other appointment.
Consistency beats intensity here. Regular small trims prevent splits from traveling up the shaft, which is what forces people into big chops. This routine suits every hair type and is the single best thing you can do for long-hair goals. The caveat is discipline: it is easy to skip a session, and once you do, splits creep upward fast. If your ends feel rough or catch on each other, you have waited too long, and it is time to see a professional for a proper shape-up.
How to Prevent Split Ends Between Trims
Trimming fixes splits, but prevention keeps them from coming back. Start with your tools: sharp hair-cutting shears are non-negotiable, and dull blades create splits as fast as you cut them off. Sleep on a satin or silk pillowcase to cut down on friction, and never brush wet hair with a fine-tooth comb, since wet hair stretches and snaps easily. Use a wide-tooth comb or a detangling brush instead.
Chemical treatments and very tight hairstyles also stress the ends, so give your hair breaks between color sessions and loosen up styles that pull. Finally, keep the ends moisturized with a light oil or leave-in conditioner, especially if your hair is long, curly, or chemically treated. Moisturized ends are flexible ends, and flexible ends do not split as fast.
FAQs
How often should I trim split ends at home?
Every 8 to 12 weeks is the sweet spot for most people. If you heat style often or have fine hair that splits easily, lean toward every 8 weeks. If you notice splits traveling up the strand or your ends feel constantly rough, shorten the interval rather than cutting more off each time.
Can I trim split ends with regular scissors?
A pair of basic hair-cutting shears costs very little, stays sharp much longer, and is the single most important purchase for at-home trimming. Use them only on hair so they stay sharp.
Will trimming my split ends make my hair grow faster?
Trimming does not change your growth rate, which is set by your follicles. What it does is stop splits from traveling up the shaft and breaking off, which means you keep more of the length you grow. Hair that is trimmed regularly often looks like it is growing faster simply because the ends stay intact instead of snapping off.
How much hair should I cut off when trimming split ends?
As little as possible. For maintenance, a quarter inch is usually enough. For visible damage, cut a quarter inch above the highest split you can see, up to about half an inch. Cutting more than you need does not prevent future splits, it just costs you length. When in doubt, take off less; you can always do another pass.
When should I see a professional instead of trimming at home?
See a stylist if your splits extend several inches up the strand, if your hair has uneven damage from bleach or color, or if you want to change the shape or length significantly. Also book an appointment if your at-home trims keep coming out uneven.
Keep exploring: if you wear your hair up often, these 10 Waterfall Braid Ideas for Long Hair are gentle on the ends and hide a multitude of trimming sins while they grow out. And if a blunt cut keeps showing every tiny uneven snip, consider a softer shape like these 12 Soft Side Part Hairstyles for an Easy Refresh, which are far more forgiving of at-home maintenance.