# 12 Pull-Through Braid Ideas for Volume
The pull-through braid has one unfair advantage over every other braid: it is technically not a braid at all. You are stacking looped ponytails, which means you get to tug and pancake each section as you go. The result looks like a thick rope braid with twice the hair you actually have, and you can build it with zero braiding skill.
That is exactly why this style blew up. It works on medium to long hair, looks convincing on second or third-day hair, and takes about ten minutes once you learn the rhythm. You just need clear elastics, a little texturizing spray, and a mirror. Here are twelve ways to wear it, from everyday ponies to bridal-level volume.
1The Classic Full-Length Pull-Through

Start with a simple ponytail at the nape, then add ponytails stacked directly below it, pulling each one apart into a wider bubble before adding the next. That pancaking step is the whole trick, and it is what separates a limp version from the thick, plush rope you see in photos. This suits medium to thick hair best, though thin hair works if you tease each section first. At a salon, ask for a pull-through with maximum pancaking rather than a tight finish. Maintenance is easy: the style holds a full day and survives most commutes. The honest drawback is the elastic count, since a long version can swallow eight to ten clear bands, and cutting them out at night takes patience.
2High Ponytail Pull-Through
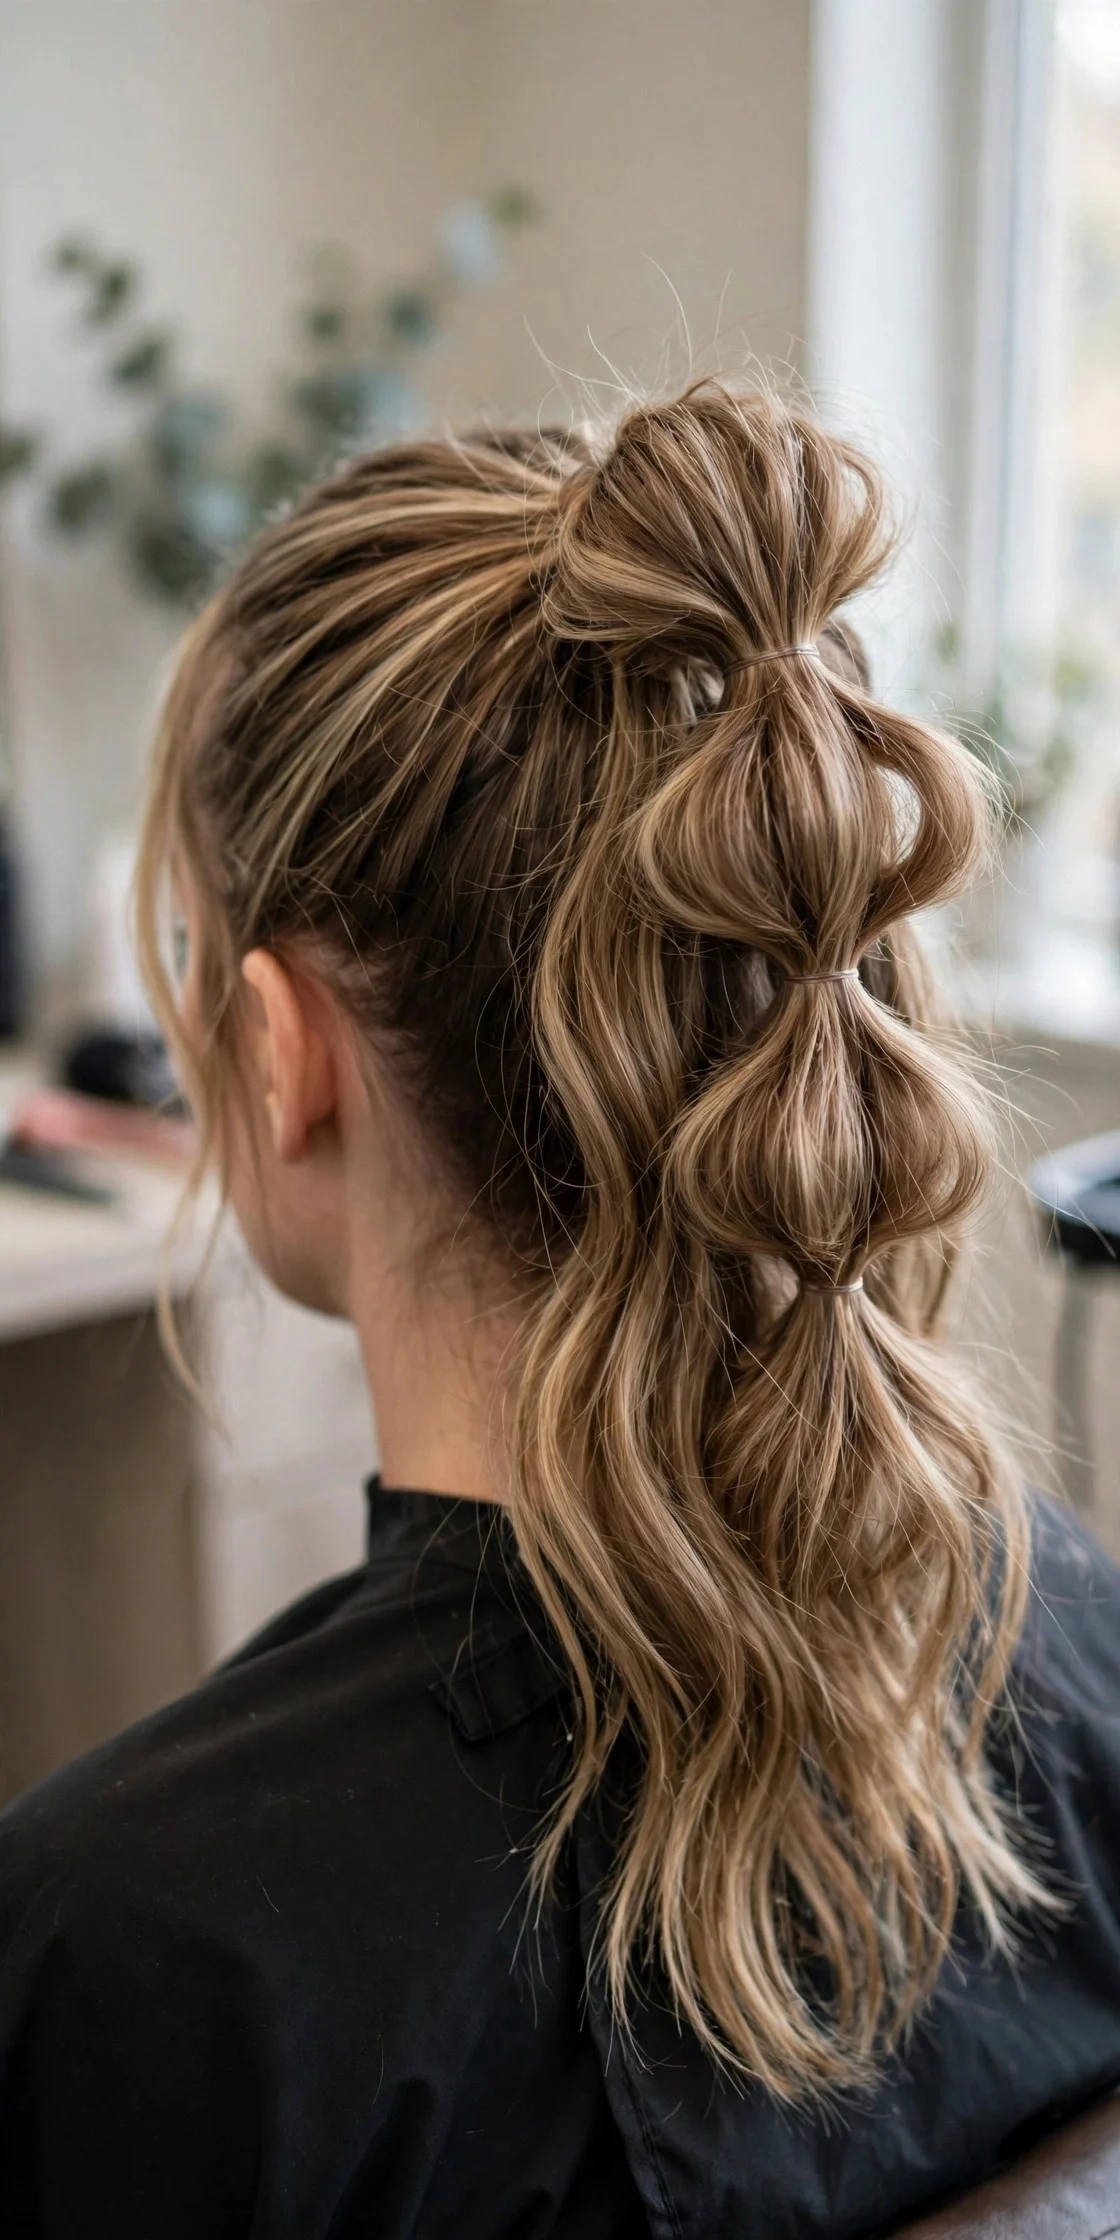
Build the same stacked technique on top of a high pony, and you get the sporty, lifted look that pairs well with off-duty outfits and gym sessions. The height keeps hair off your neck while the widened sections add drama that a plain high pony never has. Round and oval faces wear this well because the height adds length. Ask your stylist for a snatched base with soft, pancaked loops so the top stays sleek while the body stays big. It holds through workouts if you anchor the first band tightly. One warning: worn too tight at the base, it pulls at the hairline and can cause breakage over time, so keep the tension firm but not painful.
3Side-Swept Pull-Through
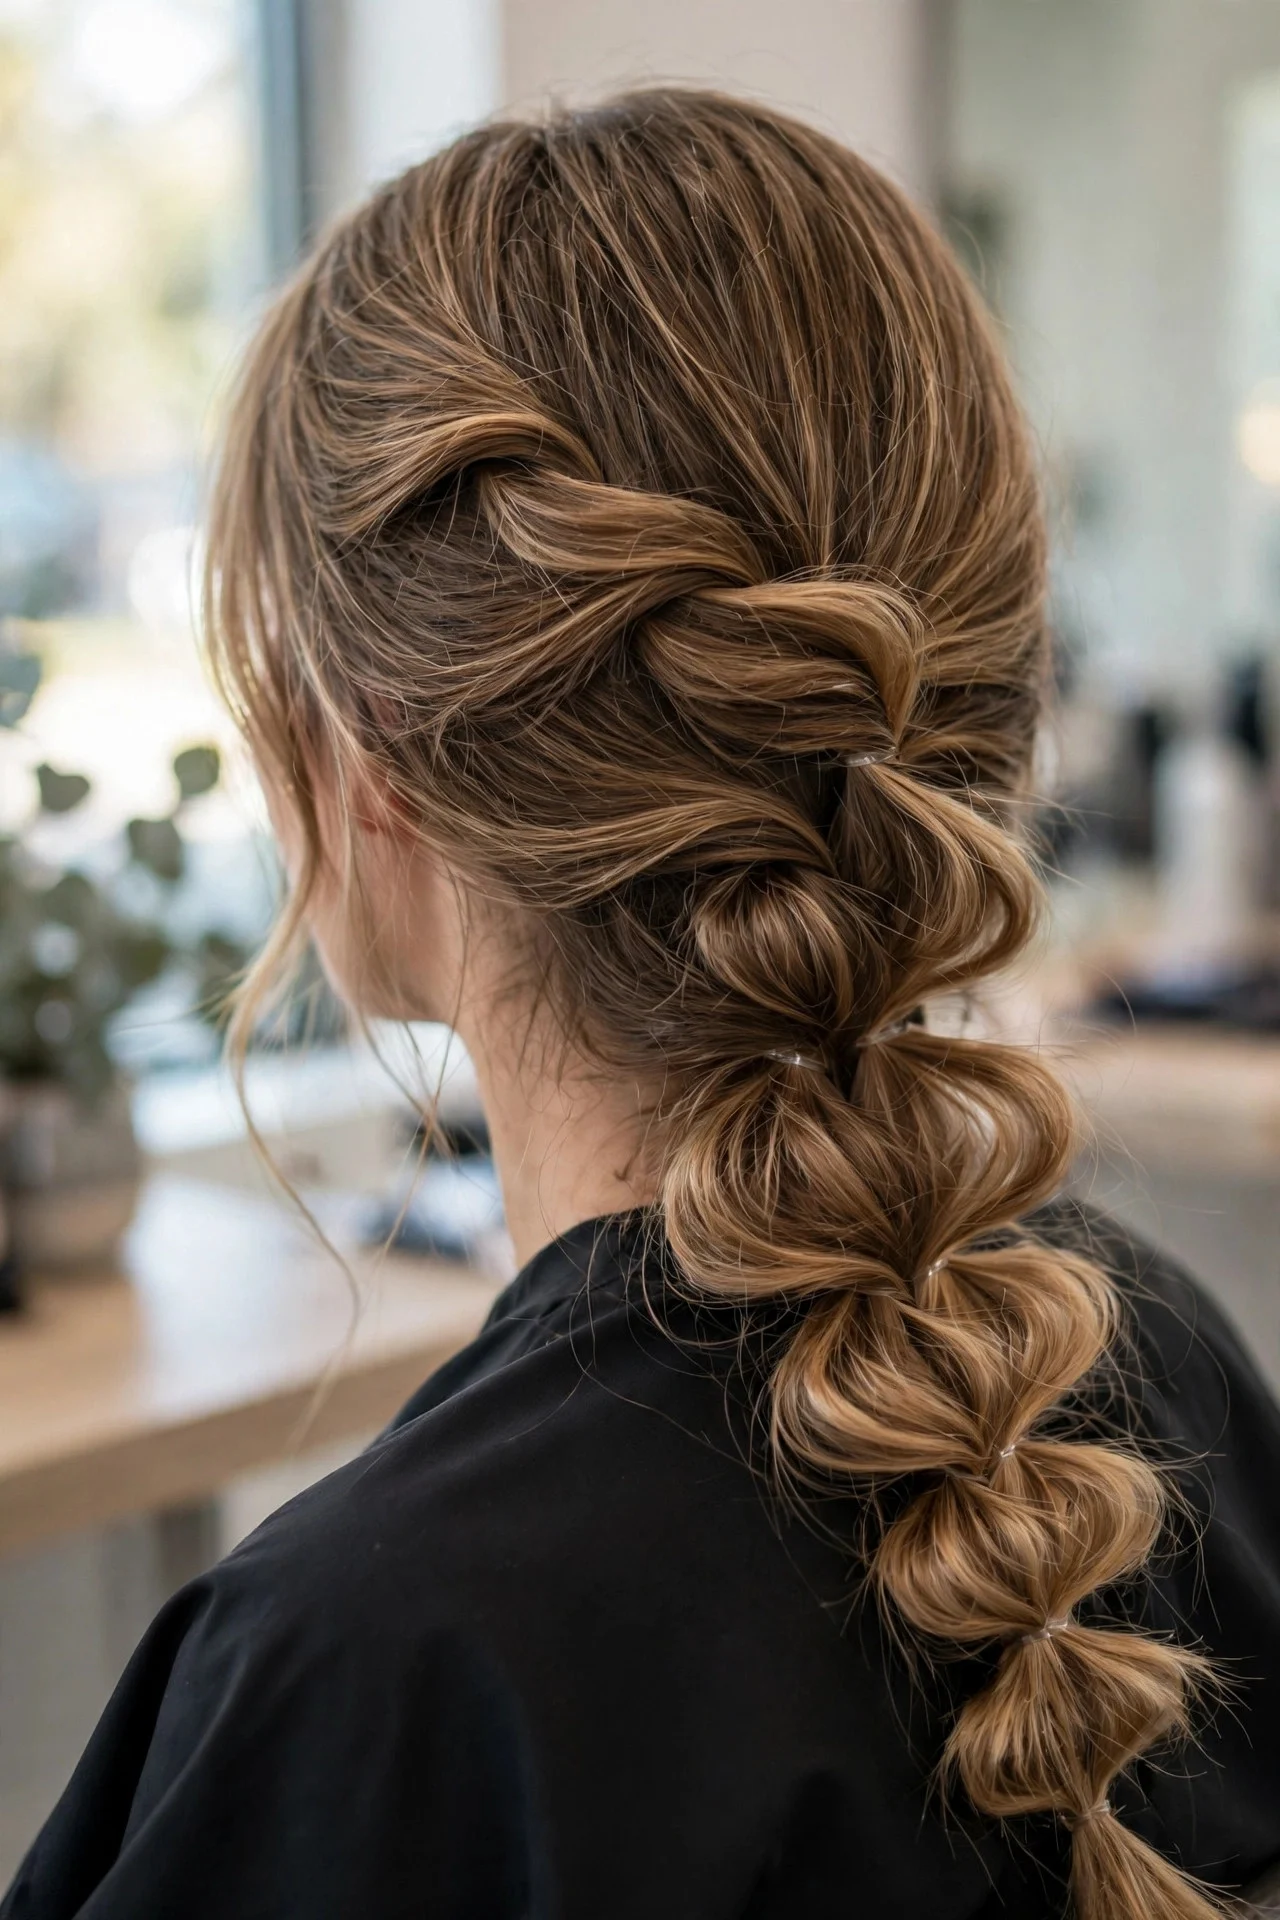
Sweep everything over one shoulder and build the loops down that side for a softer, almost romantic version that photographs beautifully. This one suits fine hair especially well because the side placement makes each pancaked section look wider and denser. It is a favorite for events where you want volume without the stiffness of an updo. Ask for looser pancaking here, since overtightened side loops slide off the shoulder. The style lasts through an evening if you set it with a flexible-hold spray. The tradeoff is that it rests against clothing all day, so a rough sweater can flatten and frizz the loops by late afternoon.
4Double Pull-Through Pigtails
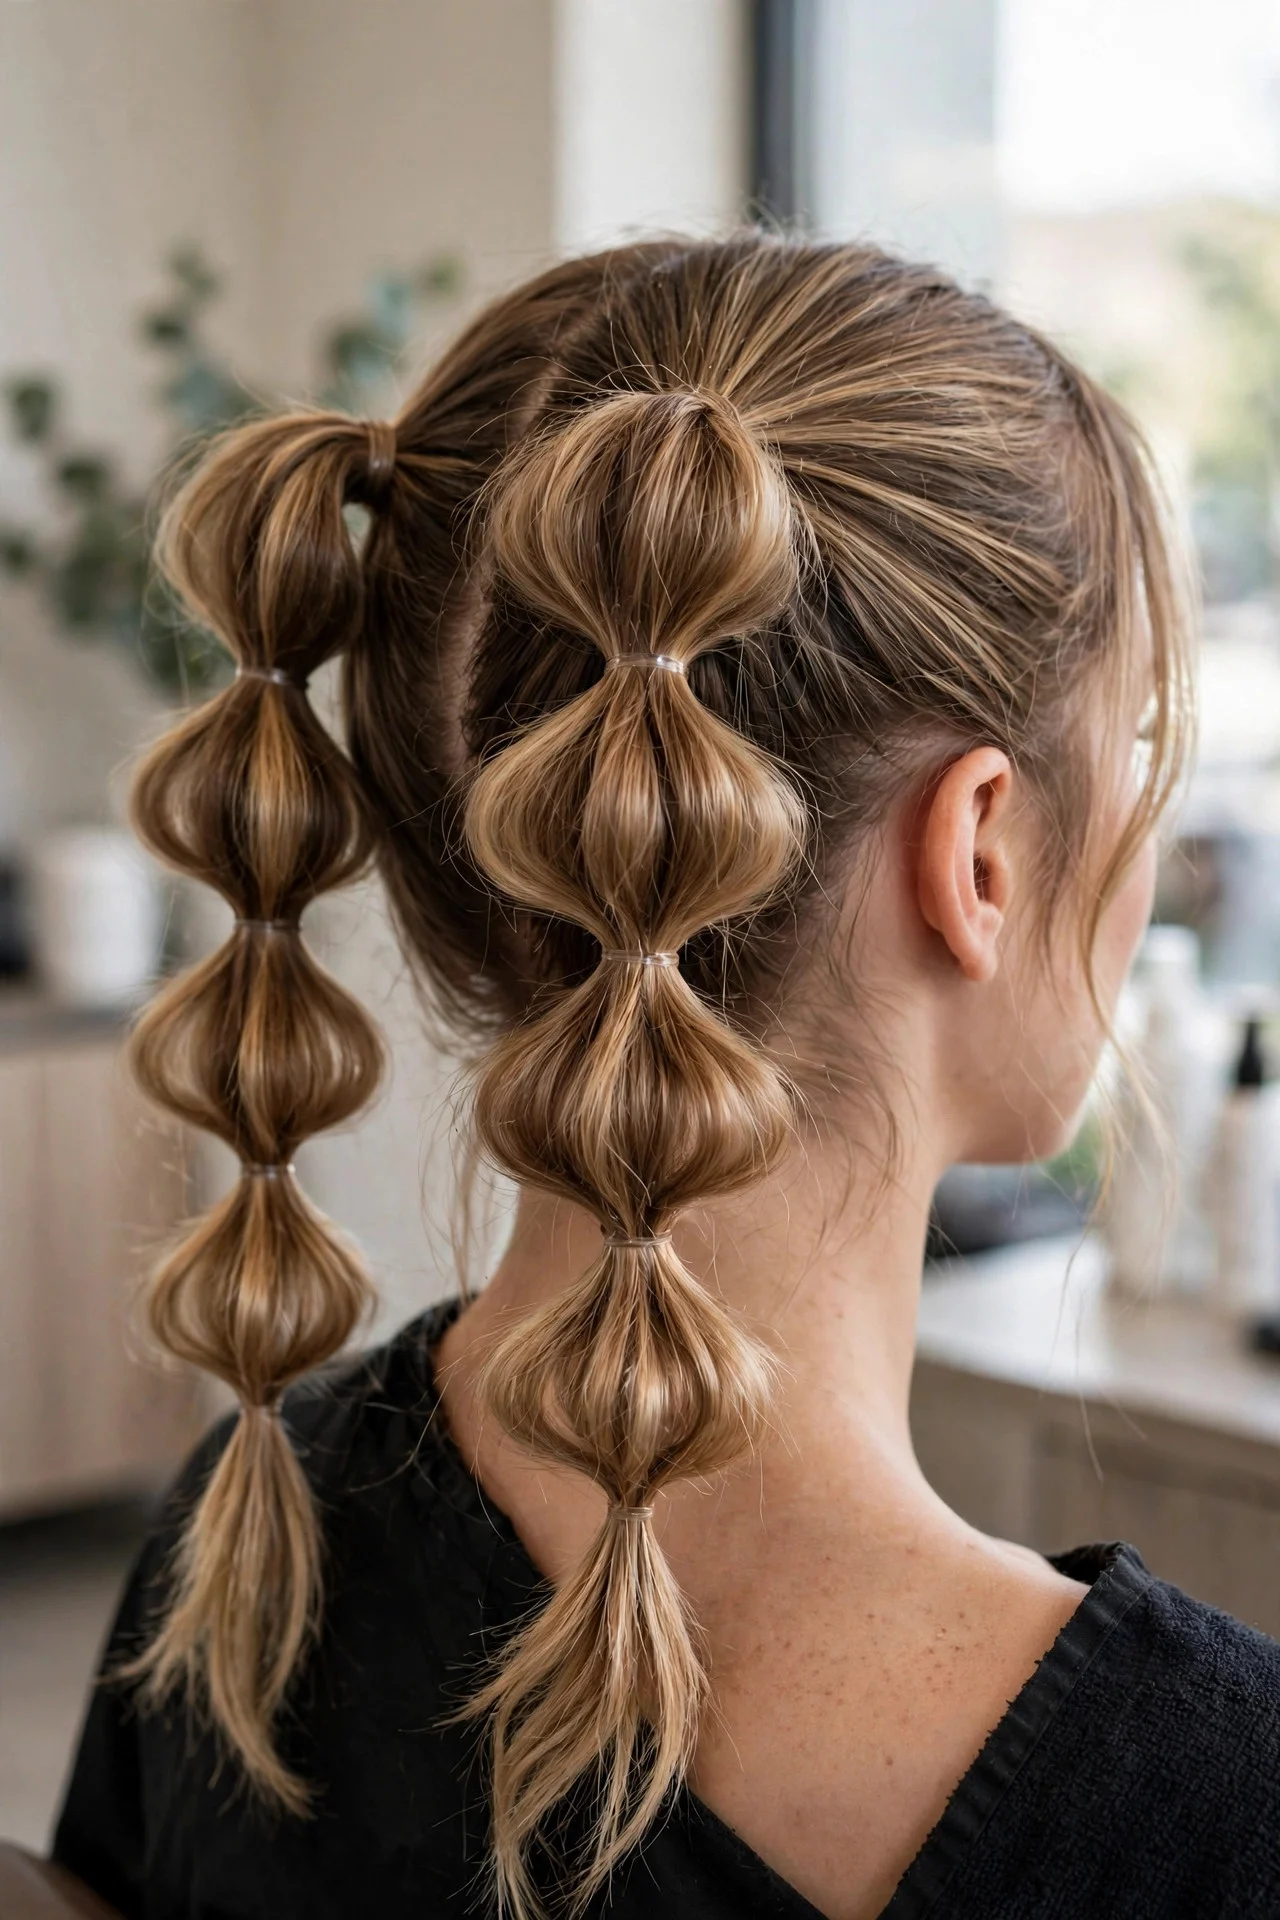
Split the hair into two sections and build a pull-through down each side, and you get a playful, festival-ready look that actually looks polished instead of childish. This is kind on thin hair because each side only needs modest thickness to look full. It works on shoulder-length to long hair, and curling the ends first gives it extra body. Ask for matching widths on both sides or one side will look heavier. Maintenance is minimal, and it holds well under hats. The honest catch: parting and matching two braids takes longer, and lopsided sections are noticeable, so expect a fiddly ten to fifteen minutes.
5Pull-Through Faux Fishtail
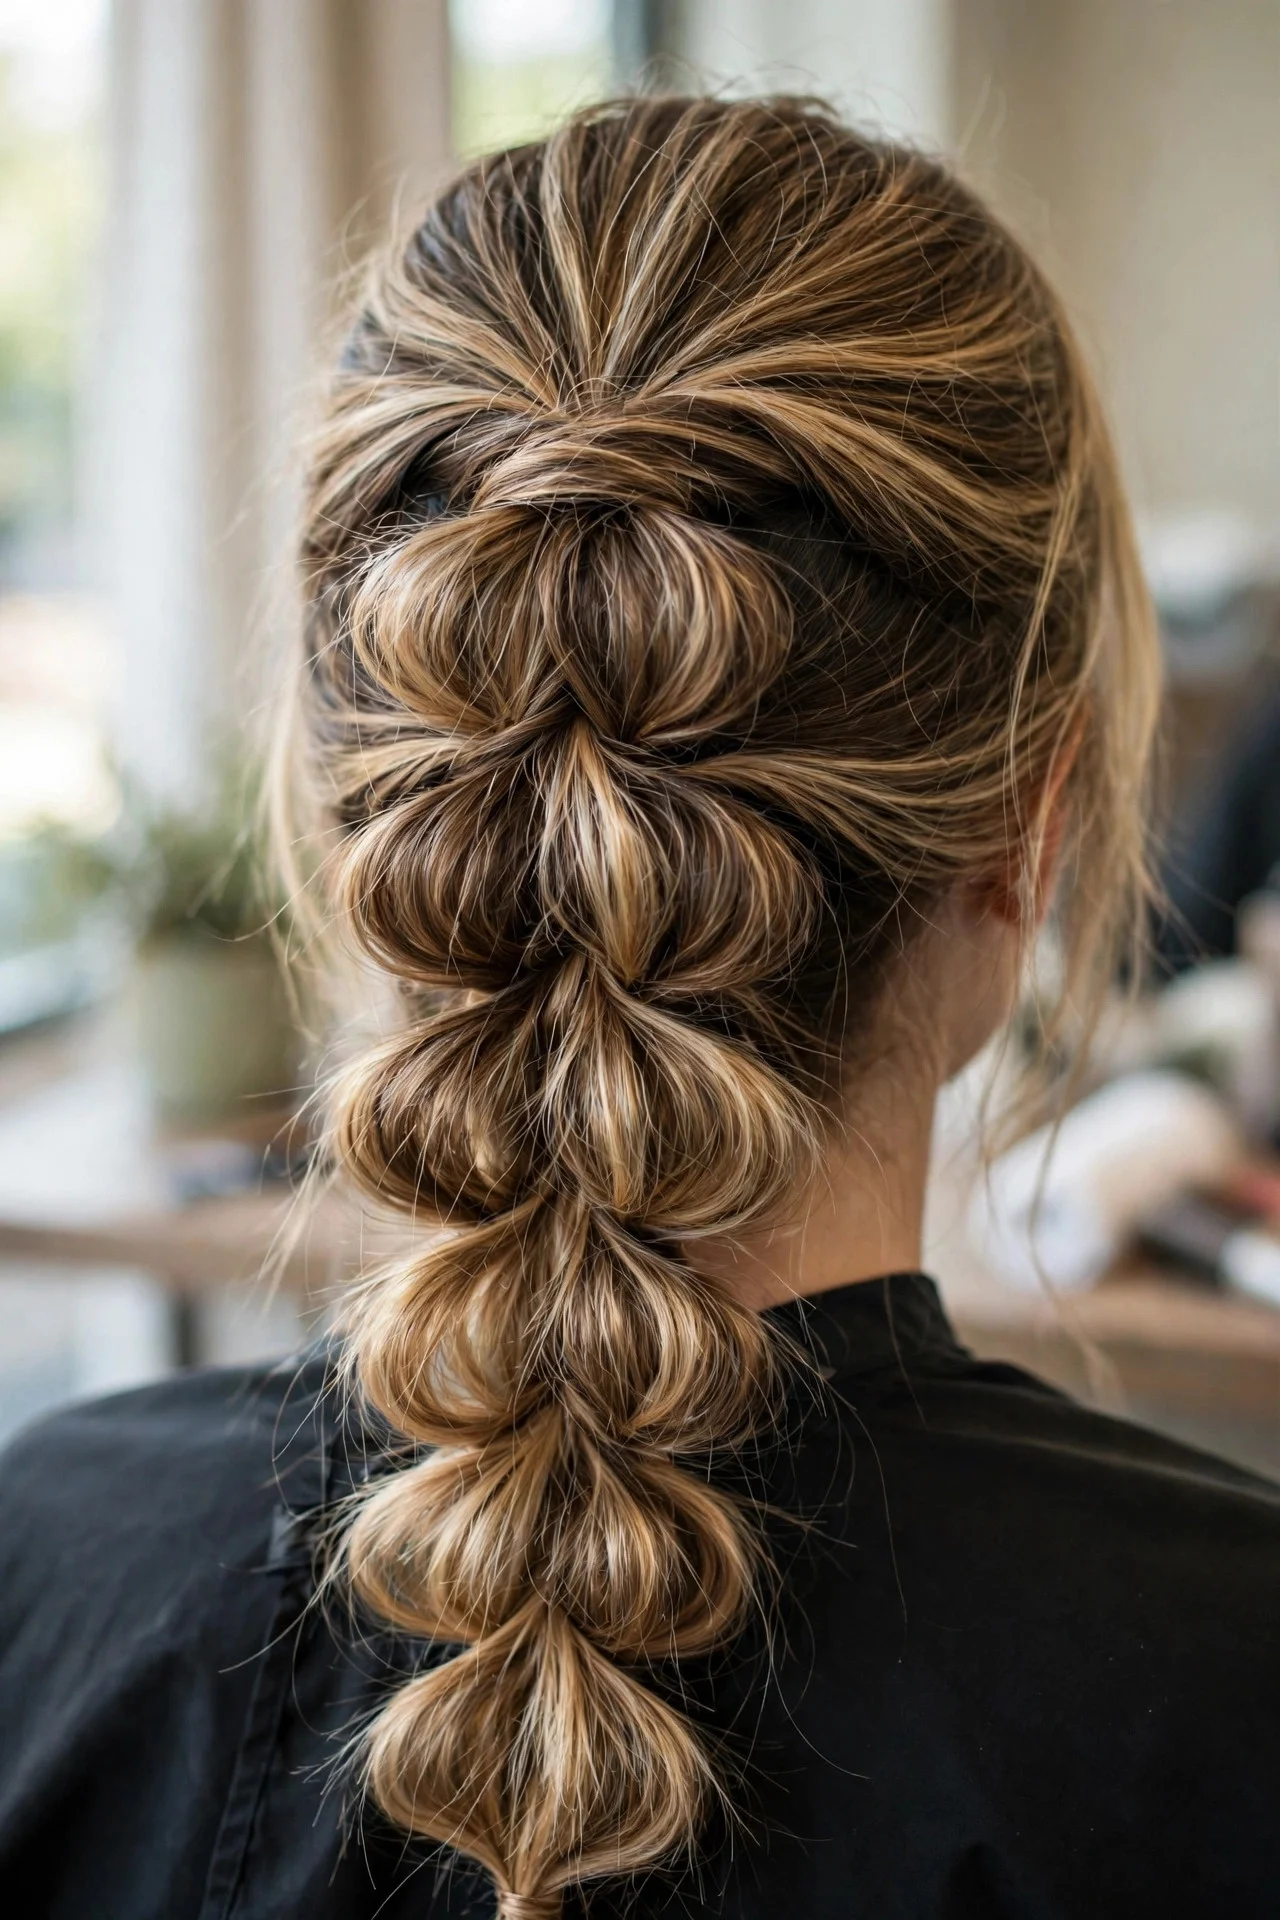
Alternate the loop direction slightly and pancake the edges wider than the center to fake a fishtail’s herringbone look without any actual fishtail skill. Real fishtails take practice; this shortcut gives you the visual texture in a fraction of the time. It suits medium-length hair best, since very long hair makes the faux pattern harder to read. Ask your stylist to keep the loops flatter rather than round to sell the fishtail illusion. It holds decently for a day out. The drawback is that it deflates in humidity faster than a classic version, since the wider, flatter loops catch moisture and sag by evening.
6Half-Up Pull-Through

Gather only the top half into the first ponytail and build two or three stacked loops, leaving the rest of the hair down. You get volume at the crown and face-framing lift while still showing off your length. This is ideal for fine hair because you need less hair overall, and it suits every face shape. Ask for gentle pancaking so the top does not look separated from the loose hair below. It is one of the fastest versions, doable in about five minutes. The upkeep is light, though the loose hair underneath can rub against the loops and create frizz at the junction. A quick smoothing pass with serum at the seam fixes it.
7Bubble Pull-Through Hybrid
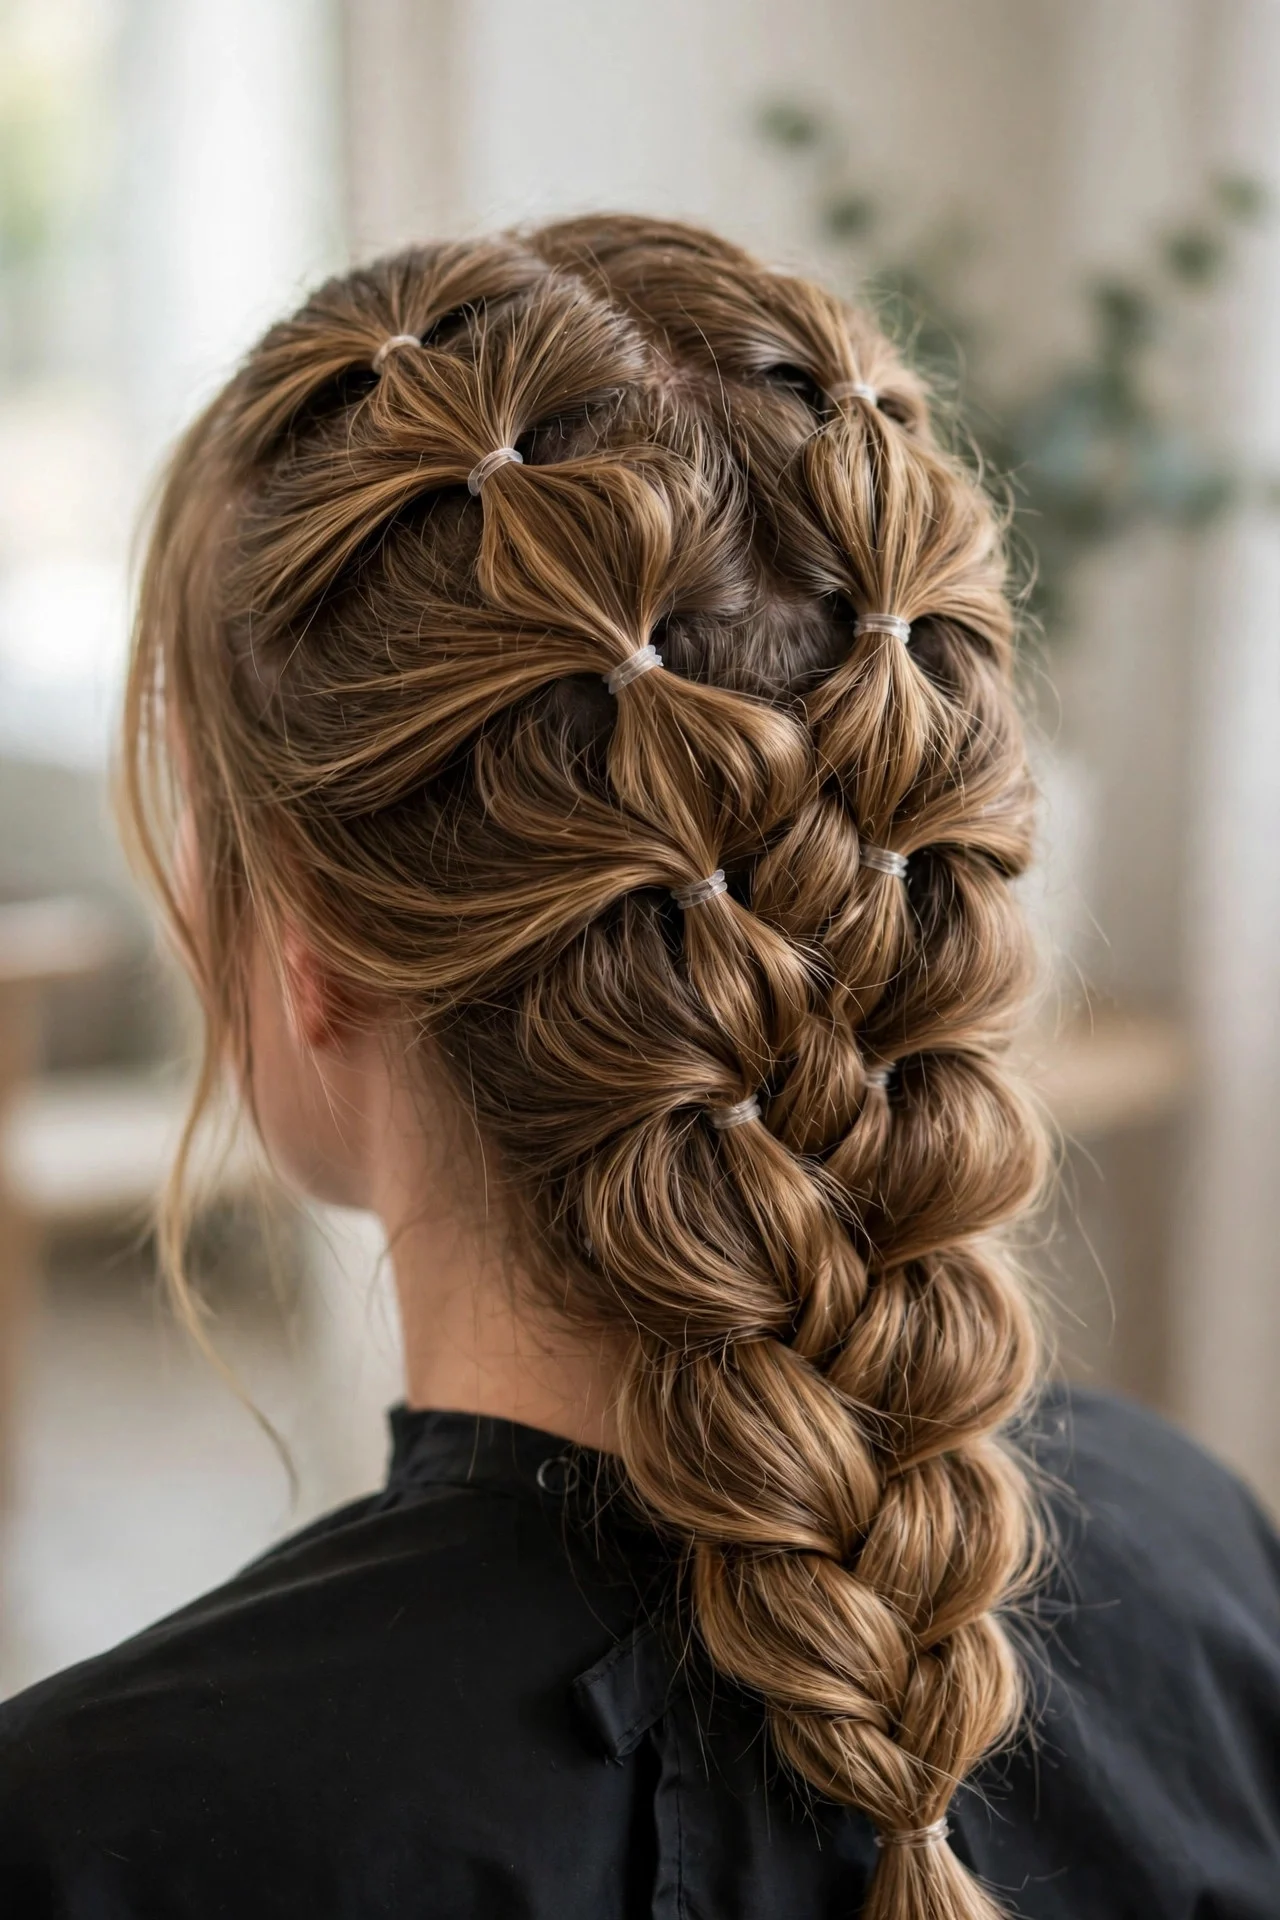
Combine the two trends: leave each stacked section round and bubbly instead of flattening it, and you get a playful hybrid with cartoonish volume. This works best on thick or long hair, where each bubble has enough hair to look substantial. Ask your stylist for separated, well-defined bubbles rather than a muddled middle ground. It is surprisingly sturdy and survives long days. The honest drawback is elastic visibility: the round shape shows the bands more clearly, so you either need hair-colored bands or to wrap small strands around each one, which adds time to the build.
8Wrapped-Base Pull-Through

After building the braid, wrap a strand of hair around the base of each ponytail to hide the elastics, pinning underneath. The result looks seamless and expensive, close to a real woven braid. This suits work and formal settings where visible bands feel too casual. It works on medium to long hair; short hair struggles to spare wrapping strands. Ask for loose wraps, since tight wrapping compresses the loops you just pancaked. The style holds through a full workday. The cost is time: wrapping every section can double your styling time, and the wrapped strands loosen first, needing midday pins.
9Curly Pull-Through
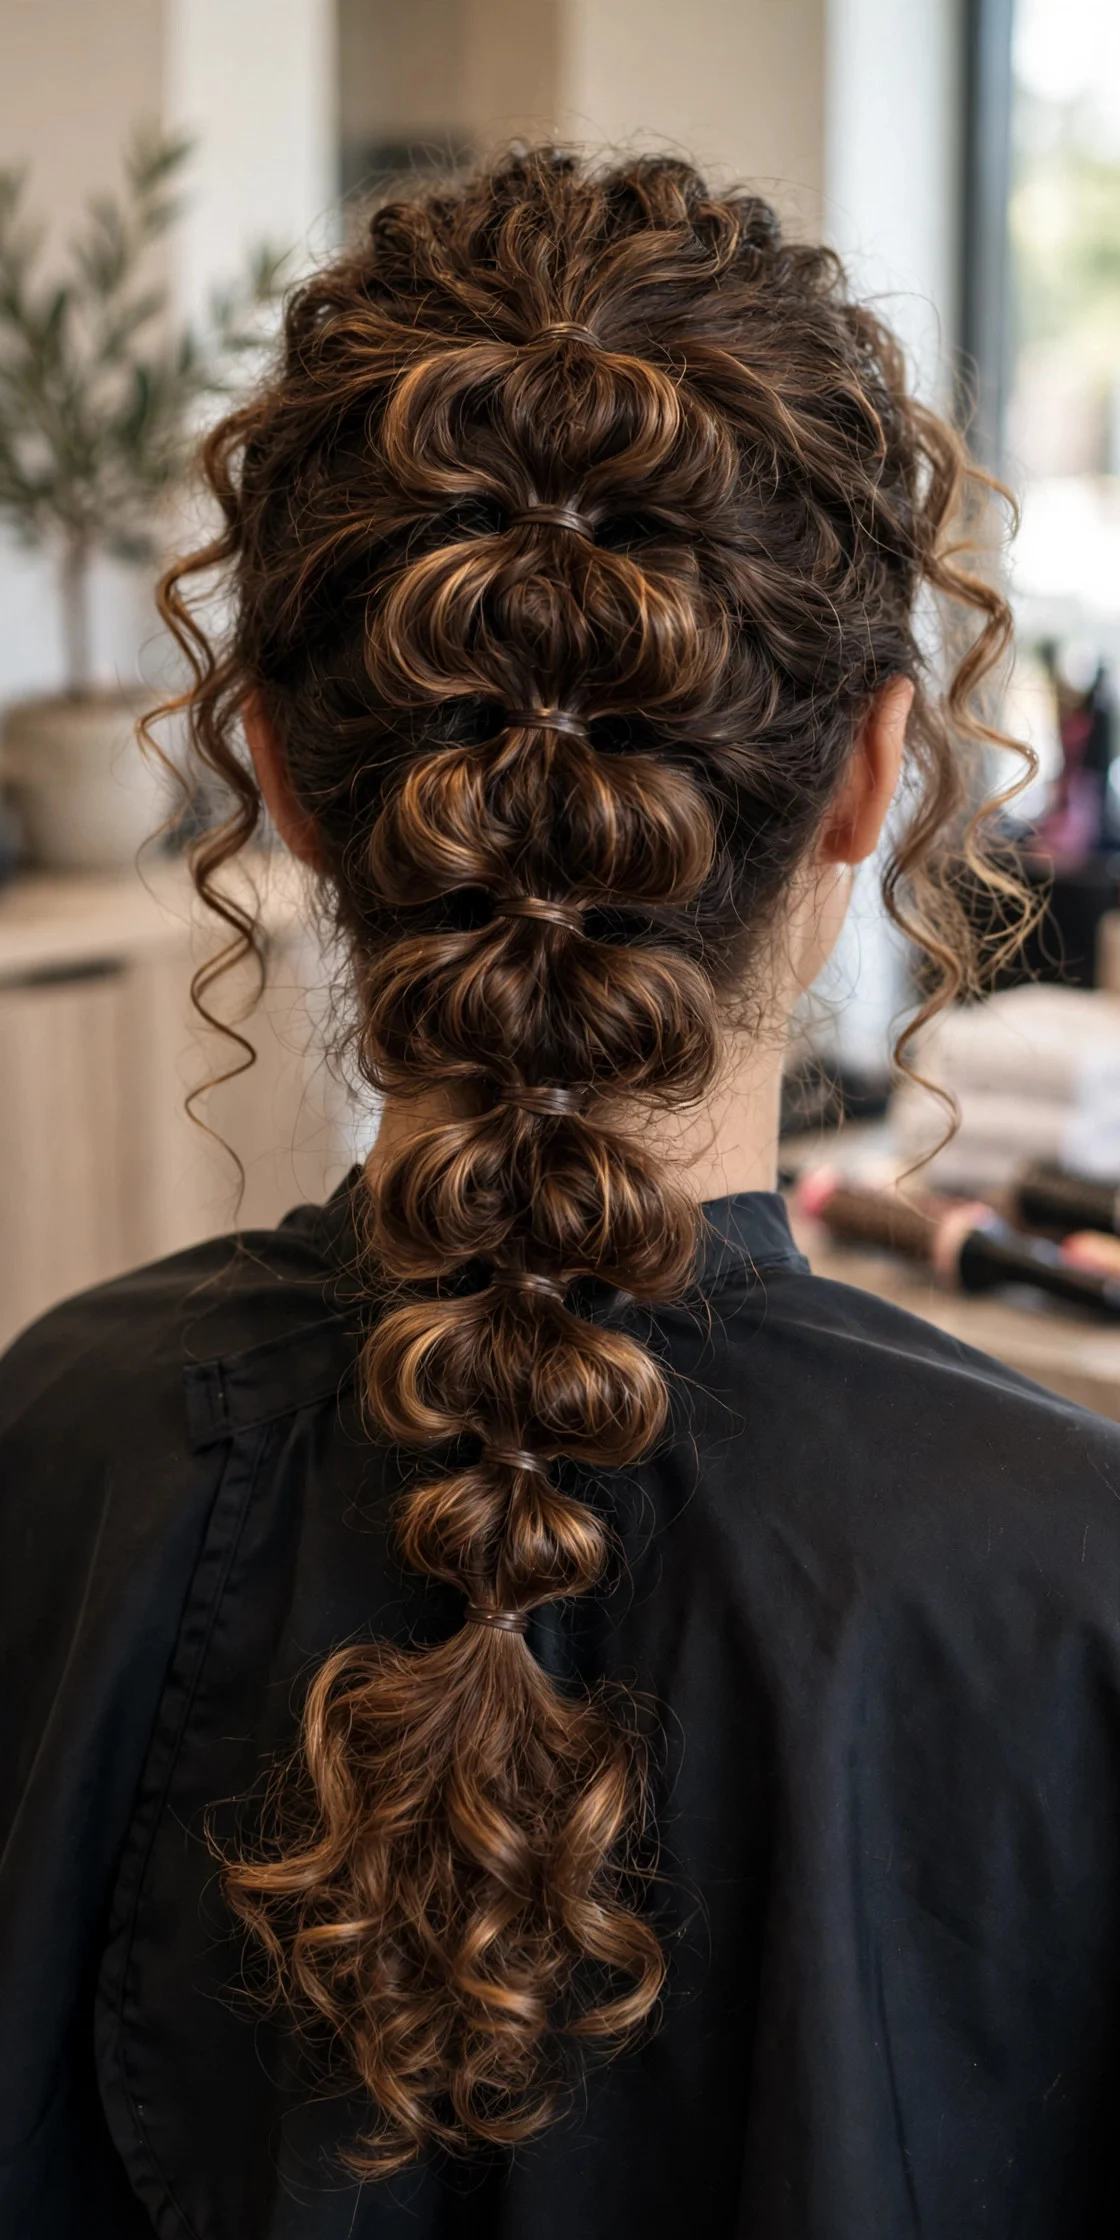
Curl the hair first, then build the stacked loops without brushing the curls out. The texture hides every elastic and makes the braid look twice as thick as it is. Curly and coily hair types wear this beautifully because their natural volume does the heavy lifting. Ask your stylist to curl with a one-inch iron and pancake gently so the curls stay intact. It holds remarkably well since texture grips texture. The drawback is heat and time: the pre-curling step adds fifteen to twenty minutes, and heavy humidity can still pull the curl pattern out of the loops, leaving them limp.
10Messy Boho Pull-Through
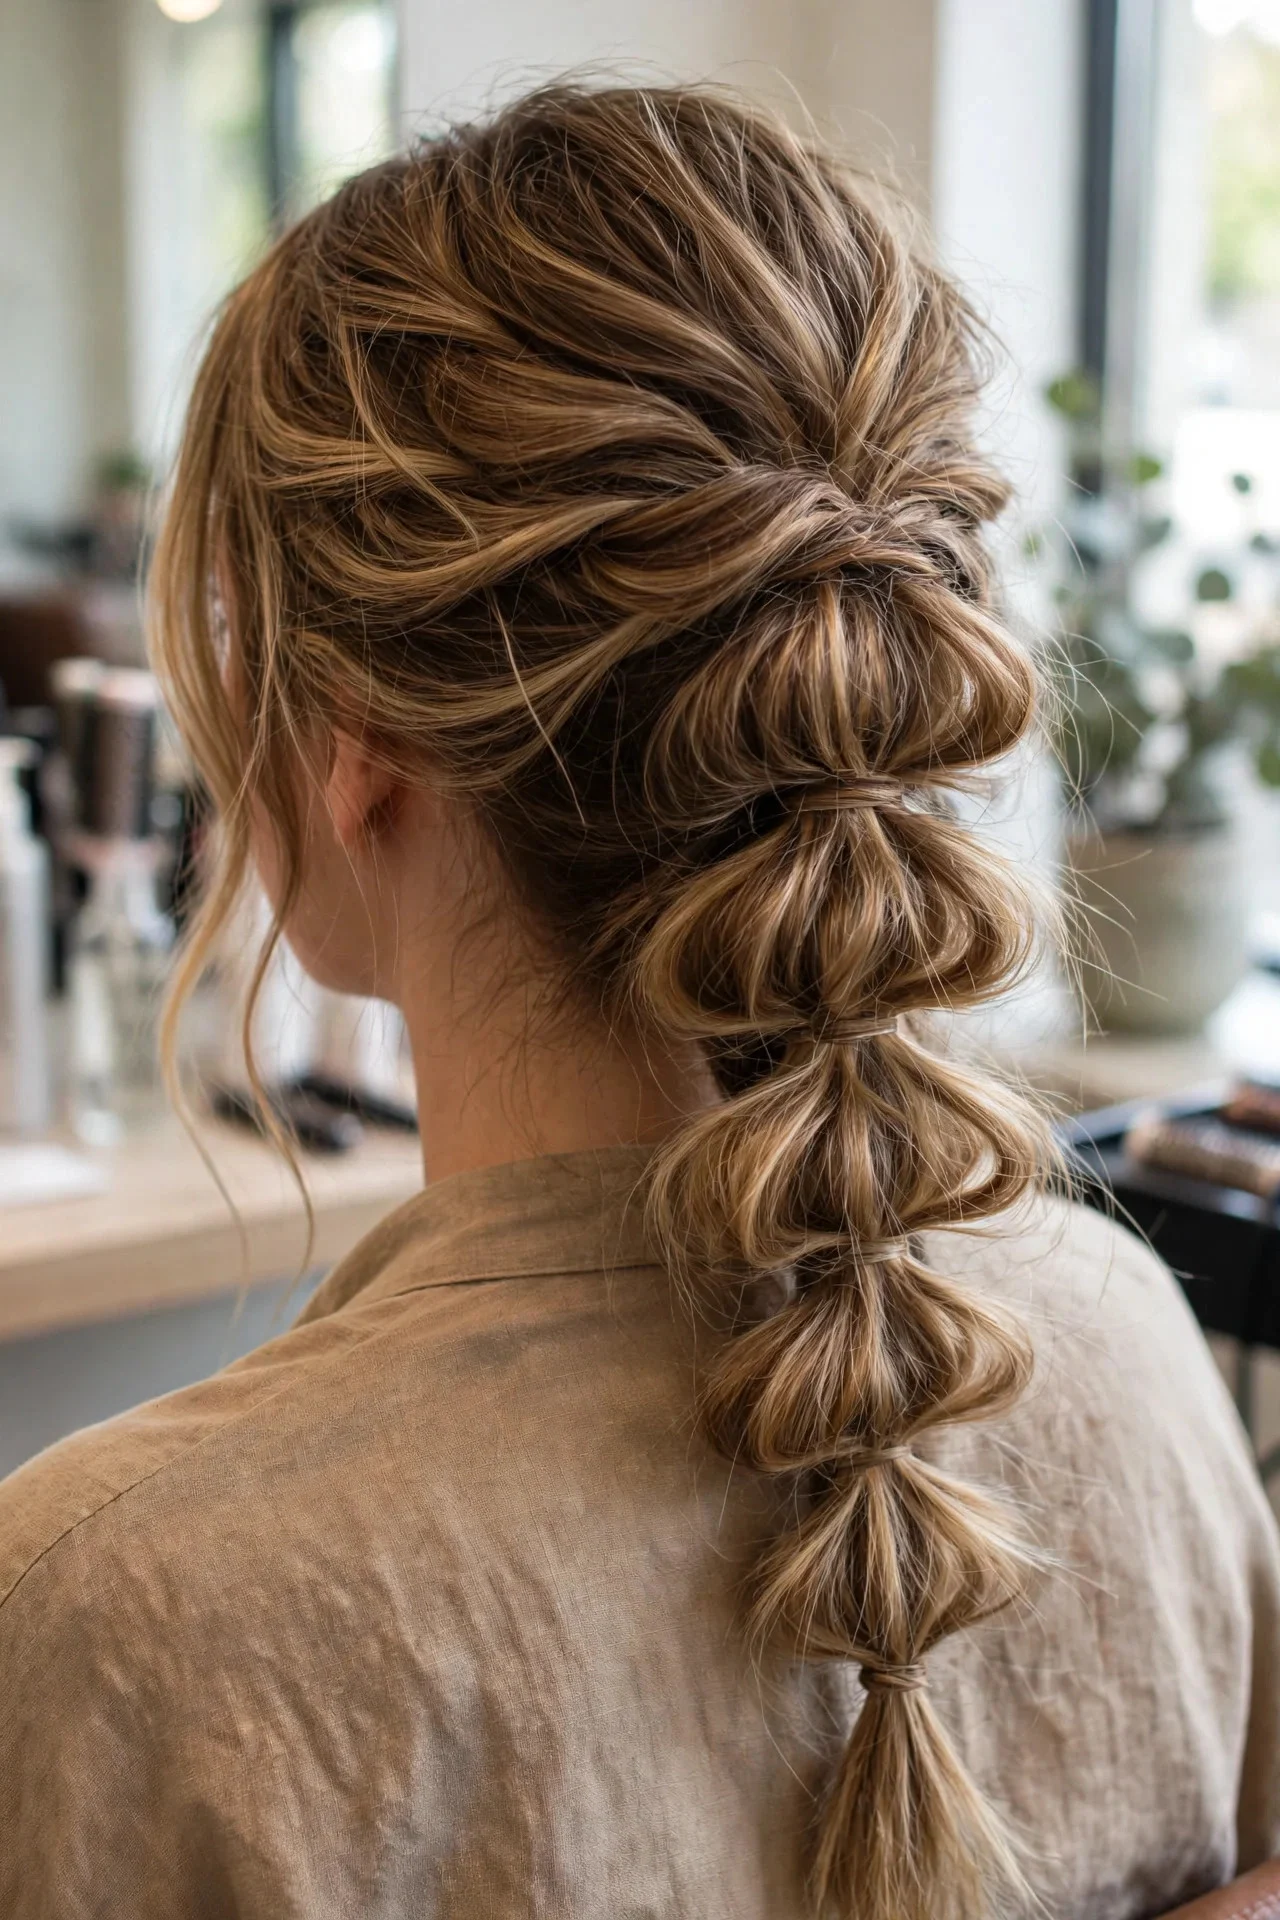
Build the braid loosely, pull the loops wide and uneven, and tug out face-framing pieces and baby hairs for a soft, undone finish. This is the version that suits most people for weddings and parties because the looseness reads as romantic rather than severe. It is forgiving on fine hair and on third-day hair with some grit. Ask for intentional unevenness so it does not just look accidental. It sets well with texturizing spray. The honest issue: messy by design means it keeps getting messier, so by late night the loops can look tired rather than artful, and it is hard to revive without rebuilding.
11Pull-Through Into a Bun
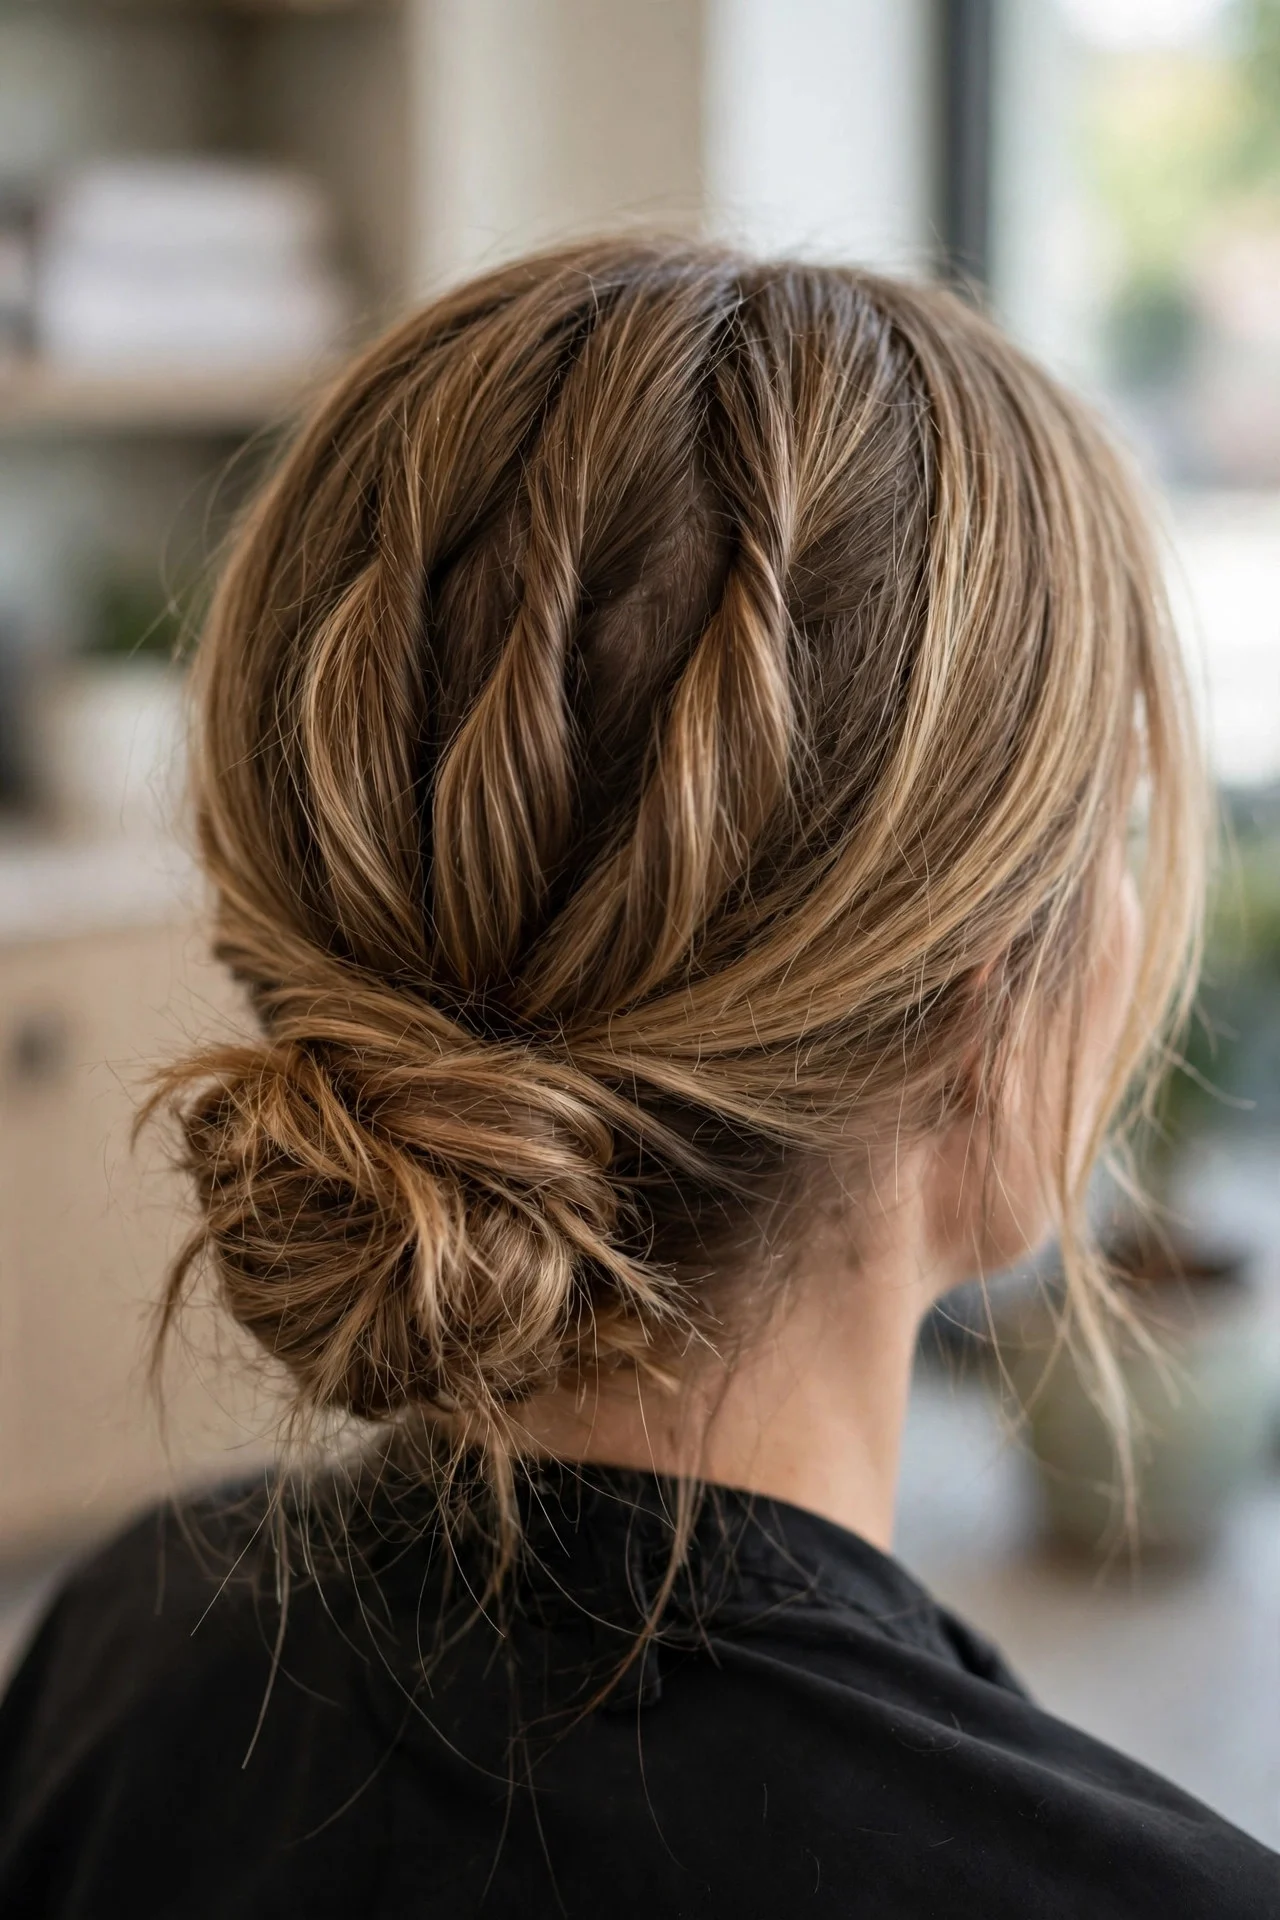
Build three or four stacked loops, then coil the whole thing into a low or high bun and pin it. The bun ends up huge and textured with none of the backcombing damage a voluminous bun usually needs. This is a strong choice for formal events and for hair that slips out of regular buns, since the internal structure grips itself. Ask for the bun to be pinned rather than wrapped so it stays fat. It holds all night. The drawback is weight: the elastics plus all that hair stacked in one spot can feel heavy and give you a dull headache by evening if you are sensitive to updo tension.
12Mini Accent Pull-Throughs

Build two or three small pull-throughs with face-framing sections or a thin side section, leaving the rest of the hair loose. This gives you the braid texture as an accent rather than a full style, and it suits short to medium hair that cannot support a full version. Ask for tight, small loops since tiny pancaked sections fall apart fast. It is the quickest version, under five minutes. The maintenance is nearly zero. The honest catch is fragility: small loops on short hair loosen within hours and can snag fine hair at the elastics, so it is a short-wear style rather than an all-day one.
Styling and Care Tips
Day-two or even day-three hair gives the best grip for any pull-through style, so do not wash right before building one. Fresh, silky hair slips through clear elastics and the loops collapse within an hour. A dry texturizing spray or a light dusting of volumizing powder at the roots makes a bigger difference than any technique tweak. Work in small sections, and remember that pancaking is a two-handed job: hold the loop below the elastic with one hand while you widen with the other, or the whole stack slides.
Elastics matter more than most people expect. Use clear poly bands or ones that match your hair color, and keep them small. Big, chunky bands show through every loop and ruin the seamless look. For removal, never rip them out: slide a pin or the tail of a rat-tail comb under each band and cut with small scissors, then detangle with a wide-tooth comb and a little oil. Ripping elastics out of fine hair causes the exact breakage that makes hair thinner over time.
To keep a pull-through fresh for a second day, sleep with it in a loose high coil or a silk scarf rather than taking it fully apart. In the morning, gently re-pancake the flattest loops, smooth the hairline with a little gel, and mist with flexible-hold spray.
Frequently Asked Questions
Does a pull-through braid actually work on thin hair?
Yes, and it is one of the better braid options for thin hair, because the pancaking step lets you widen each loop beyond what your hair would do naturally. Tease each section lightly before stacking, use a texturizing spray for grip, and keep the loops medium rather than huge. Huge loops on thin hair reveal gaps and look sparse instead of full. With modest pancaking, the result looks genuinely thick.
How long does a pull-through braid last?
Built tightly, it holds a full day and often survives into day two with minor touch-ups. The stacked structure supports itself better than a three-strand braid, which loosens from the ends. Sleeping in it works if you coil it loosely on top of your head. By the third day the loops look tired and the elastics start sliding, so treat it as a one-to-two-day style.
Do pull-through braids damage hair?
They can, mainly because of the elastics. Ten or more tight bands worn repeatedly cause breakage at the band lines, especially on fine or color-treated hair. The damage is preventable: do not wear it daily, keep band tension moderate, and remove bands by cutting rather than pulling. The technique itself is gentler than backcombing for volume.
Can you do a pull-through braid on short hair?
Shoulder-length hair is about the minimum for a classic full version, since you need enough length to stack at least three loops. Shorter hair works for the mini accent versions or a half-up pull-through with two loops. Below the chin, there is simply not enough length to stack, and the loops pop open.
How is a pull-through braid different from a bubble braid?
They share the stacked-ponytail base, but the finish differs. A bubble braid keeps each section round and puffy with visible bands between them, while a pull-through braid pancakes each loop wide and flat so it reads as one continuous rope, closer to a real braid. Think of the pull-through as the sleeker, more convincing cousin. The hybrid version in idea 7 deliberately blends the two.
Keep Exploring
If you liked building volume with stacked loops, you will enjoy other braided looks that play with texture and fullness. Try the detailed tutorials in <a href=”https://hairtrendly.com/12-pammy-updo-tutorials/”>12 Pammy Updo Tutorials for more ways to turn simple sections into polished updos, or explore <a href=”https://hairtrendly.com/pink-peekaboo-braids-ideas/”>Pink Peekaboo Braids Ideas if you want to add a color twist to your braided styles. For something more intricate, the <a href=”https://hairtrendly.com/french-curl-braids-hairstyles/”>French Curl Braids Hairstyles guide walks through a technique that pairs beautifully with the pancaking skills you picked up here.