Thin fine hair can feel like it disappears the moment you try to pin it up. Strands slip out, volume flattens, and a style that looked full in the mirror can fall limp by lunchtime. The good news is that the right updo works with fine texture instead of fighting it, using teasing, texture, and smart pin placement to fake density.
The ideas below are chosen for real life, not just photo shoots. Each one adds visible fullness, holds through a long day, and can be adapted for work, weddings, or a hot afternoon.
1Textured Low Bun with Face-Framing Pieces
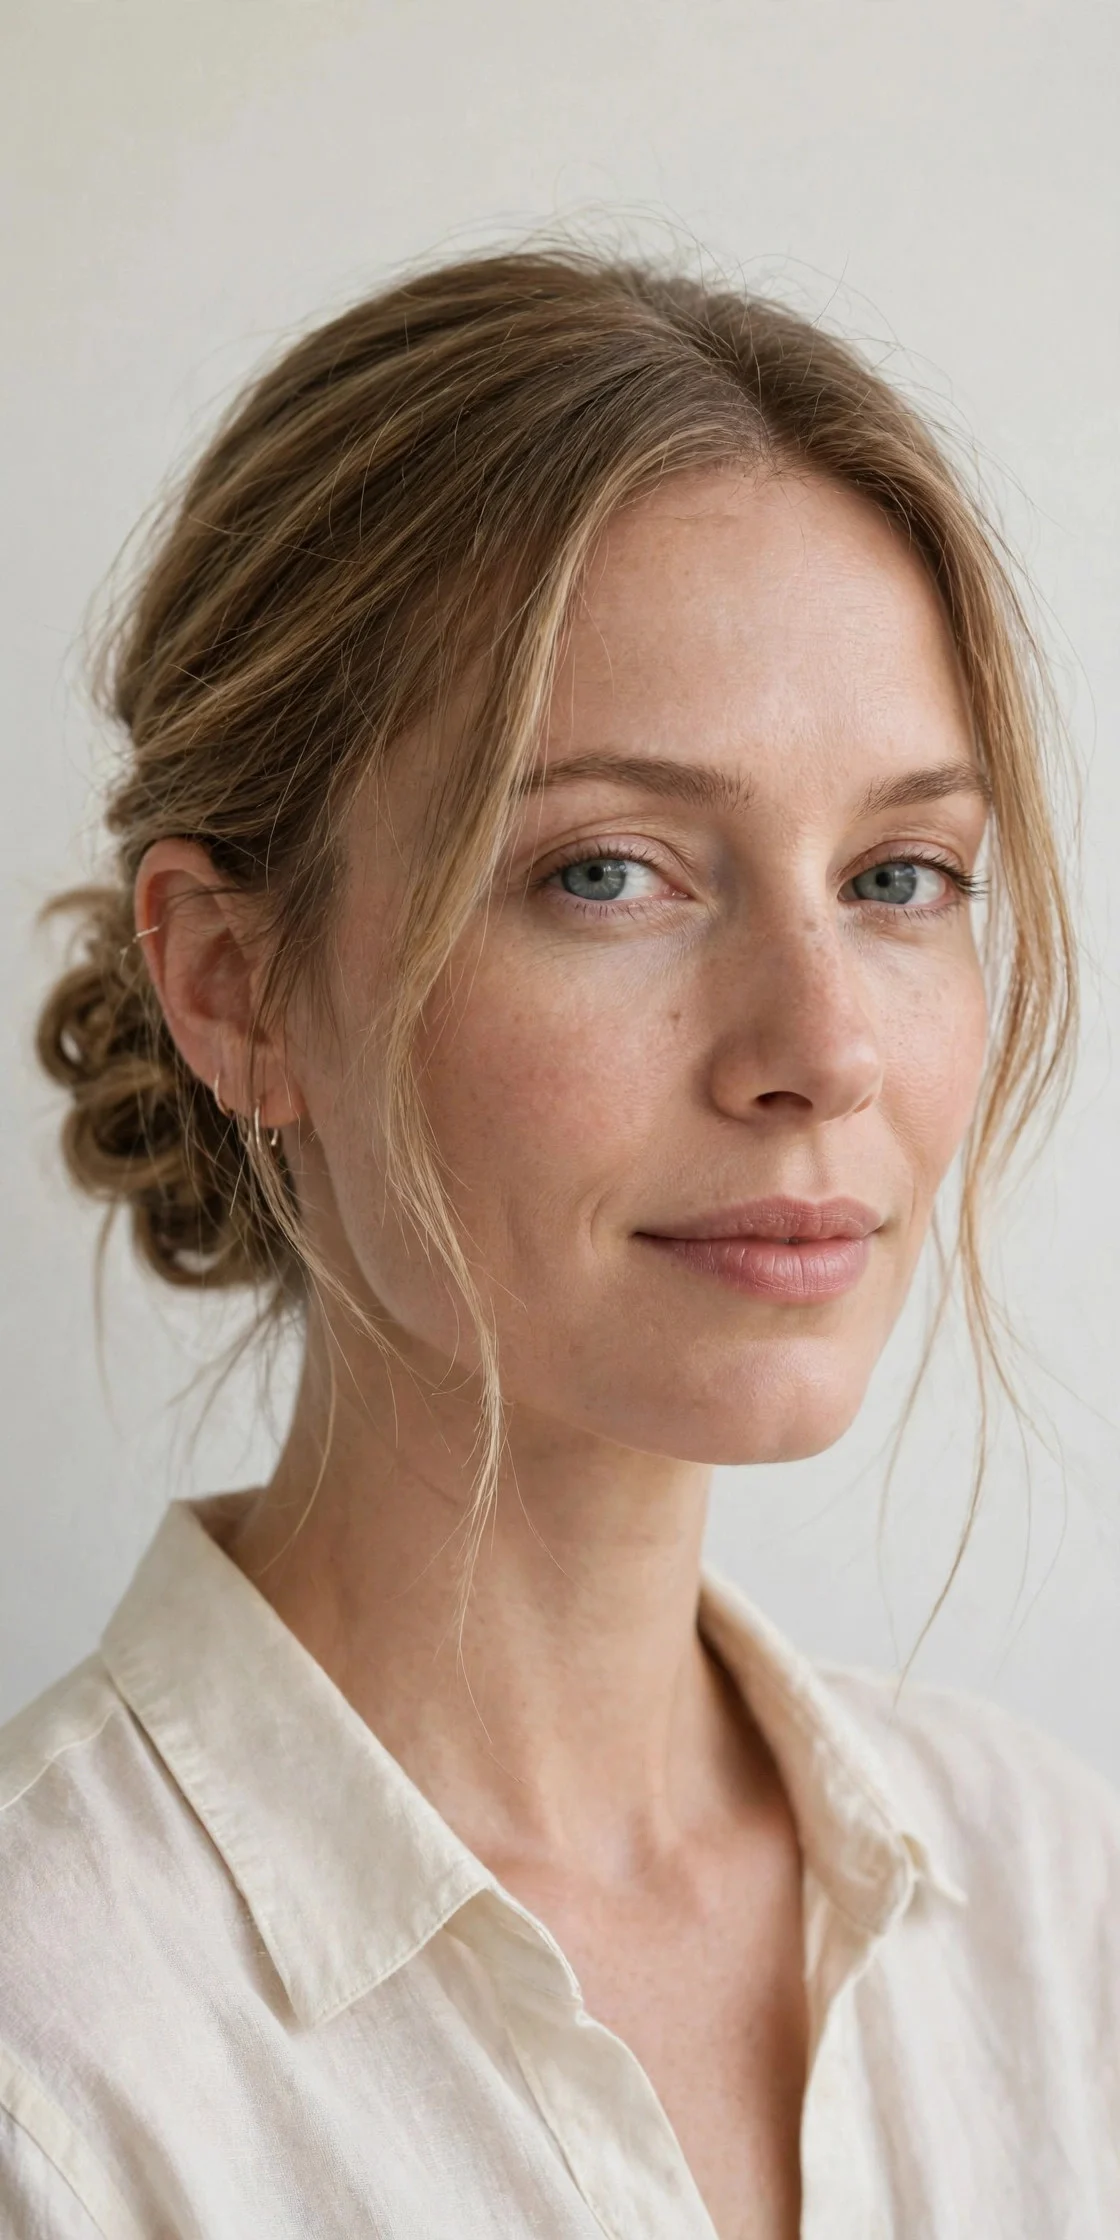
Start with dry hair and a light dusting of volumizing powder at the roots. Backcomb the crown gently, just two or three strokes per section, then smooth the top layer over it so the teasing stays hidden. Gather hair low at the nape, twist it loosely, and pin it into a soft bun, leaving the ends slightly tucked rather than perfectly smooth.
Ask your stylist for long layers around the face and a blunt-ish perimeter, which helps the bun look thicker. This suits oval and heart-shaped faces, and it works well for office days or dinners. The drawback is that heavy teasing every day can cause breakage over time, so save the full backcomb for special occasions and use texture spray on regular days.
2Messy Top Knot with a Padded Base
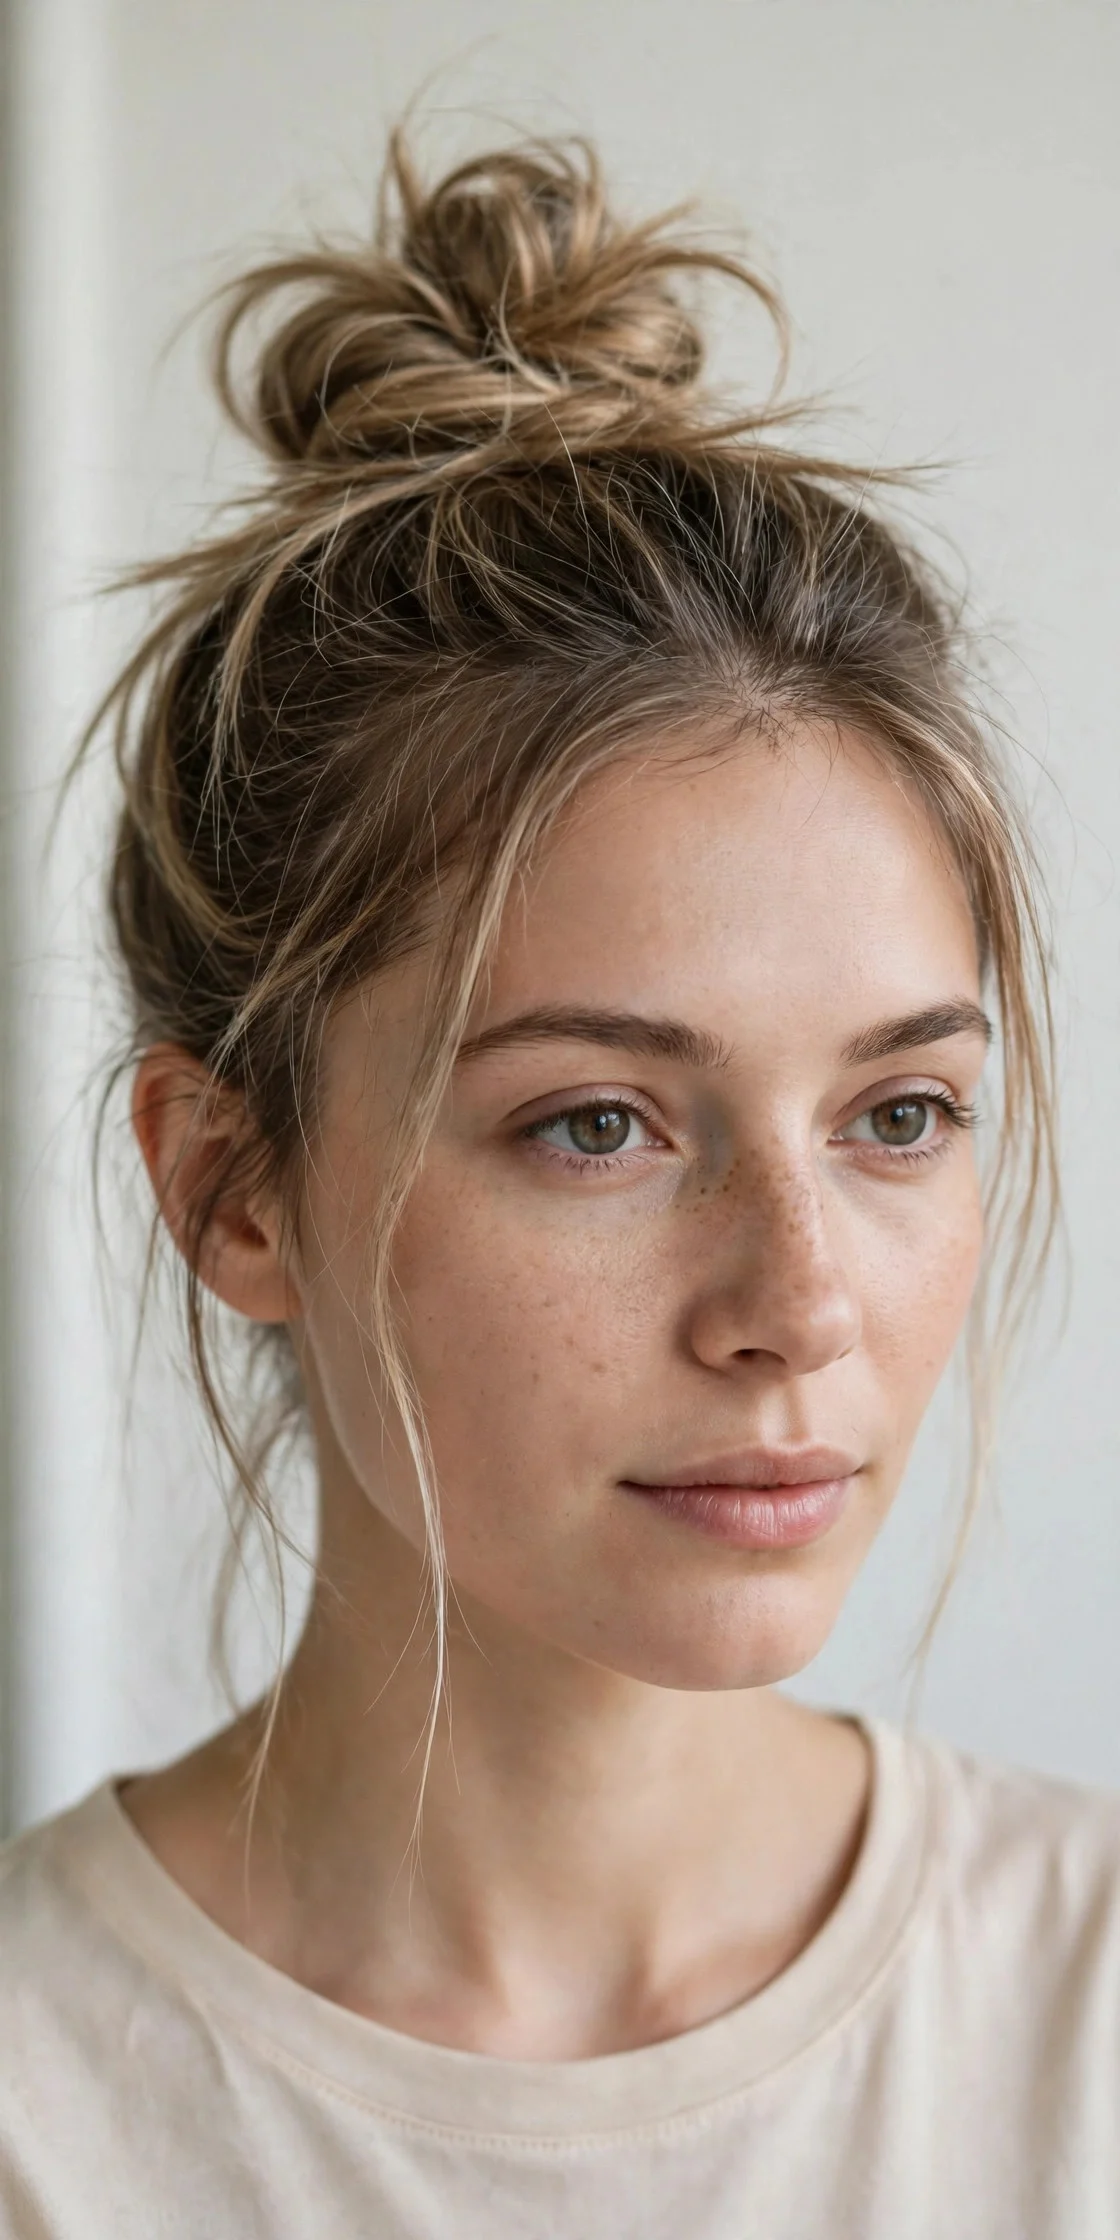
A top knot often looks tiny on fine hair, so the trick is a small mesh donut or a rolled sock bun insert that matches your hair color. Pull hair into a high ponytail, slide the donut over it, spread the hair around the insert, and pin the ends underneath. Pull out a few wisps around the hairline and rough up the surface slightly with your fingers.
Ask for a cut with subtle internal layers, which helps the hair wrap around the donut without obvious gaps. This style suits anyone who wants height and an open neckline, and it is a lifesaver on humid days. It takes about ten minutes once you practice. The honest drawback is that the donut can feel bulky if you lean back in a chair, and the style can slip if your hair is freshly washed, so second-day hair or dry shampoo works best.
3French Twist with Volume at the Crown
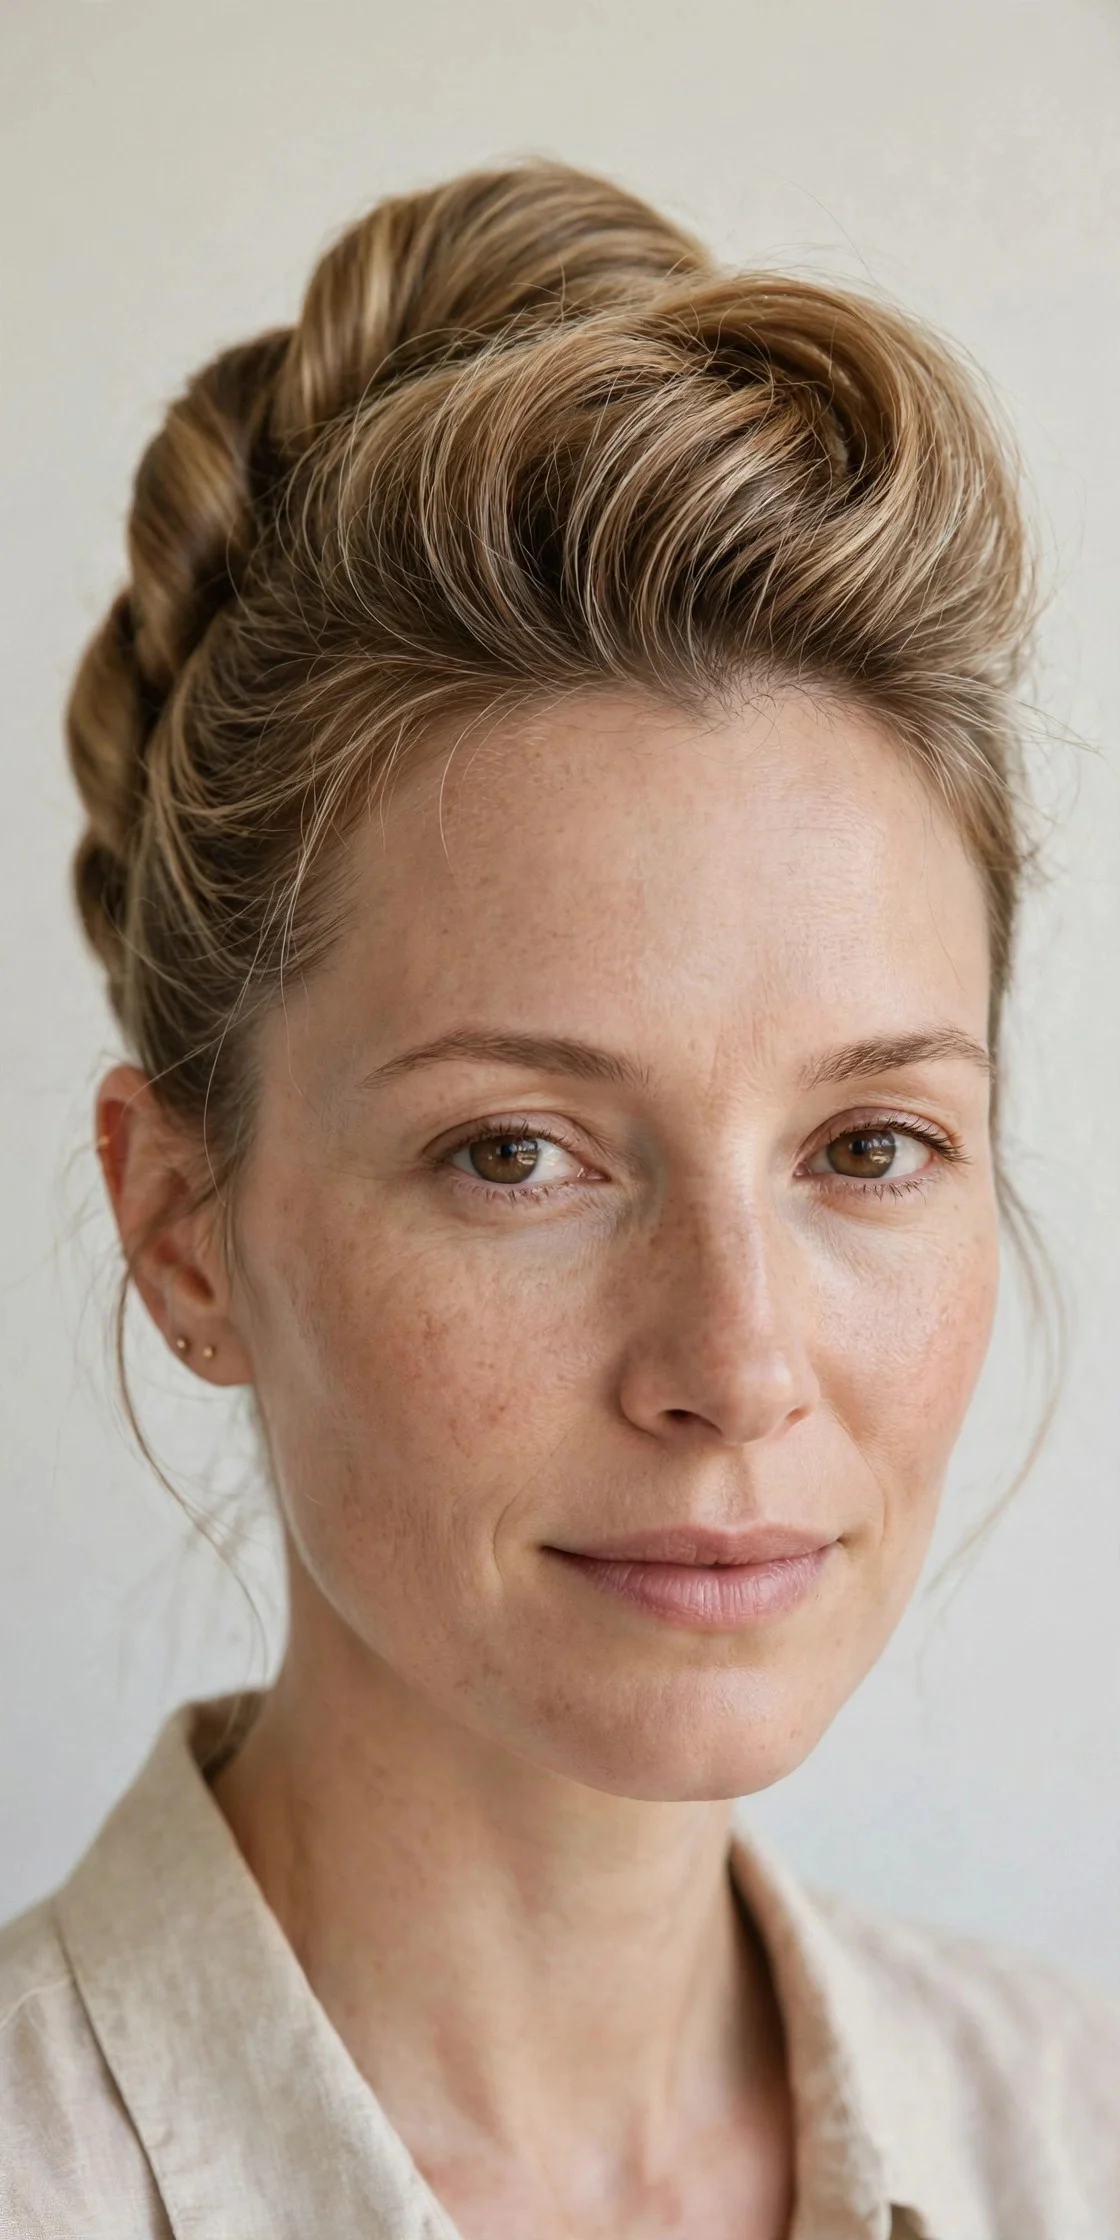
The French twist gets a bad reputation for looking severe, but a looser version is lovely on fine hair. Prep with mousse on damp hair, blow dry with your head flipped upside down for lift, then gather hair to one side and roll it upward, pinning along the fold. Keep the crown slightly puffed and let a few soft pieces fall near the ears.
Ask your stylist to show you the pinning pattern once, since placement matters more than force here. This suits formal events, weddings, and work presentations, especially with earrings. The drawback is the learning curve: your first two or three attempts may feel fiddly, and very short layers near the crown can poke out, so keep a small smoothing brush handy for touch-ups.
4Braided Crown with a Volumized Part
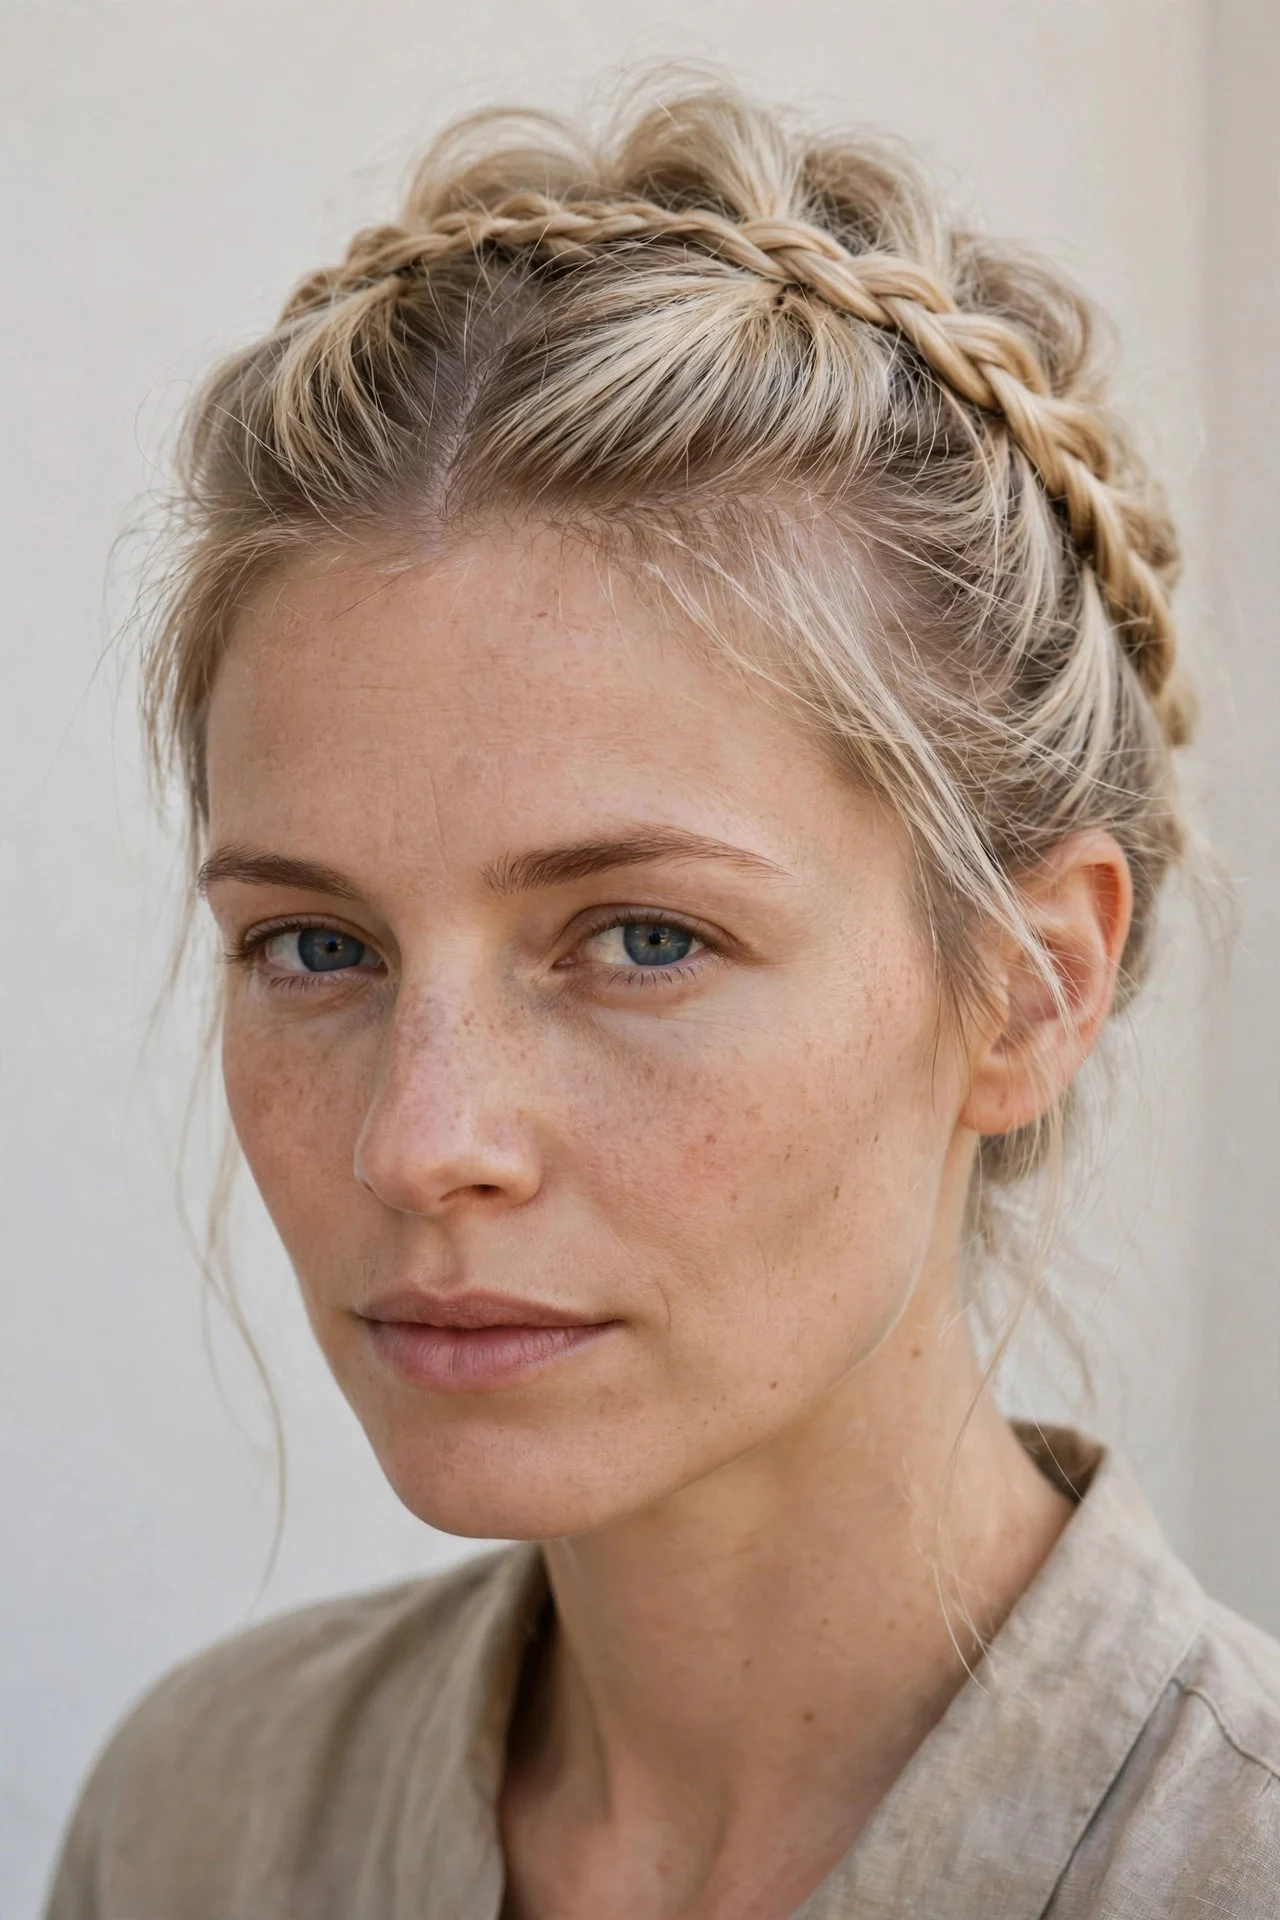
A braided crown adds instant width across the top of the head, which is exactly where fine hair tends to look flat. Part hair in the middle or slightly off center, braid two loose Dutch braids from the front toward the back, then pancake each braid by gently pulling the edges outward. Cross them over the crown and pin securely.
Ask your stylist for face-framing layers long enough to braid, roughly chin length or longer. This suits festivals, garden parties, and summer weddings, and it keeps hair completely off the neck. The drawback is that pancaking takes a gentle hand: pull too hard and the braid unravels, and very silky hair may need texture spray before braiding to stop it sliding apart.
5Half-Up Twisted Knot
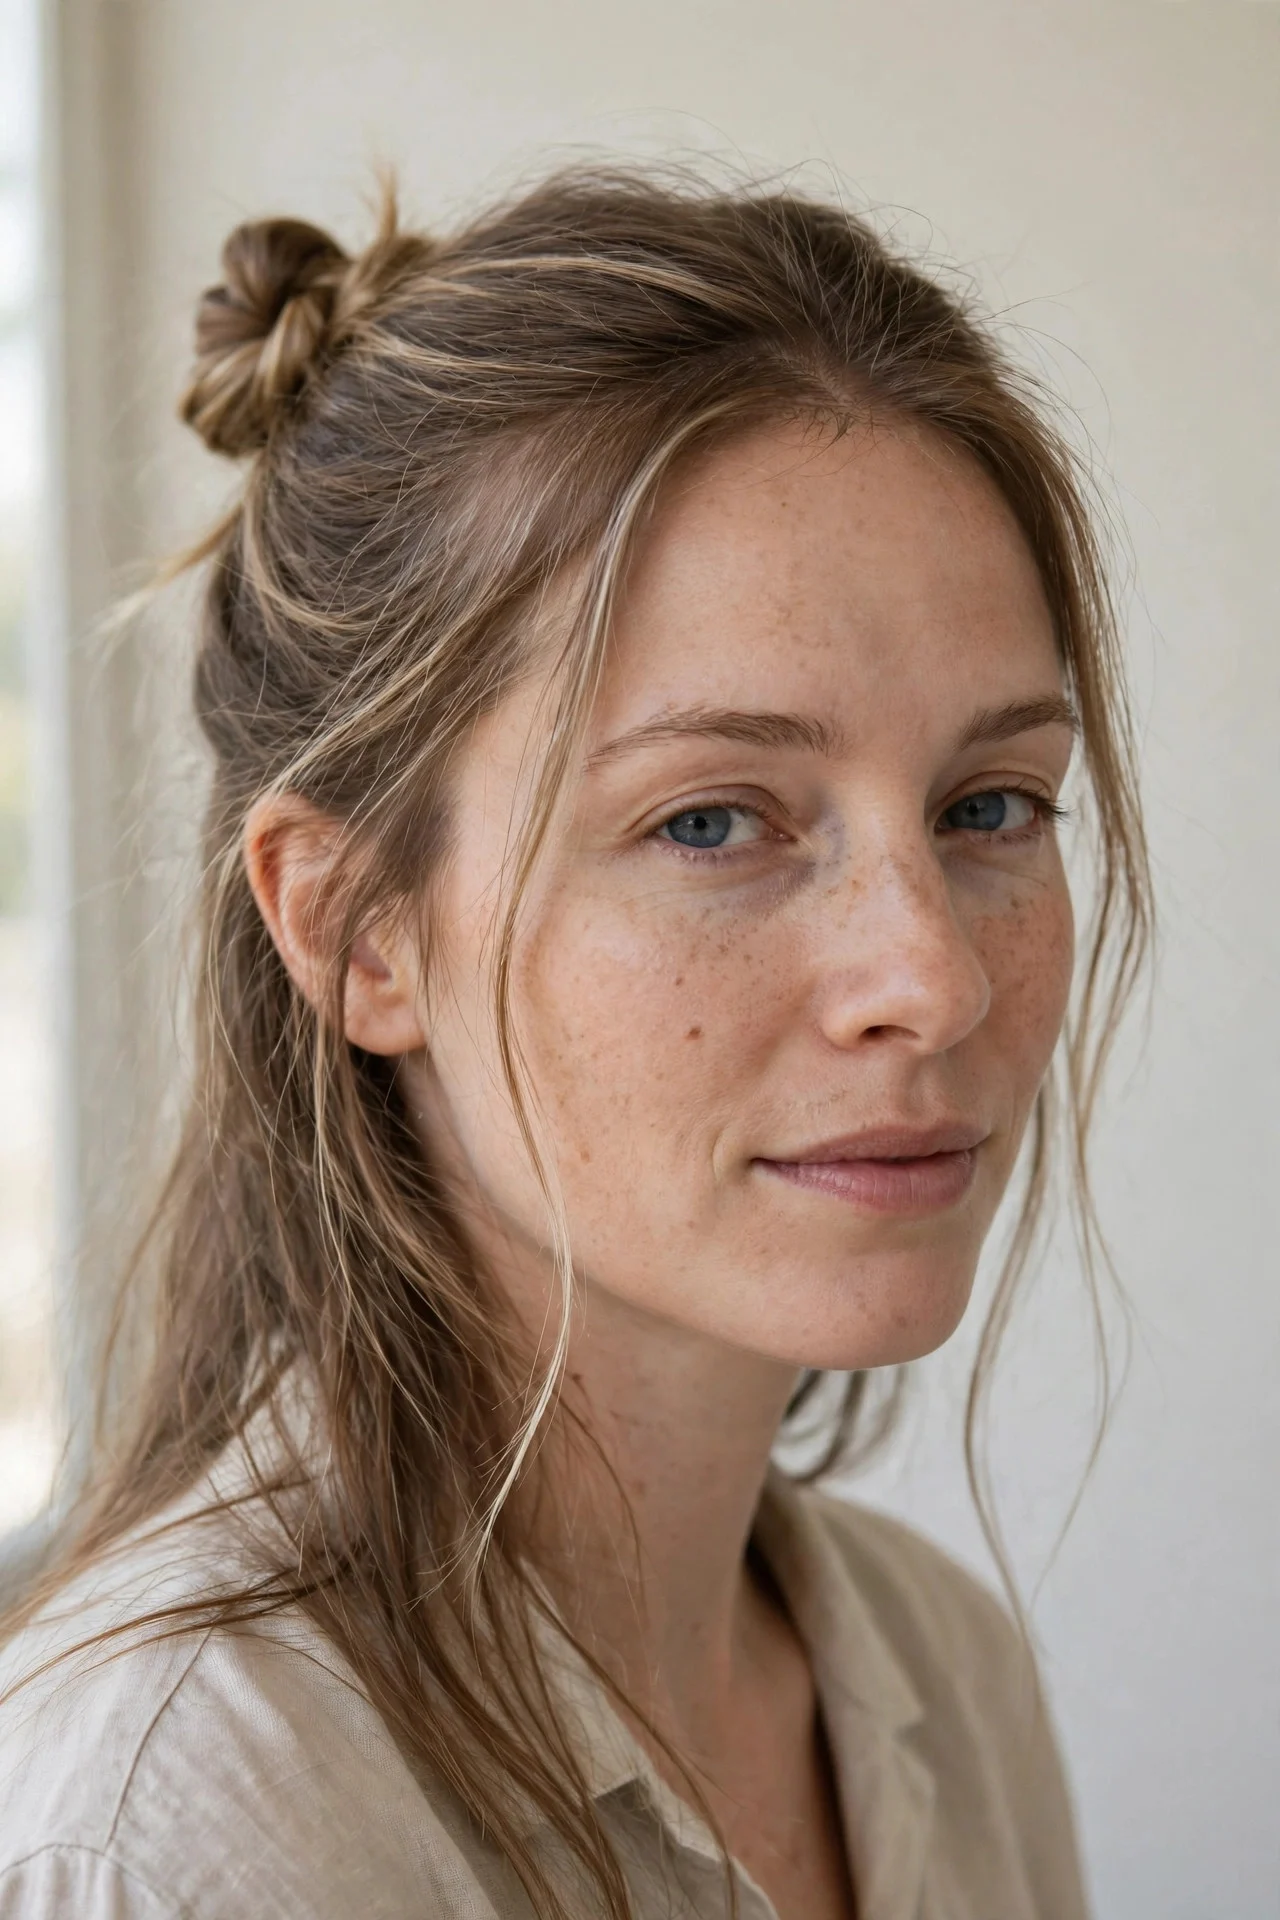
If a full updo feels too much, a half-up twisted knot gives lift without committing every strand. Take the top third of your hair, twist it back from each temple, and knot the two twists together at the back of the head. Pin through the knot, then fluff the crown lightly for height. Leave the rest of the hair down and add loose waves with a large barrel iron.
Ask for long layers through the back so the loose section moves nicely. This suits everyday wear, brunch, and dates, and it flatters most face shapes. The drawback is that the knot can loosen on very smooth hair, so a few crisscrossed pins and a light texture spray are worth the extra minute. It also adds less overall fullness than a full bun.
6Low Chignon with a Deep Side Part
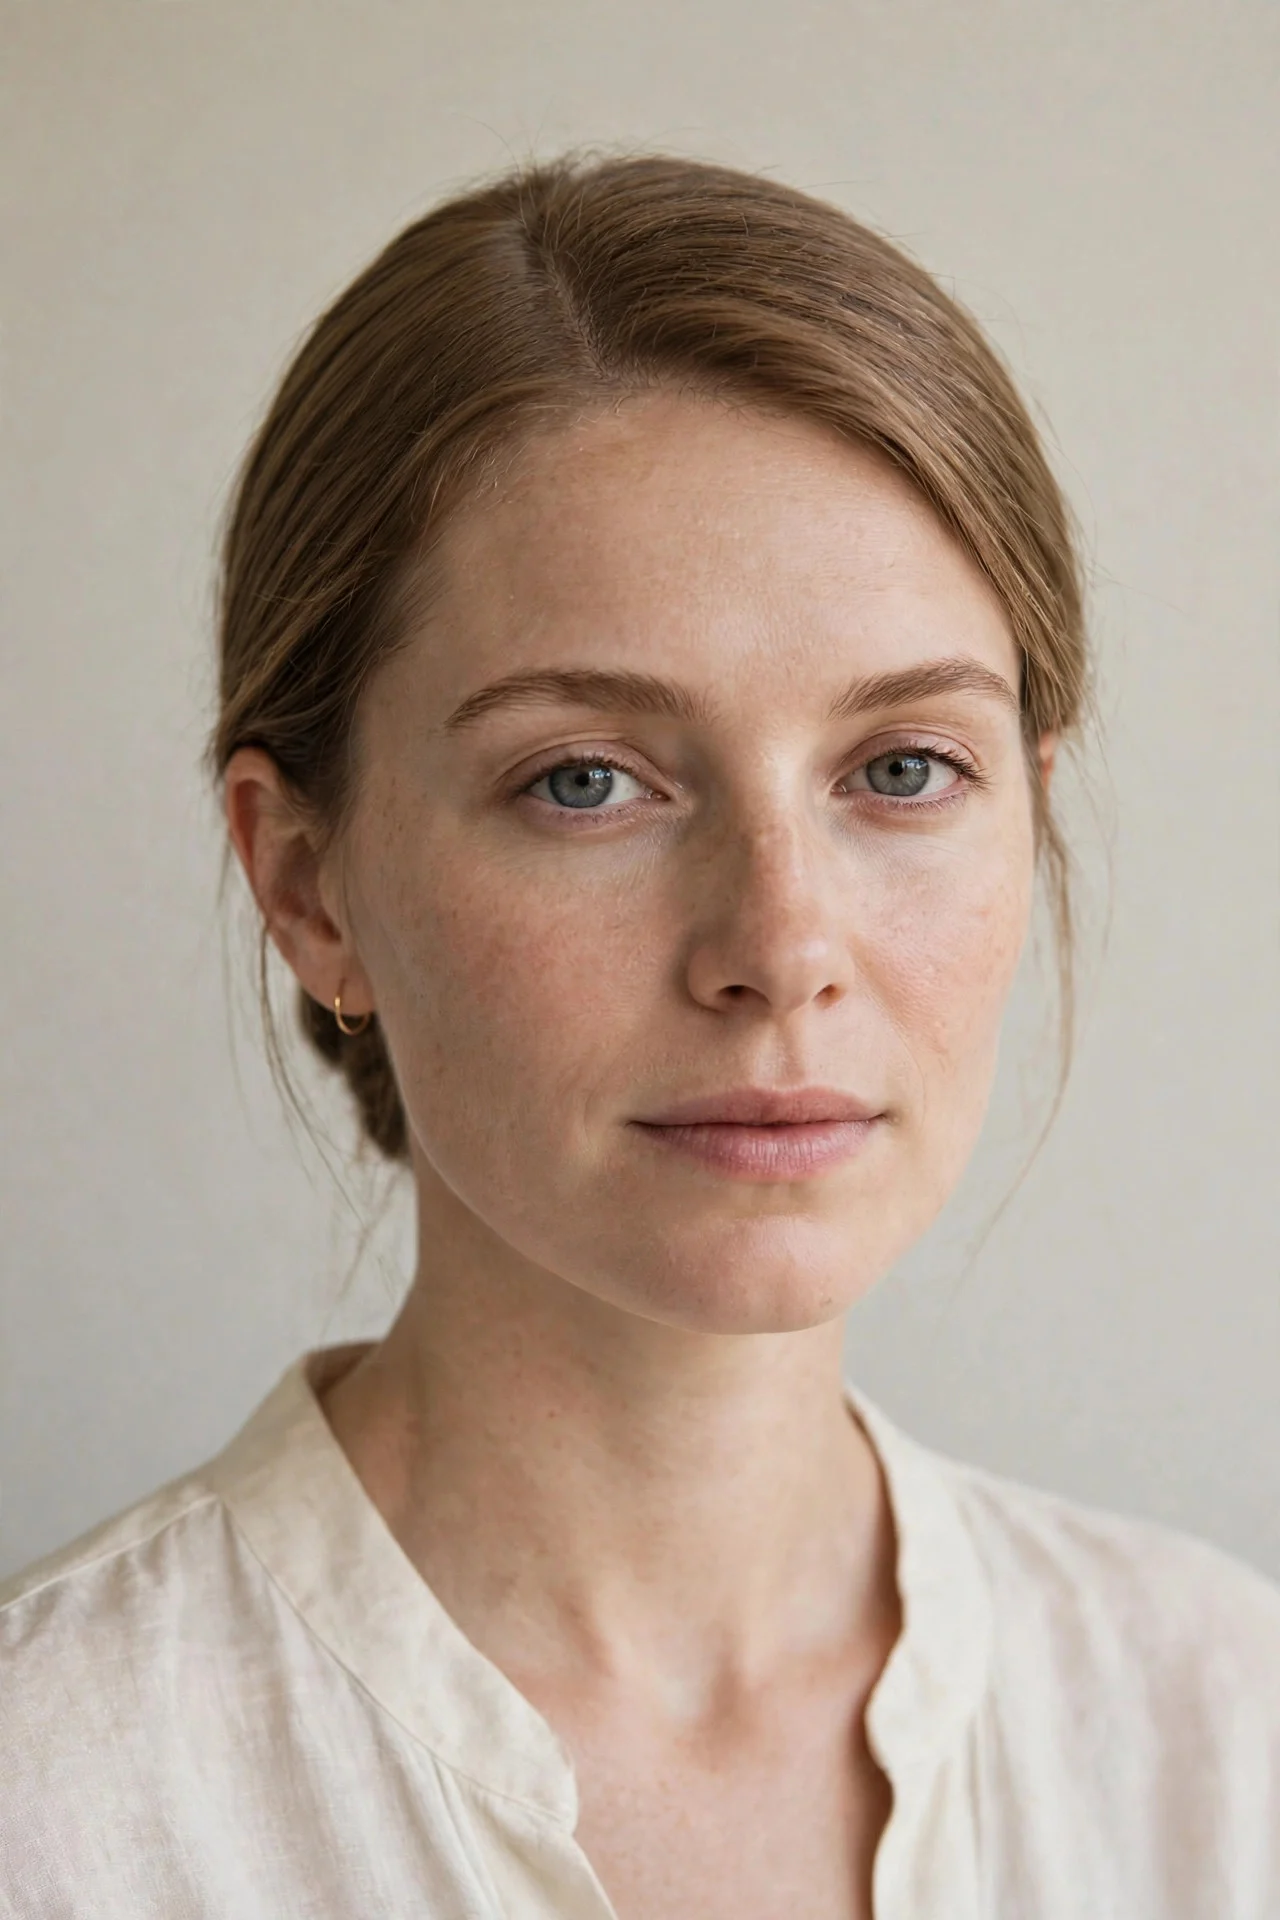
A deep side part instantly creates the illusion of more hair on one side, and a low chignon turns that into an elegant finish. Blow dry with a round brush for root lift, part hair deeply to one side, sweep it low, and twist it into a soft knot at the nape. Pin loosely so the shape stays rounded rather than flat.
Ask your stylist for a side-swept fringe or long front layers to balance the part. This suits weddings, evening events, and anyone who prefers a polished look without stiffness. The drawback is that the side part needs resetting if you run your fingers through it often, and fine hair may need a root-lifting spray to stop the heavy side from collapsing by evening.
7Bubble Ponytail Updo
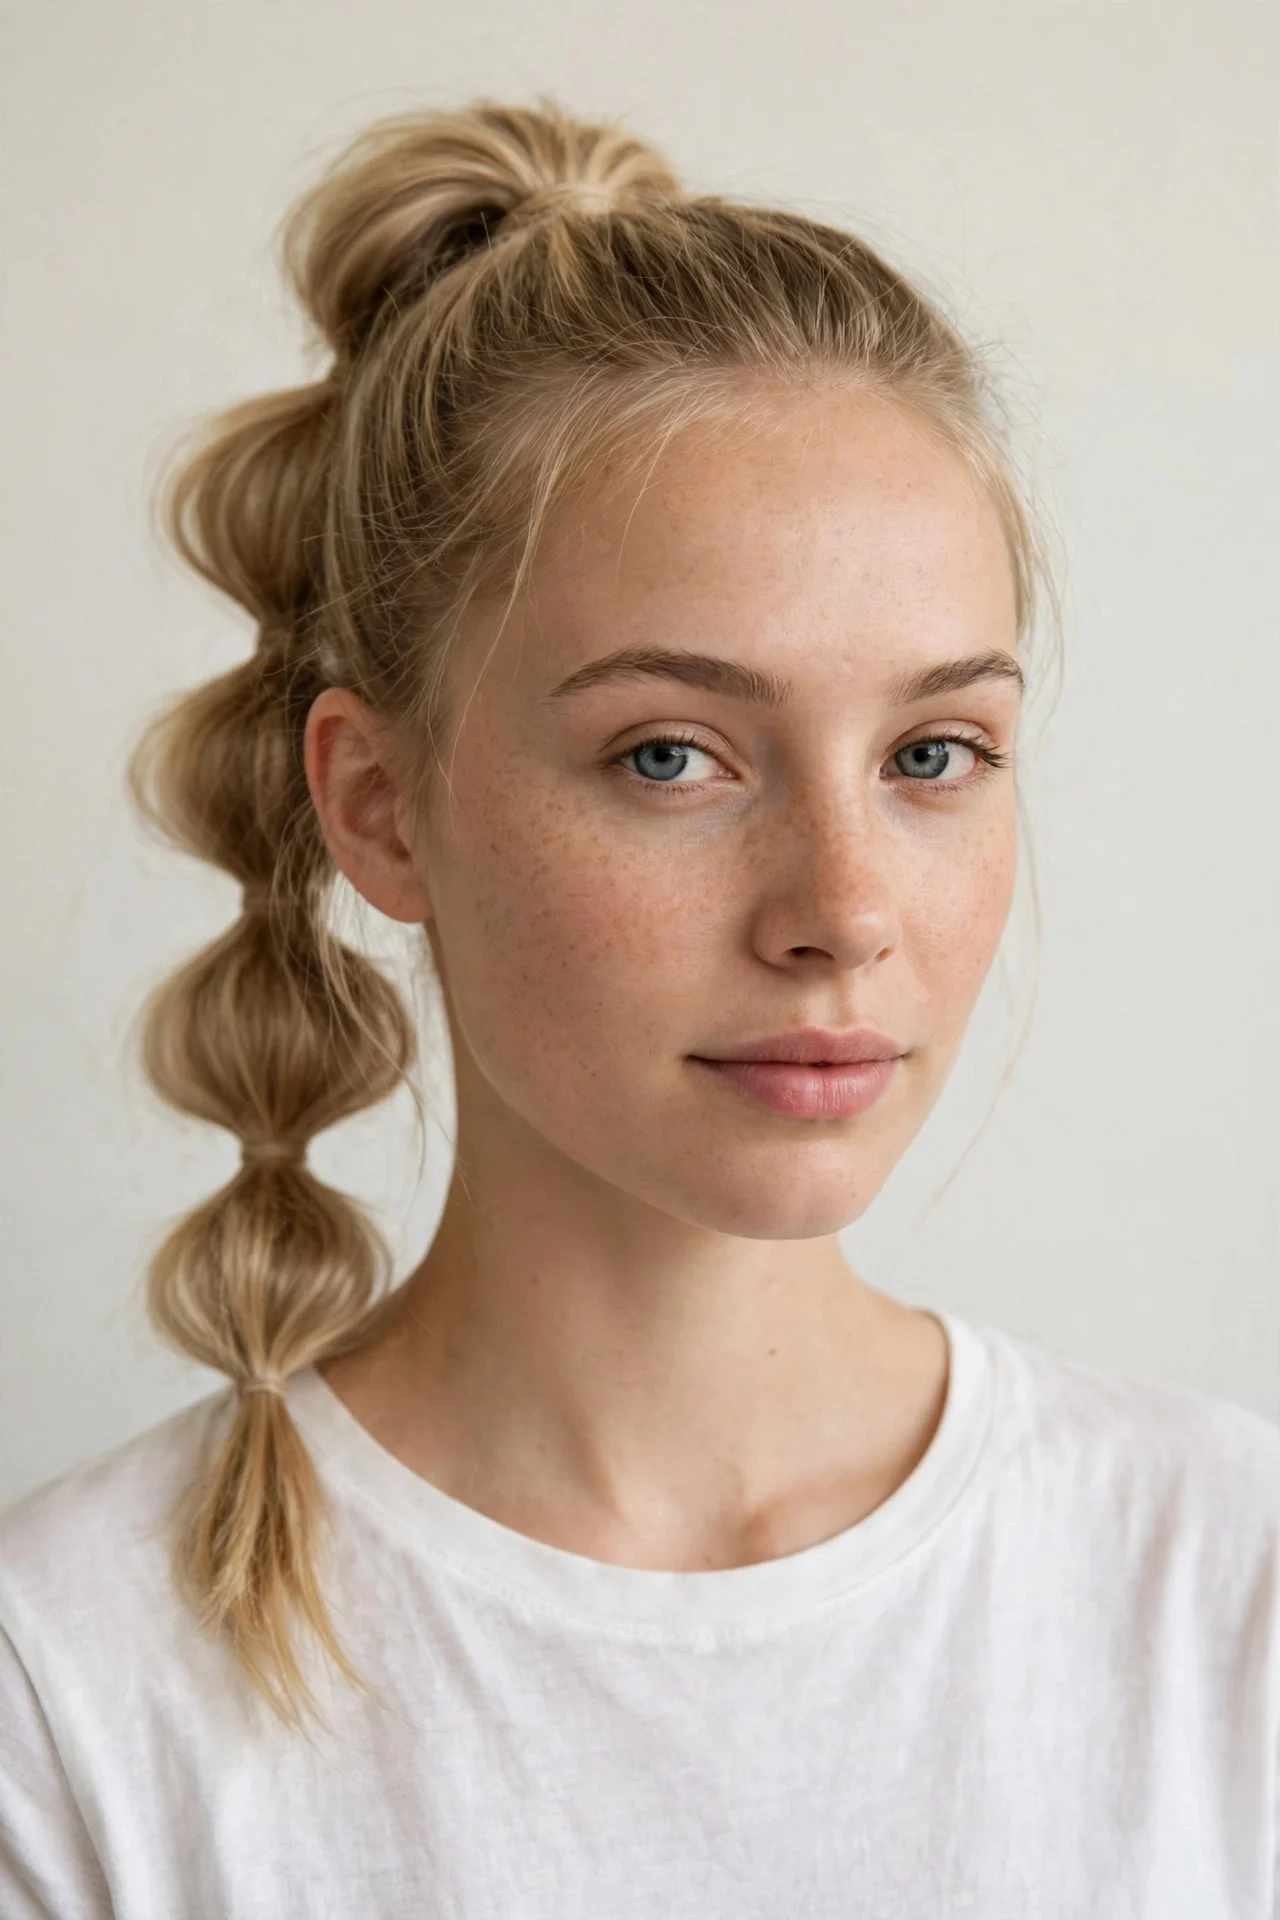
A bubble ponytail turns a basic ponytail into something playful and surprisingly full. Secure a high ponytail, add small elastics every few inches down the length, and gently pull each section outward to create rounded bubbles. For a true updo version, loop the tail up and pin the end under the base so it reads as a sculpted shape.
Ask your stylist about a blunt cut at the ends, which makes each bubble look rounder. This suits casual outings, concerts, and younger or more playful styles, and it works well for medium to long fine hair. The drawback is that the bubbles can deflate if the elastics are too loose, and the style can look uneven if sections are different sizes, so measure roughly with your fingers as you go.
8Rope Twist Updo
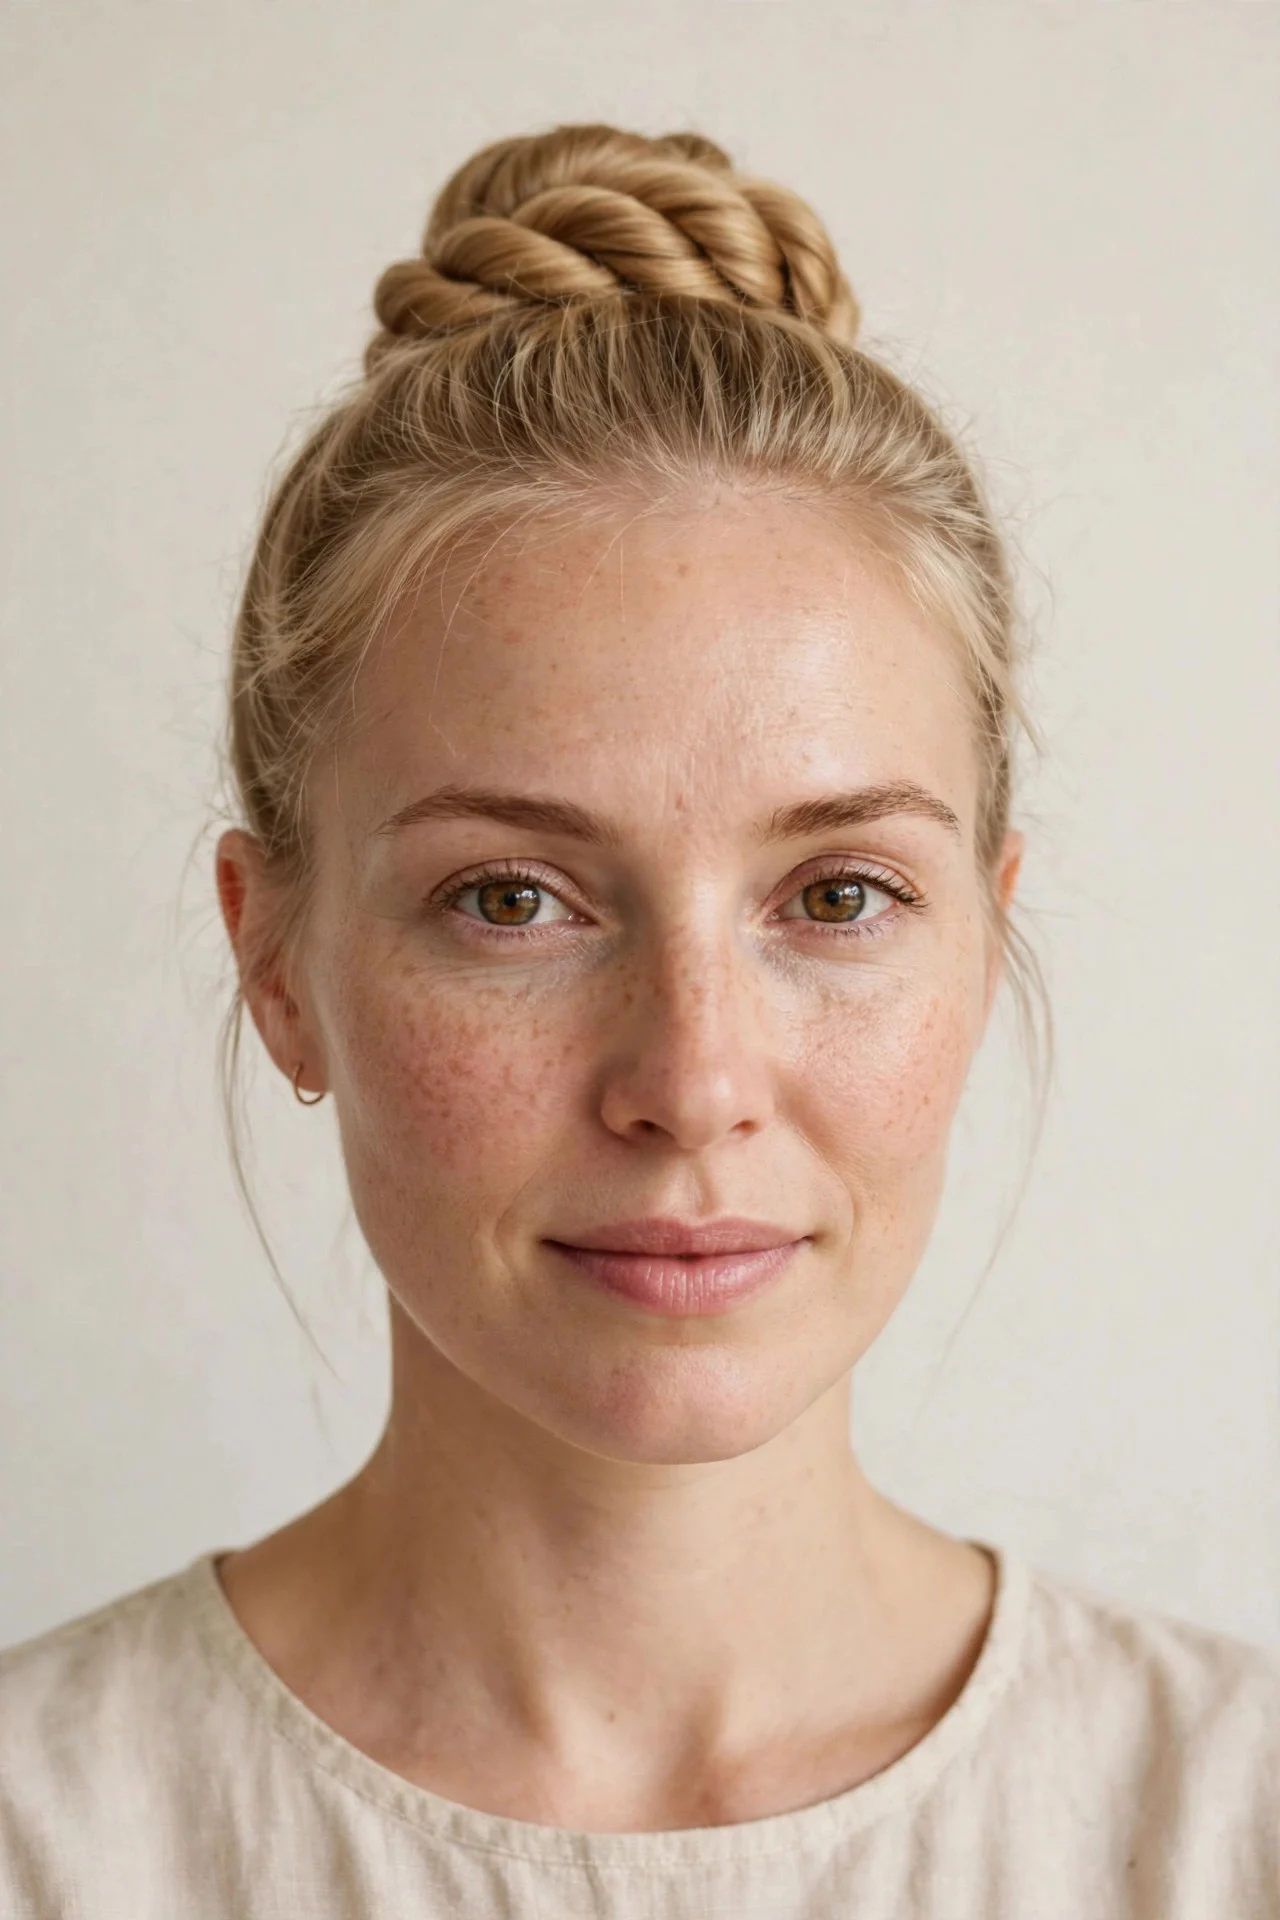
Rope twists grip fine hair better than many braids because the twisting action creates natural friction. Divide hair into two sections, twist each section in the same direction, then wrap them around each other in the opposite direction. Coil the rope into a low bun and pin it well.
Ask your stylist for a cut without too many short layers at the nape, which can escape the twist. This suits hot weather, workouts that need hair fully contained, and low-key elegant days. The drawback is that rope twists can look thin if the sections are too small, so keep sections chunky, and the ends may need a tiny elastic plus a pin to stop them springing loose.
9Vintage Beehive with Soft Waves
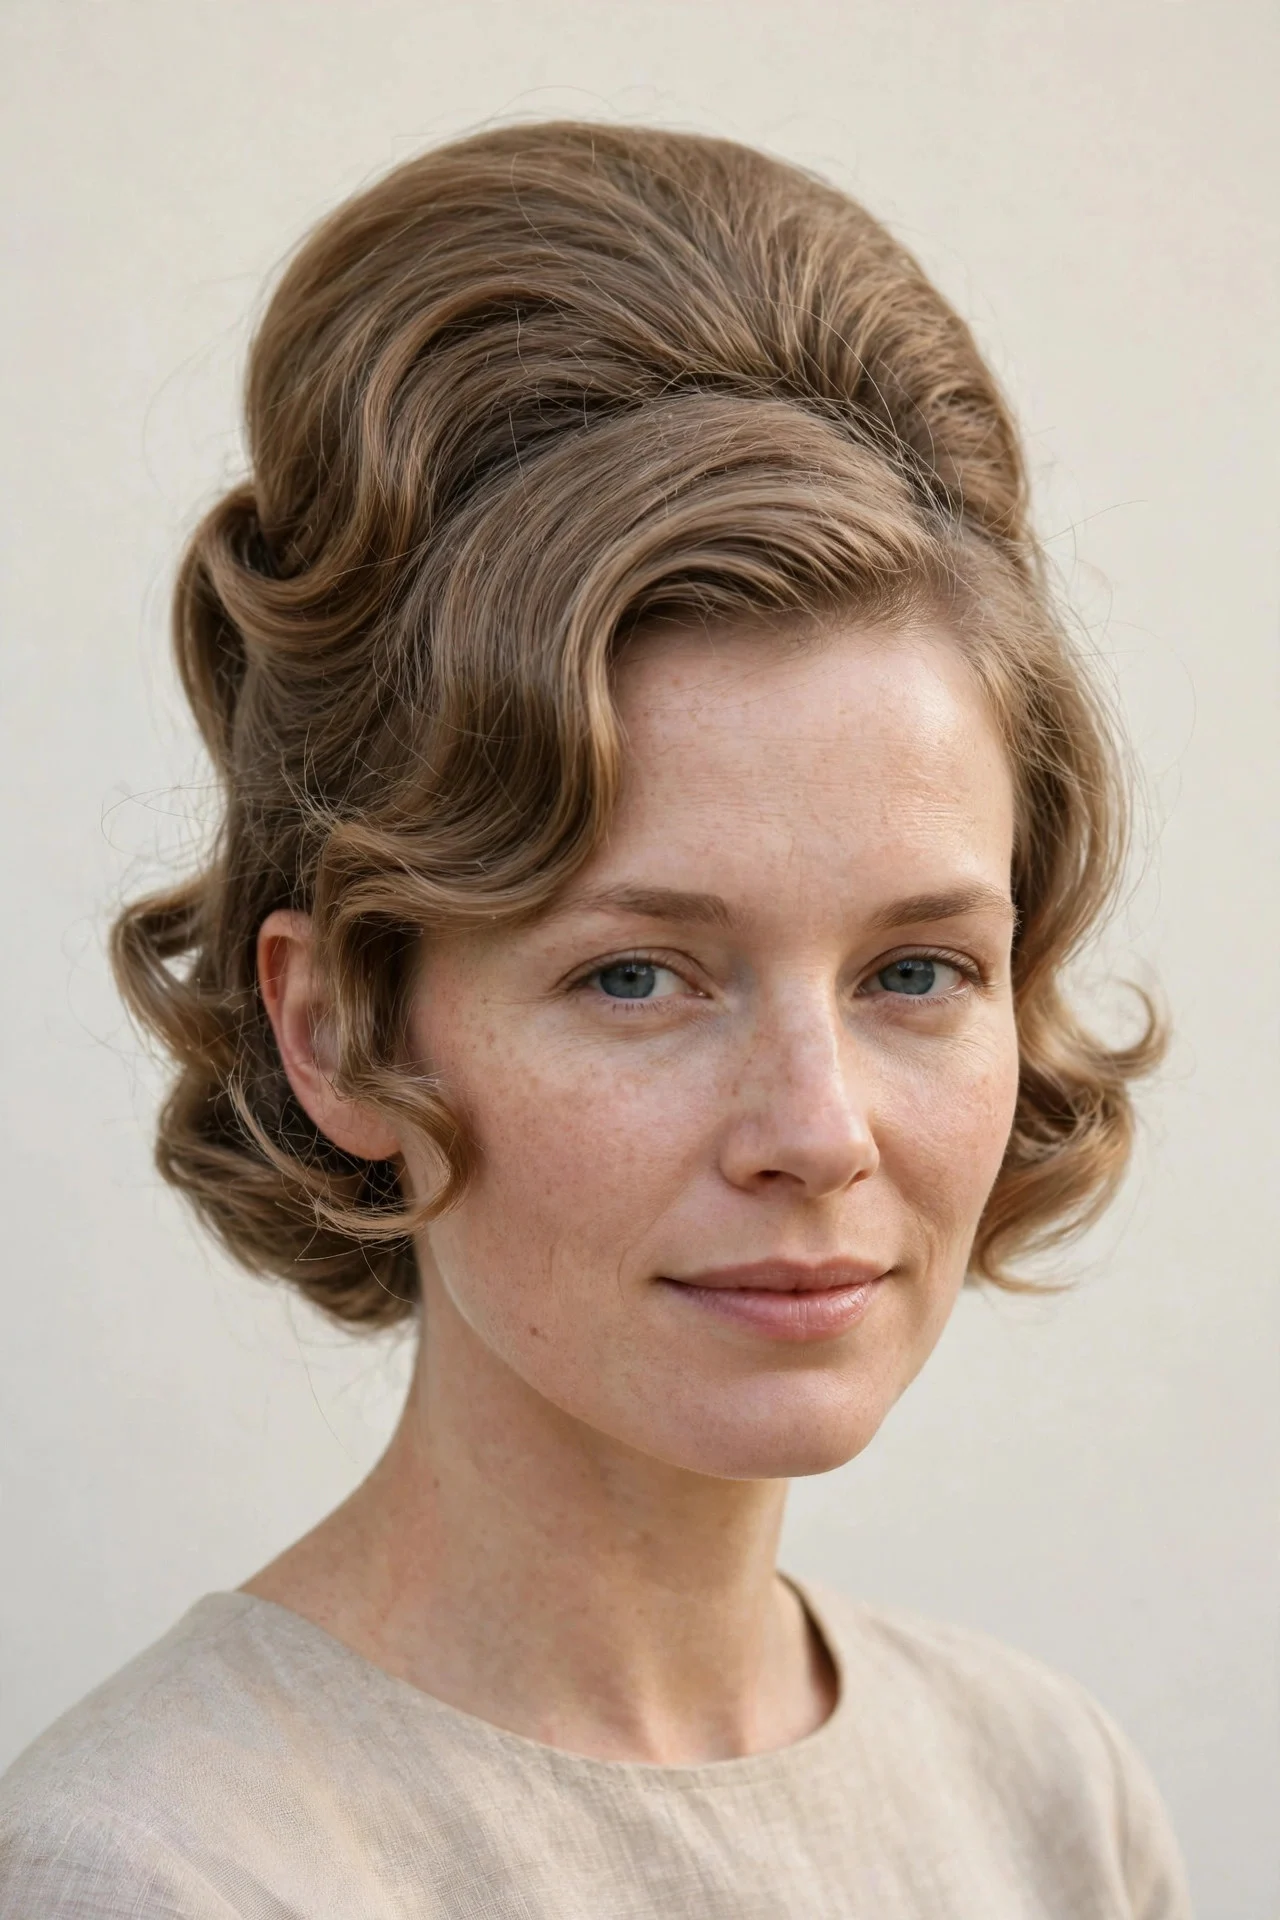
A beehive gives fine hair serious height, and a modern softer version avoids the stiff retro look. Tease the crown in small sections, smooth the outer layer, and shape it into a rounded dome. Pin the sides back, then either leave the remaining length in soft waves or tuck it into a low roll.
Ask your stylist for a cut that keeps enough length at the crown to tease and smooth. This suits themed parties, formal dinners, and anyone who loves a statement silhouette. With strong spray it can last all evening. The drawback is the takedown: teased hair needs gentle brushing and conditioner to detangle, and daily beehives would stress fine strands, so treat this as an occasional style rather than a daily habit.
10Fishtail Braid Bun
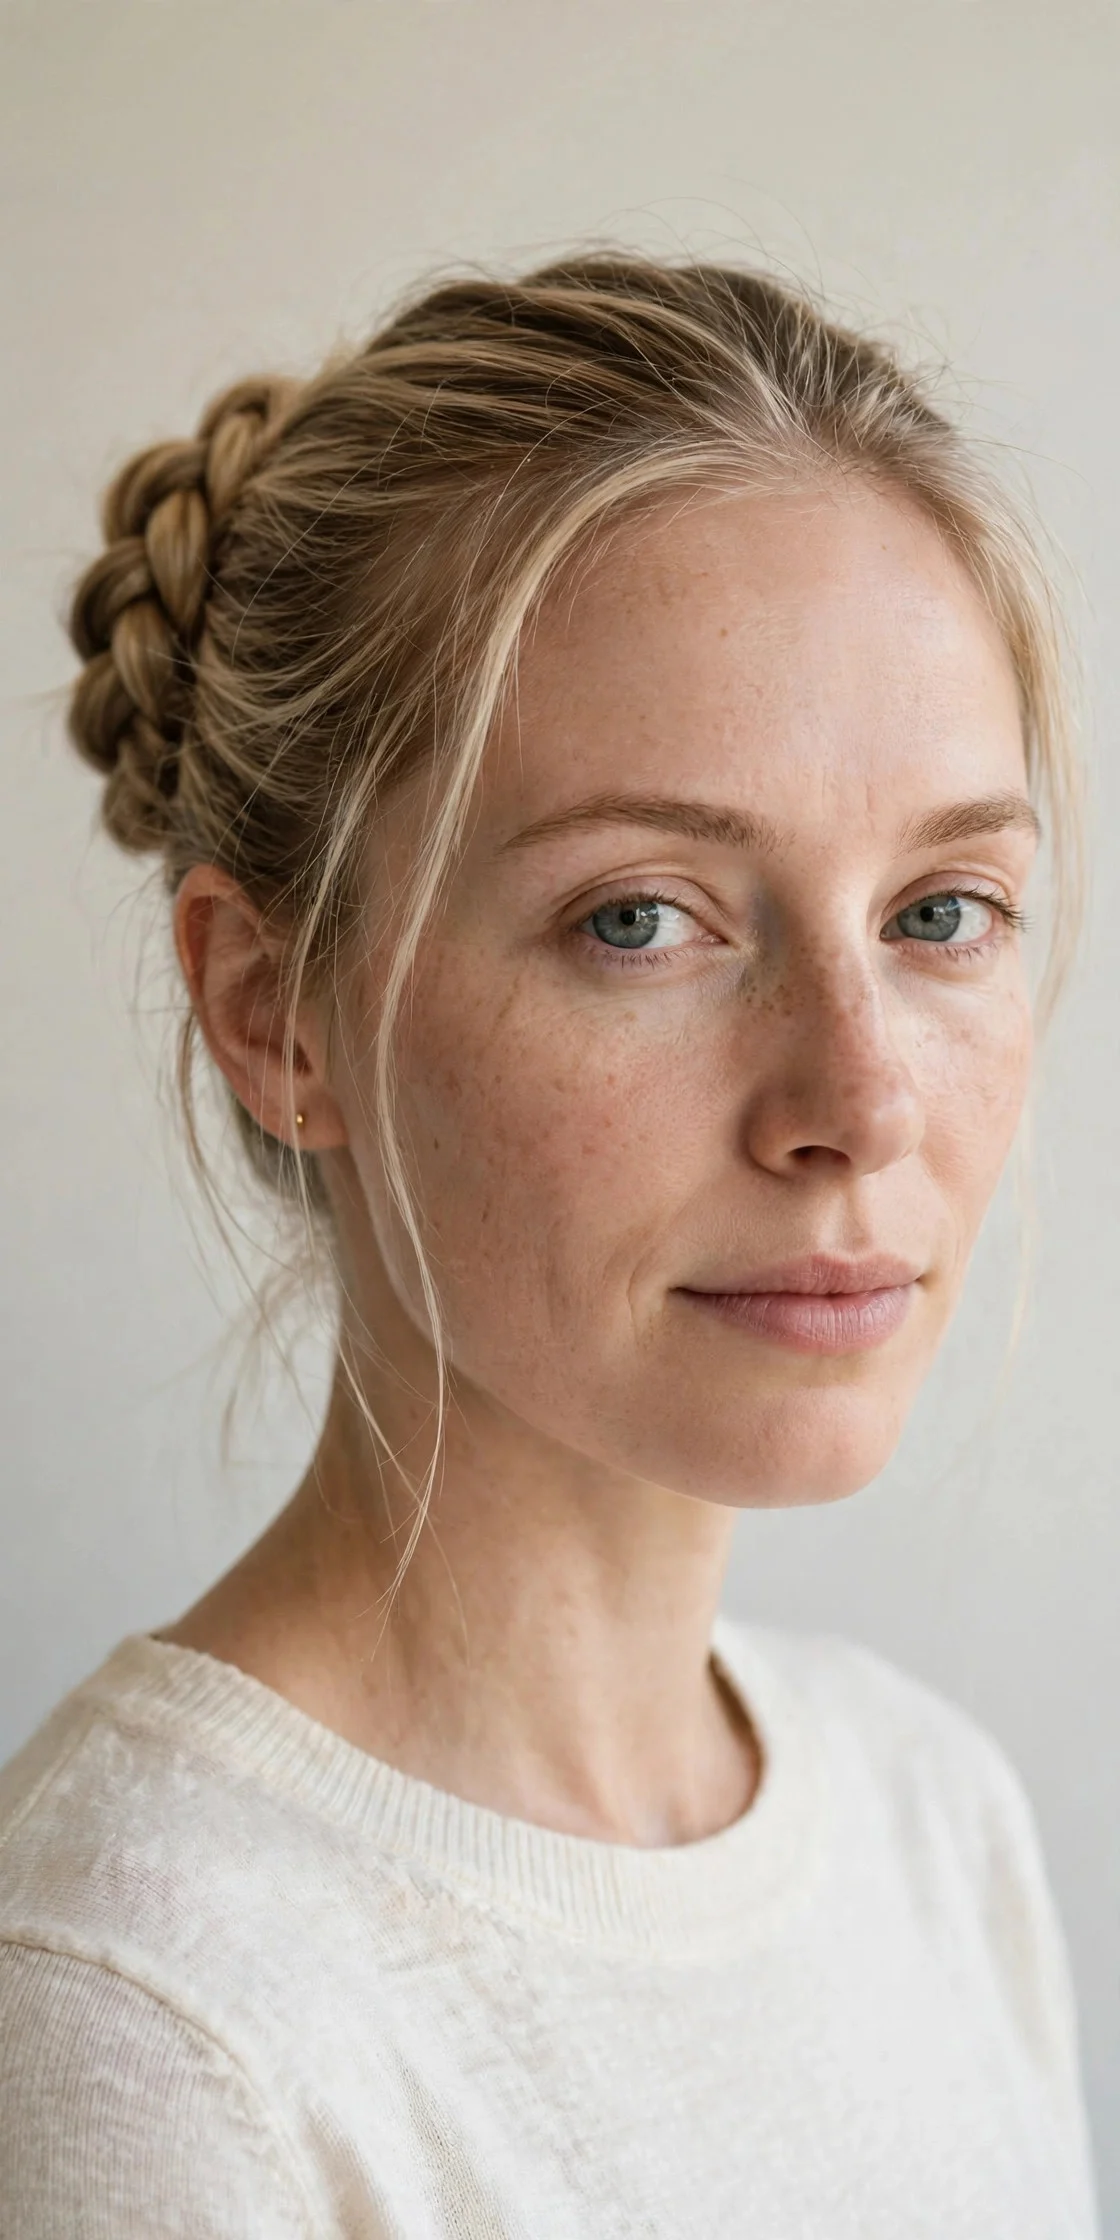
A fishtail braid looks intricate, but it is just two sections crossed in small pieces, and it adds wonderful texture to fine hair. Braid loosely from the nape or from a side ponytail, pancake the braid for width, then wrap it into a bun and pin. The woven pattern catches the light and makes the bun look much denser than a plain twist.
Ask your stylist to keep your ends healthy and blunt, since split ends show more in a fishtail. This suits weddings, holidays, and days when you want something a little different. The drawback is time: a full fishtail can take fifteen to twenty minutes, and very short hair may not have enough length to wrap into a full bun, in which case a side fishtail worn down works better.
11Double Dutch Braids into a Low Bun
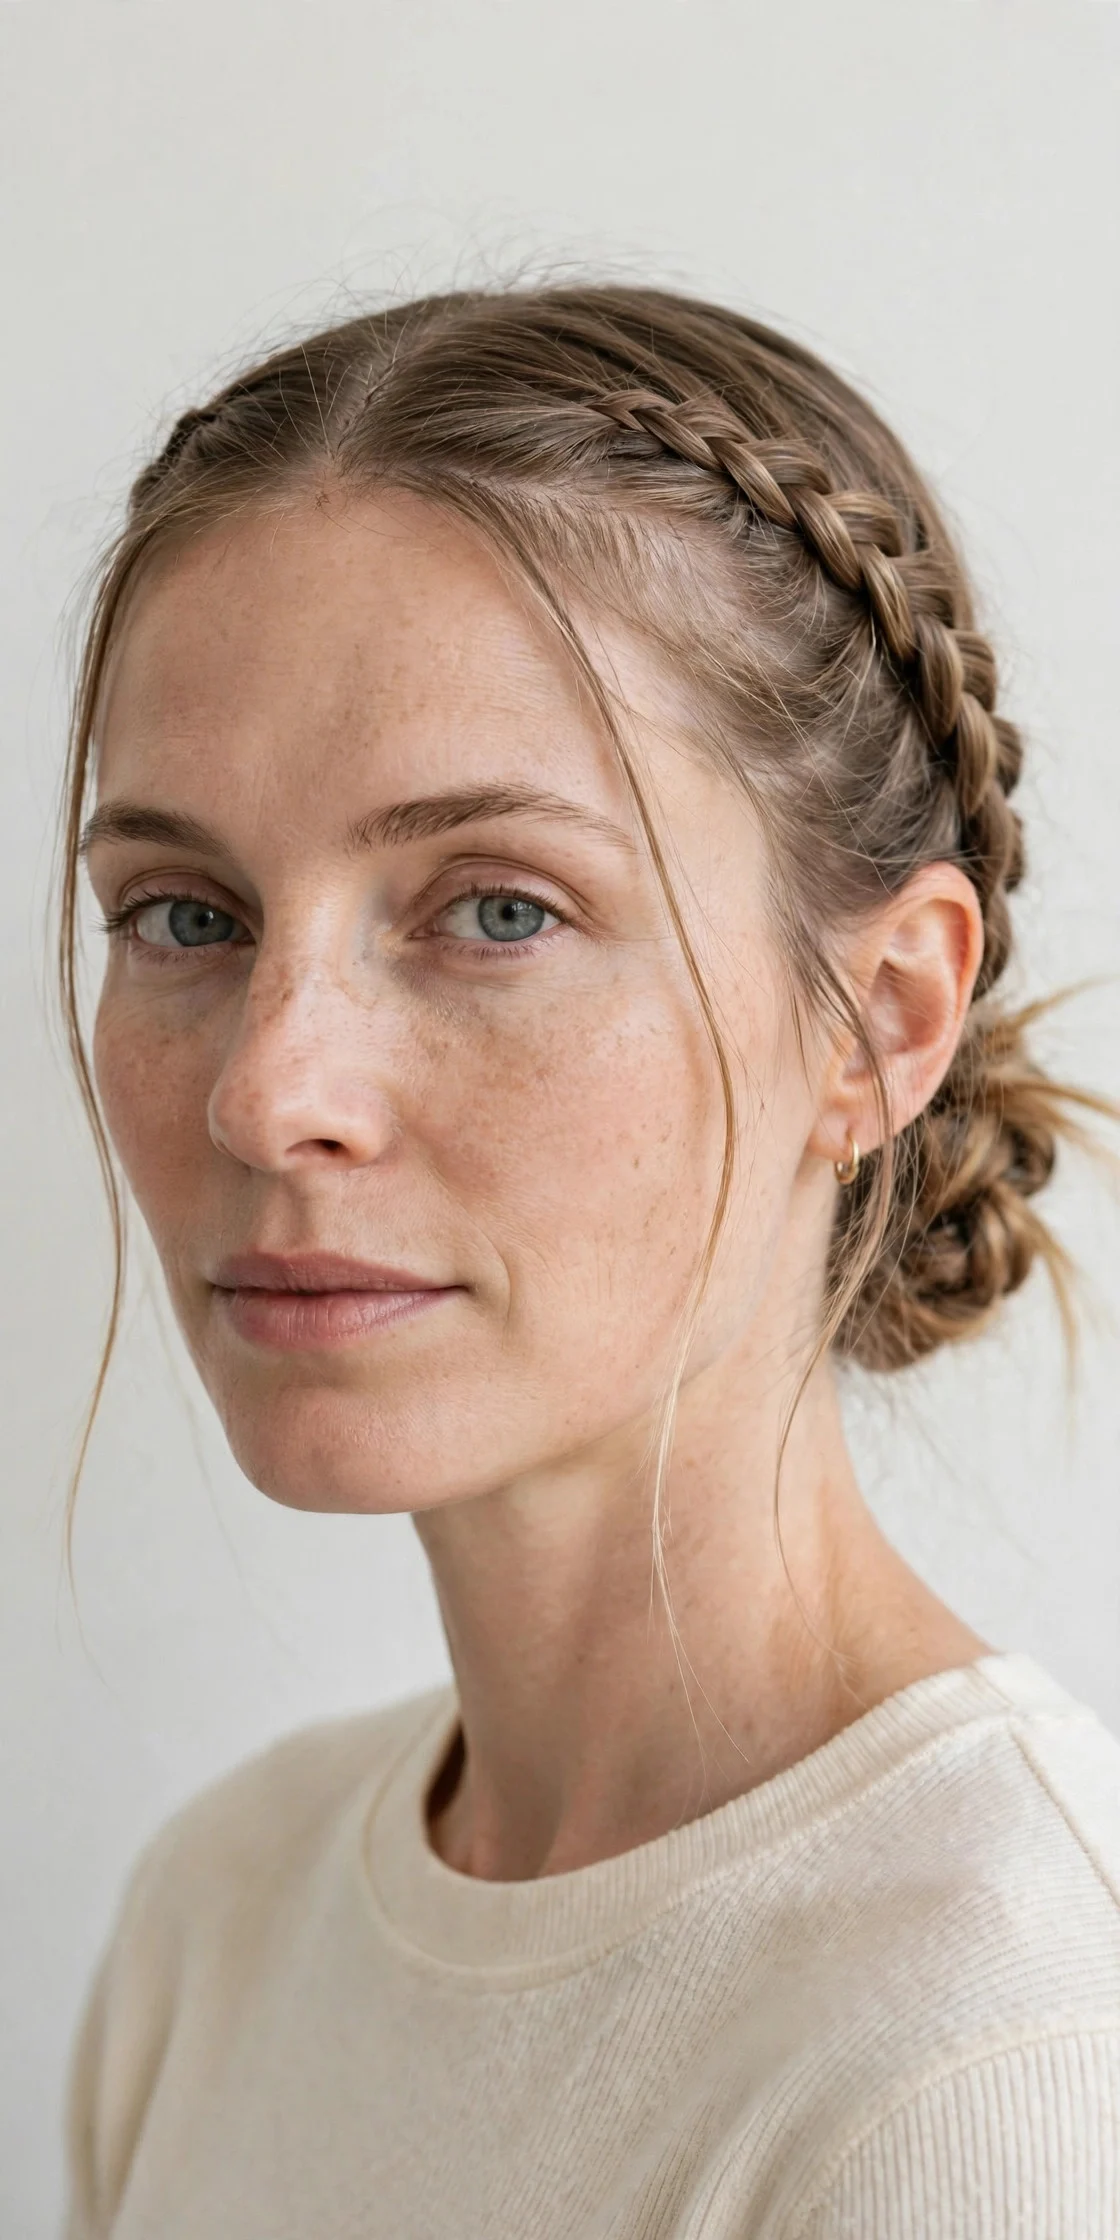
Two Dutch braids feeding into a low bun give structure, grip, and width all at once. Braid from the hairline back on each side, keeping the braids slightly loose and pancaked, then join them at the nape and twist the remaining length into a bun. The braids act like scaffolding that holds everything in place.
Ask your stylist for layers that are long enough to stay inside the braids, and mention if your hairline is fine or sparse so they can adjust the braid tension. This suits active days, festivals, and long events where you cannot fuss with your hair. The drawback is that tight braiding every day can strain the hairline, so keep tension comfortable and give your hair braid-free days in between.
12Sleek Ballerina Bun with Root Lift
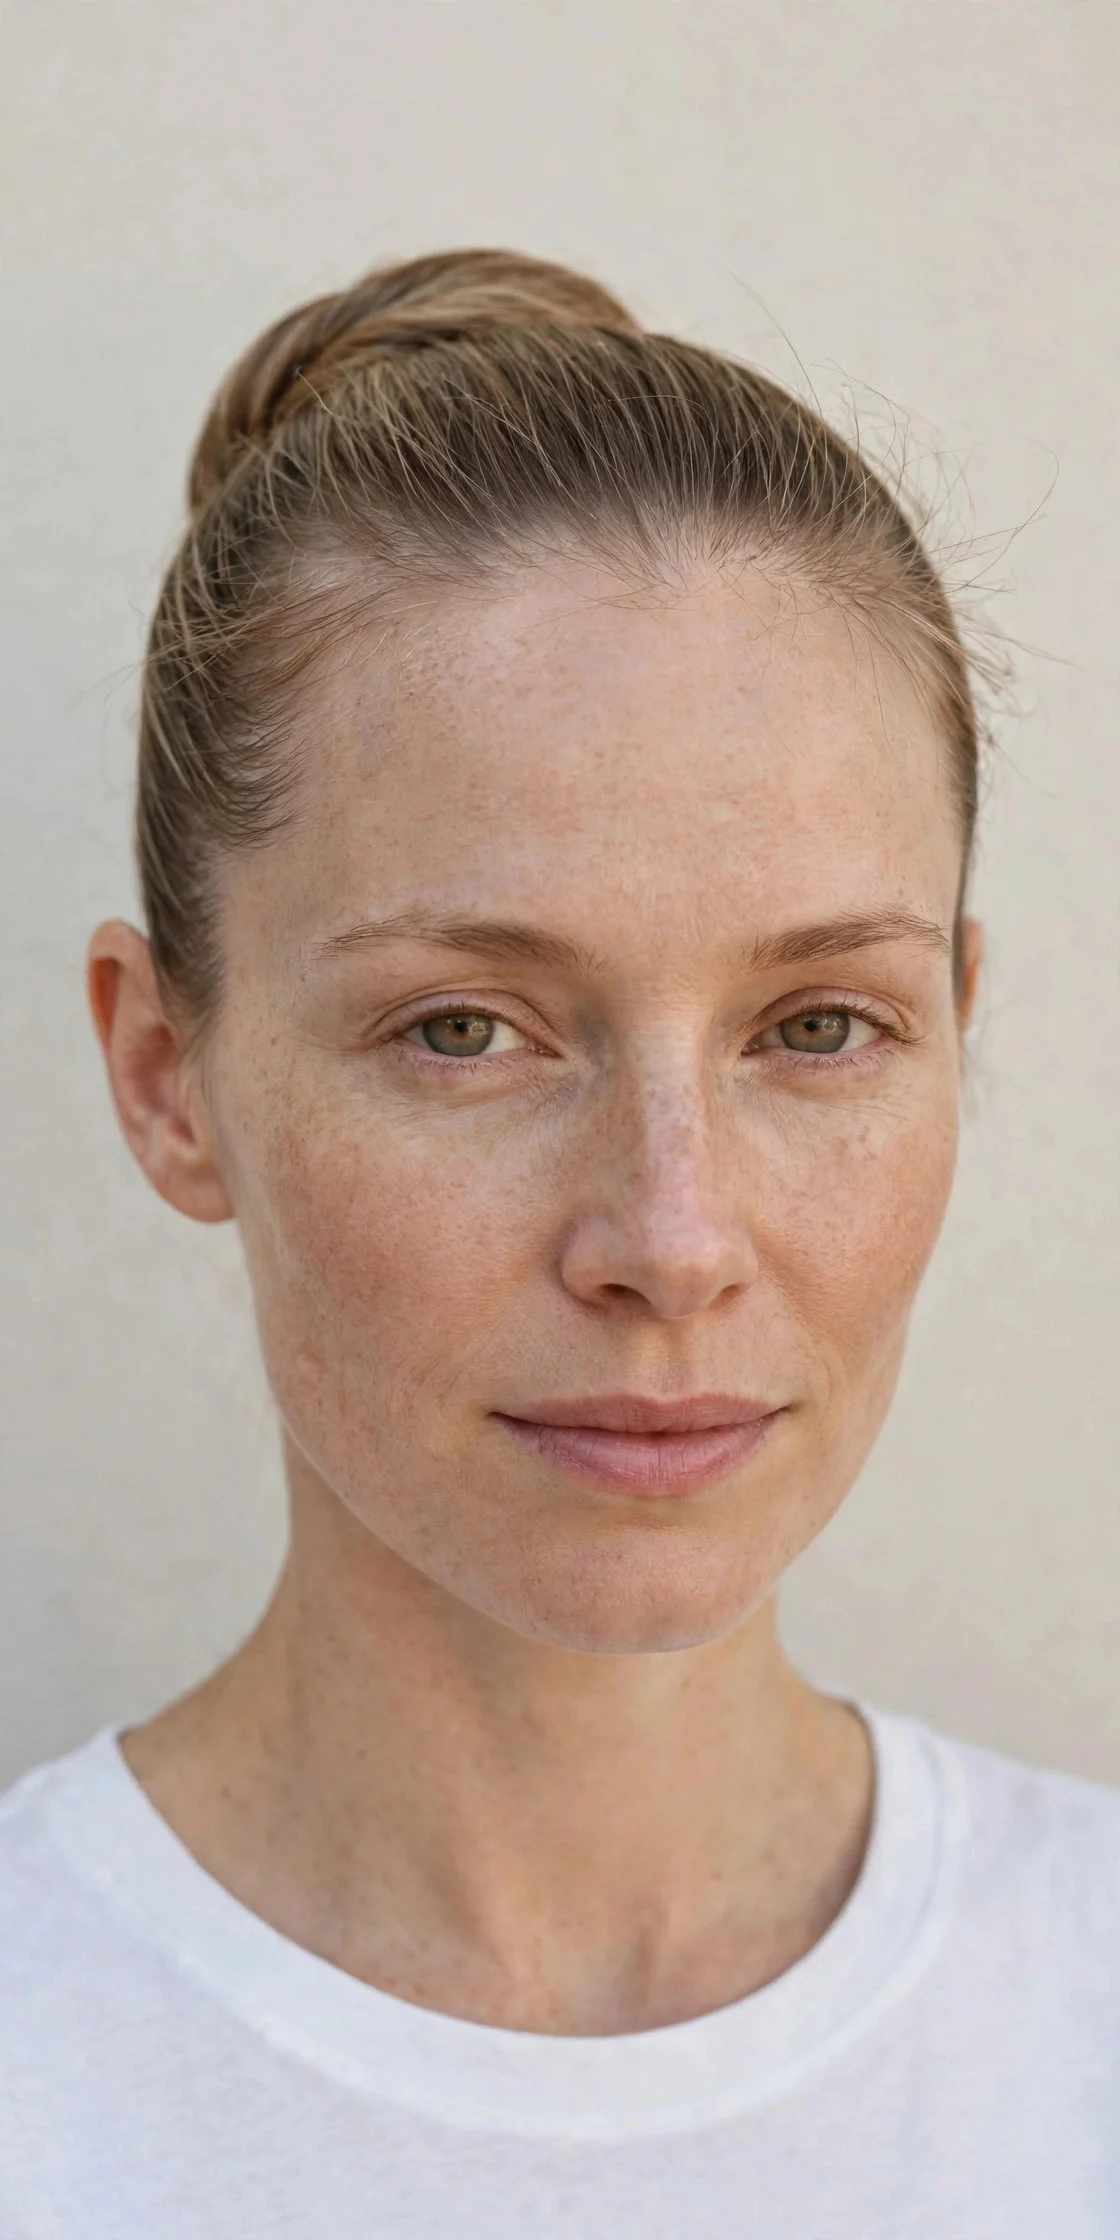
A sleek bun does not have to mean flat. The secret is lift at the roots before smoothing the surface. Apply volumizing mousse, blow dry upward at the crown, then brush hair back into a high or mid ponytail and twist it into a neat bun. Smooth flyaways with a tiny amount of pomade on a toothbrush, but keep the crown slightly raised.
Ask your stylist for a clean perimeter cut, which helps the bun edge look sharp. This suits dance, work, formal events, and days when you want a tidy finish. The drawback is that the sleek surface shows every gap if hair is very thin at the temples, so a little root powder or a soft side sweep at the front can disguise sparse spots without breaking the polished effect.
Hair care and styling tips
Fine hair holds updos better when it has some grip, so second-day hair is often easier than freshly washed hair. If you must style clean hair, use dry shampoo or texture spray at the roots first. Choose lightweight products over heavy oils or thick creams, which flatten fine strands fast. Match your bobby pins to your hair color and insert them with the wavy side facing down for better hold. Protect the ends with regular trims every eight to ten weeks, since thin ends make every updo look smaller. Finally, practice a new updo the day before an event, not the morning of it, so you know exactly how many pins and how much spray you need.
How do I make an updo stay in thin fine hair?
Start with texture, not clean slippery hair. Use dry shampoo, texture spray, or light mousse, and pin in a crisscross pattern so pins lock against each other. Finish with flexible hairspray, then strong-hold spray only on the outer layer.
Which updo adds the most volume to fine hair?
A padded top knot or a beehive adds the most visible height, while a pancaked braided crown adds the most width. For everyday volume, a textured low bun with a teased crown is the most reliable. Choose height for short necks and width for longer faces, and always tease underneath rather than on the surface.
Can I do updos if my hair is short and fine?
Yes, if your hair reaches at least chin to shoulder length. Half-up styles, small braided crowns, and mini buns work well. Use small elastics, mini pins, and texture spray for grip. If layers are very short, a half-up twist is usually easier than a full bun, and clip-in extensions can add length for a special occasion.
How do I stop fine hair from slipping out of pins?
Use pins that match your hair color and thickness, and push them in against the direction of the hair so they grip. Crisscross two pins at key points, especially at the nape and temples. A light mist of hairspray on the pins before inserting them also helps. Avoid overloading one pin with too much hair.
Do updos damage thin fine hair?
Occasional updos with gentle tension are fine, but daily tight styles, heavy teasing, and rough brushing can cause breakage. Vary your styles, keep tension comfortable, and detangle teased sections gently with conditioner.
Keep exploring
If you liked these updos for thin fine hair, check out chin-length bob for fine hair, ballerina bun tutorials, twisted updos for medium hair for more ideas.