
I have a box of old family photos from the 90s, and every single one features my mom with the same incredible, voluminous, perfectly rounded blowout. As a kid, I thought it just looked dated. As an adult who has spent the last several months trying to recreate that exact look, I now understand it was actually a masterclass in hair styling that took serious skill to pull off.
What I didn’t want, though, was the other thing that came along with a lot of 90s hair — the frizz. Big hair and frizzy hair often got lumped together back then, partly because the products and tools available weren’t what we have now. I wanted the volume, the bounce, the iconic rounded silhouette, without my hair looking like static electricity got involved.
After months of trial and error, multiple ruined blowouts, and finally getting it right, I want to share exactly how to bring back this incredible look the smart way.
What Made the 90s Blowout So Iconic
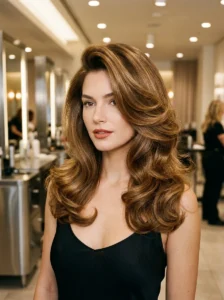
Before getting into the how-to, it’s worth understanding what specifically defined this look, because not every big, voluminous style from that era counts as a true 90s blowout.
The defining characteristics were significant volume concentrated at the crown and through the mid-lengths, a smooth, rounded shape rather than loose waves or curls, and ends that curved inward or outward in a controlled, uniform way rather than flying out randomly. Think of the iconic supermodel blowouts of the era — full, bouncy, and undeniably polished despite the size.
The frizz that often accompanied this look back then usually came from a combination of factors: less advanced heat protectant products, hot tools that didn’t have the temperature control modern tools offer, and a general lack of understanding about how humidity and hair porosity affect frizz. None of those limitations exist anymore, which is exactly why this look can come back better than ever.
The Tools That Make the Difference
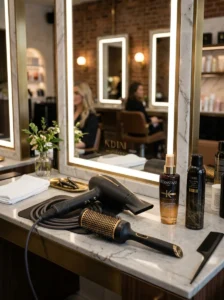
Getting a frizz-free version of this iconic style starts with having the right equipment, and a few specific tools matter more than others.
A large round brush, ideally ceramic or boar bristle. The size of your round brush directly determines how much volume and curve you can create. For a true 90s blowout silhouette, you want something on the larger side, at least two to three inches in diameter.
A blow dryer with a concentrator nozzle and multiple heat settings. The concentrator nozzle directs airflow precisely, which helps smooth the hair cuticle as you dry, reducing frizz significantly compared to dispersed airflow.
A high-quality heat protectant. This is non-negotiable. A good heat protectant doesn’t just prevent damage, it also helps create a smoother hair shaft that resists frizz far better than unprotected hair.
A smoothing serum or oil, used sparingly. A small amount of a lightweight, smoothing product helps seal the hair cuticle after styling, locking in shine and reducing frizz throughout the day.
Step-by-Step: The Frizz-Free 90s Blowout
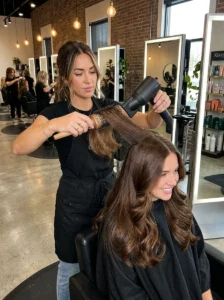
Here’s the exact process I’ve refined over months of practice, broken down clearly.
Step 1: Start With the Right Products on Wet Hair
After washing, apply a lightweight heat protectant evenly through damp hair, focusing on mid-lengths and ends while keeping product away from the very roots to avoid weighing down volume. Follow with a small amount of smoothing serum, again avoiding the roots.
Step 2: Rough-Dry Before Sectioning
Rather than immediately sectioning your hair for the round brush, spend a few minutes rough-drying with your fingers until your hair is about seventy percent dry. This step alone makes a significant difference in frizz prevention, since fully wet hair is more prone to frizzing during the detailed blow-dry process.
Step 3: Section Strategically
Divide your hair into four to six sections depending on thickness, clipping each section out of the way except the one you’re currently working on. Working in smaller, manageable sections allows for more control and a smoother result than trying to blow-dry large sections at once.
Step 4: Use the Round Brush With Tension and Direction
Starting at the roots of each section, wrap the hair around the round brush with firm tension, following the brush with the dryer’s concentrator nozzle pointed downward along the hair shaft. This downward direction is critical for smoothing the cuticle and minimizing frizz. Roll the ends under or over depending on your desired finish, holding the shape briefly before releasing.
Step 5: Cool-Shot Each Section
After styling each section with the round brush, use your dryer’s cool shot button (or switch to the coolest setting) for a few seconds while still holding the section in place. This step sets the shape and significantly improves how long the volume and smoothness will last throughout the day.
Step 6: Brush Through Gently Once Cool
Once your entire head is dry and cooled, use a boar bristle brush or paddle brush to gently brush through all the sections together, blending them into one cohesive, rounded shape rather than leaving visible sections.
Step 7: Finish With a Light Hold Spray
A light, flexible-hold hairspray locks in the shape without creating stiffness, and a tiny amount of additional shine serum on just the surface layer adds the glossy finish that distinguishes a polished 90s blowout from one that looks merely big.
Common Mistakes That Lead to Frizz
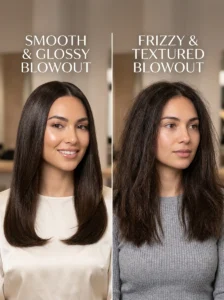
Through my own trial and error, here’s what I learned causes frizz specifically when attempting this style.
Skipping the rough-dry step. Going straight from soaking wet hair to detailed round-brush styling is one of the most common causes of frizz in a blowout, regardless of the era you’re going for.
Using too high a heat setting. It’s tempting to crank up the heat for faster results, but excessive heat damages the hair cuticle, which directly leads to more frizz both immediately and over time.
Not using a concentrator nozzle. Dispersed airflow from a blow dryer without a concentrator can ruffle the hair cuticle in multiple directions, creating exactly the kind of frizz this whole process is designed to avoid.
Touching your hair too much once it’s dry and styled. Repeatedly running your fingers through a finished blowout disrupts the smooth cuticle alignment you worked to create and can introduce frizz, especially in humid conditions.
Using too much product. More isn’t better here. Heavy product application, especially at the roots, weighs hair down and can actually create a greasy-looking frizz rather than the clean volume you’re after.
How to Make It Last Through Humidity

This was the biggest hurdle in my own process, since I live somewhere with genuinely unpredictable humidity. Here’s what’s worked.
An anti-humidity spray as a final step. These products create a light barrier on the hair shaft that helps repel moisture from the air, which is the primary cause of frizz in humid conditions.
Avoid touching your hair throughout the day. I know this is repeated advice, but it matters even more in humidity. Each touch disrupts the smooth surface and gives frizz an opportunity to creep in.
Carry a small travel-size hairspray for touch-ups. A light mist over any areas starting to frizz throughout the day can extend the life of your blowout significantly without requiring a full restyle.
Consider your hair’s porosity. Hair with higher porosity tends to absorb moisture from the air more readily, leading to more frizz. If you know your hair is high porosity, a slightly heavier anti-humidity product may serve you better than a very lightweight one.
Adapting This for Different Hair Types
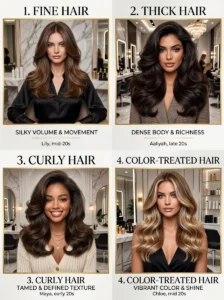
The classic 90s blowout technique works differently depending on your starting hair type, so here’s how I’d adjust the approach.
Fine hair: Focus extra attention on root lift during the rough-drying phase, and use a slightly smaller round brush than you might think, since a very large brush can sometimes flatten fine hair rather than adding volume. Use lightweight products throughout to avoid weighing down already delicate volume.
Thick hair: You may need to work in more sections than someone with finer hair, since thick sections take longer to dry thoroughly and are more prone to leaving the inside slightly damp, which can lead to frizz later in the day as that moisture interacts with humidity.
Naturally wavy or curly hair: This technique can absolutely work, but you’ll need a bit more tension while round-brushing to fully smooth out the natural texture into the rounded blowout shape. A blow-dry cream designed for smoothing can help significantly.
Color-treated hair: Pay extra attention to heat protectant application, since color-treated hair is often more porous and prone to both heat damage and frizz than untreated hair.
How Often Should You Do This?

A full 90s blowout using this detailed technique takes time and a fair amount of heat styling, so I don’t recommend doing it daily if you’re concerned about hair health. My personal approach is doing the full process once or twice a week, then maintaining the shape on subsequent days with light touch-ups: a quick pass with the round brush on any sections that have fallen, a spritz of dry shampoo at the roots for renewed volume, and a small amount of smoothing serum on the ends if needed.
This approach has let me enjoy this iconic look regularly without subjecting my hair to daily high-heat styling, which matters a lot for keeping the frizz-prevention cycle working in my favor over time, rather than slowly damaging my hair into a state that’s more frizz-prone overall.
Final Thoughts
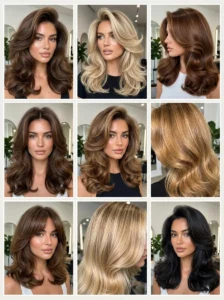
Recreating my mom’s iconic 90s blowout from those old family photos turned out to be more achievable than I expected, once I understood that the original frizz issues were largely a product and tool limitation rather than something inherent to the style itself. With the right technique, the right tools, and a bit of patience while I figured out my own hair’s specific needs, I finally got the voluminous, rounded, glossy result I’d been chasing.
If you’ve been nostalgic for this look but worried about the frizz that sometimes came with it, I genuinely think it’s more achievable now than it ever was in the actual 90s. The big hair can come back. The frizz doesn’t have to come with it.