Christmas morning is not the time for a forty five minute styling session. You have presents to open, breakfast on the stove, and probably a house full of people who all need you at once. Your hair still deserves to look like you tried, just not like you tried too hard.
The trick is picking styles that work with hair that is not freshly washed, or that you can finish with one tool and a handful of pins. Every style below takes twenty minutes or less, and most take ten. Grab your brush, a few elastics, and whatever bobby pins you can find at the bottom of your bag, and you are set.
1The Soft Messy Bun With Face Framing Pieces
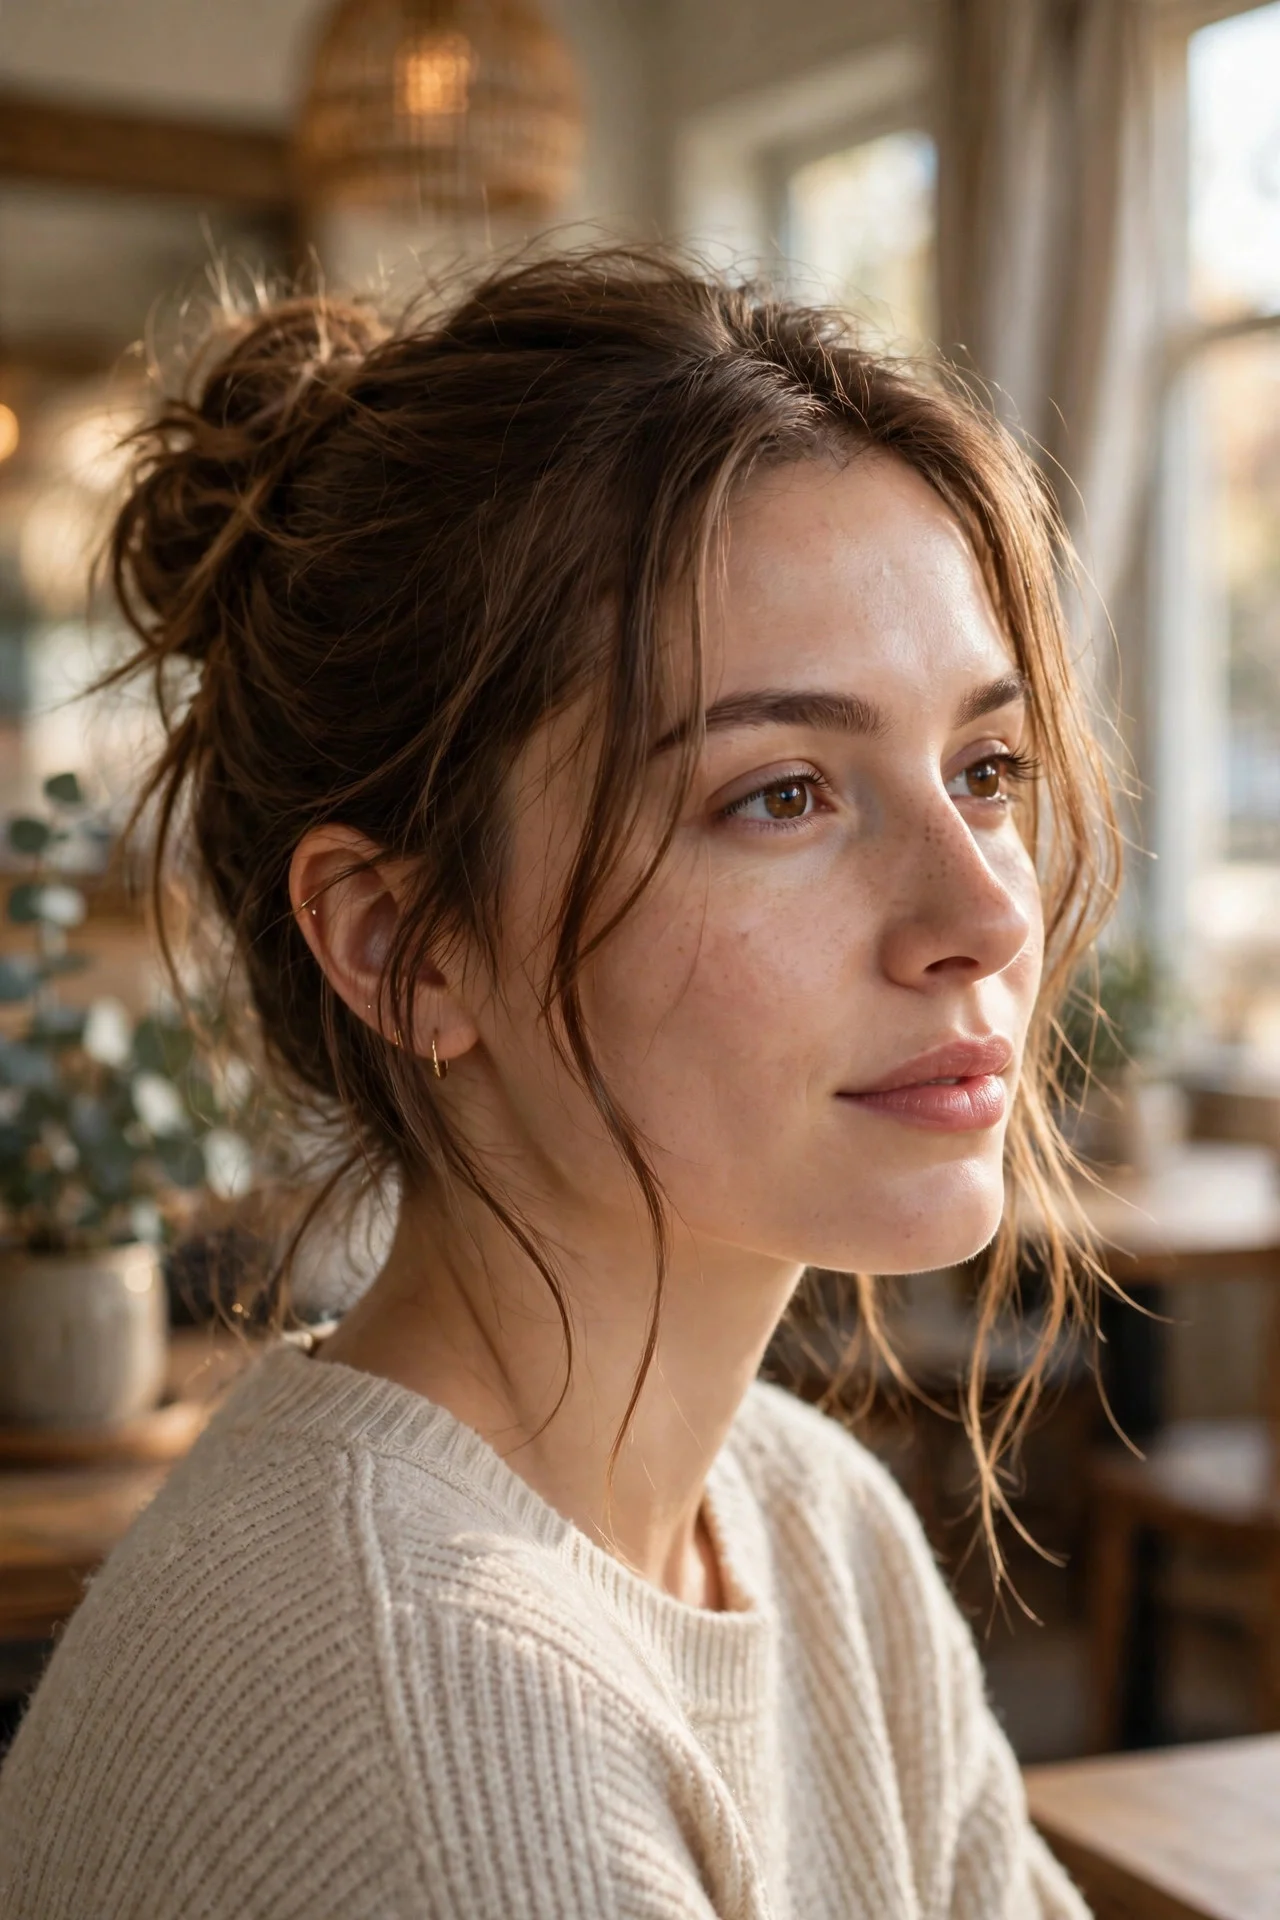
Pull your hair into a high ponytail, twist it, and wrap it around the base. Pin it where it lands, not where you think it should, because the undone shape is the whole point. Pull out two thin pieces at the front and curl them with a straightener if you have a spare minute. This suits almost everyone, especially second day hair that already has some grip. It takes about five minutes. The honest drawback is that it can slide apart by lunchtime, so anchor it with at least four pins and a light mist of hairspray before you leave the bedroom.
2The Low Ponytail With a Wrapped Base
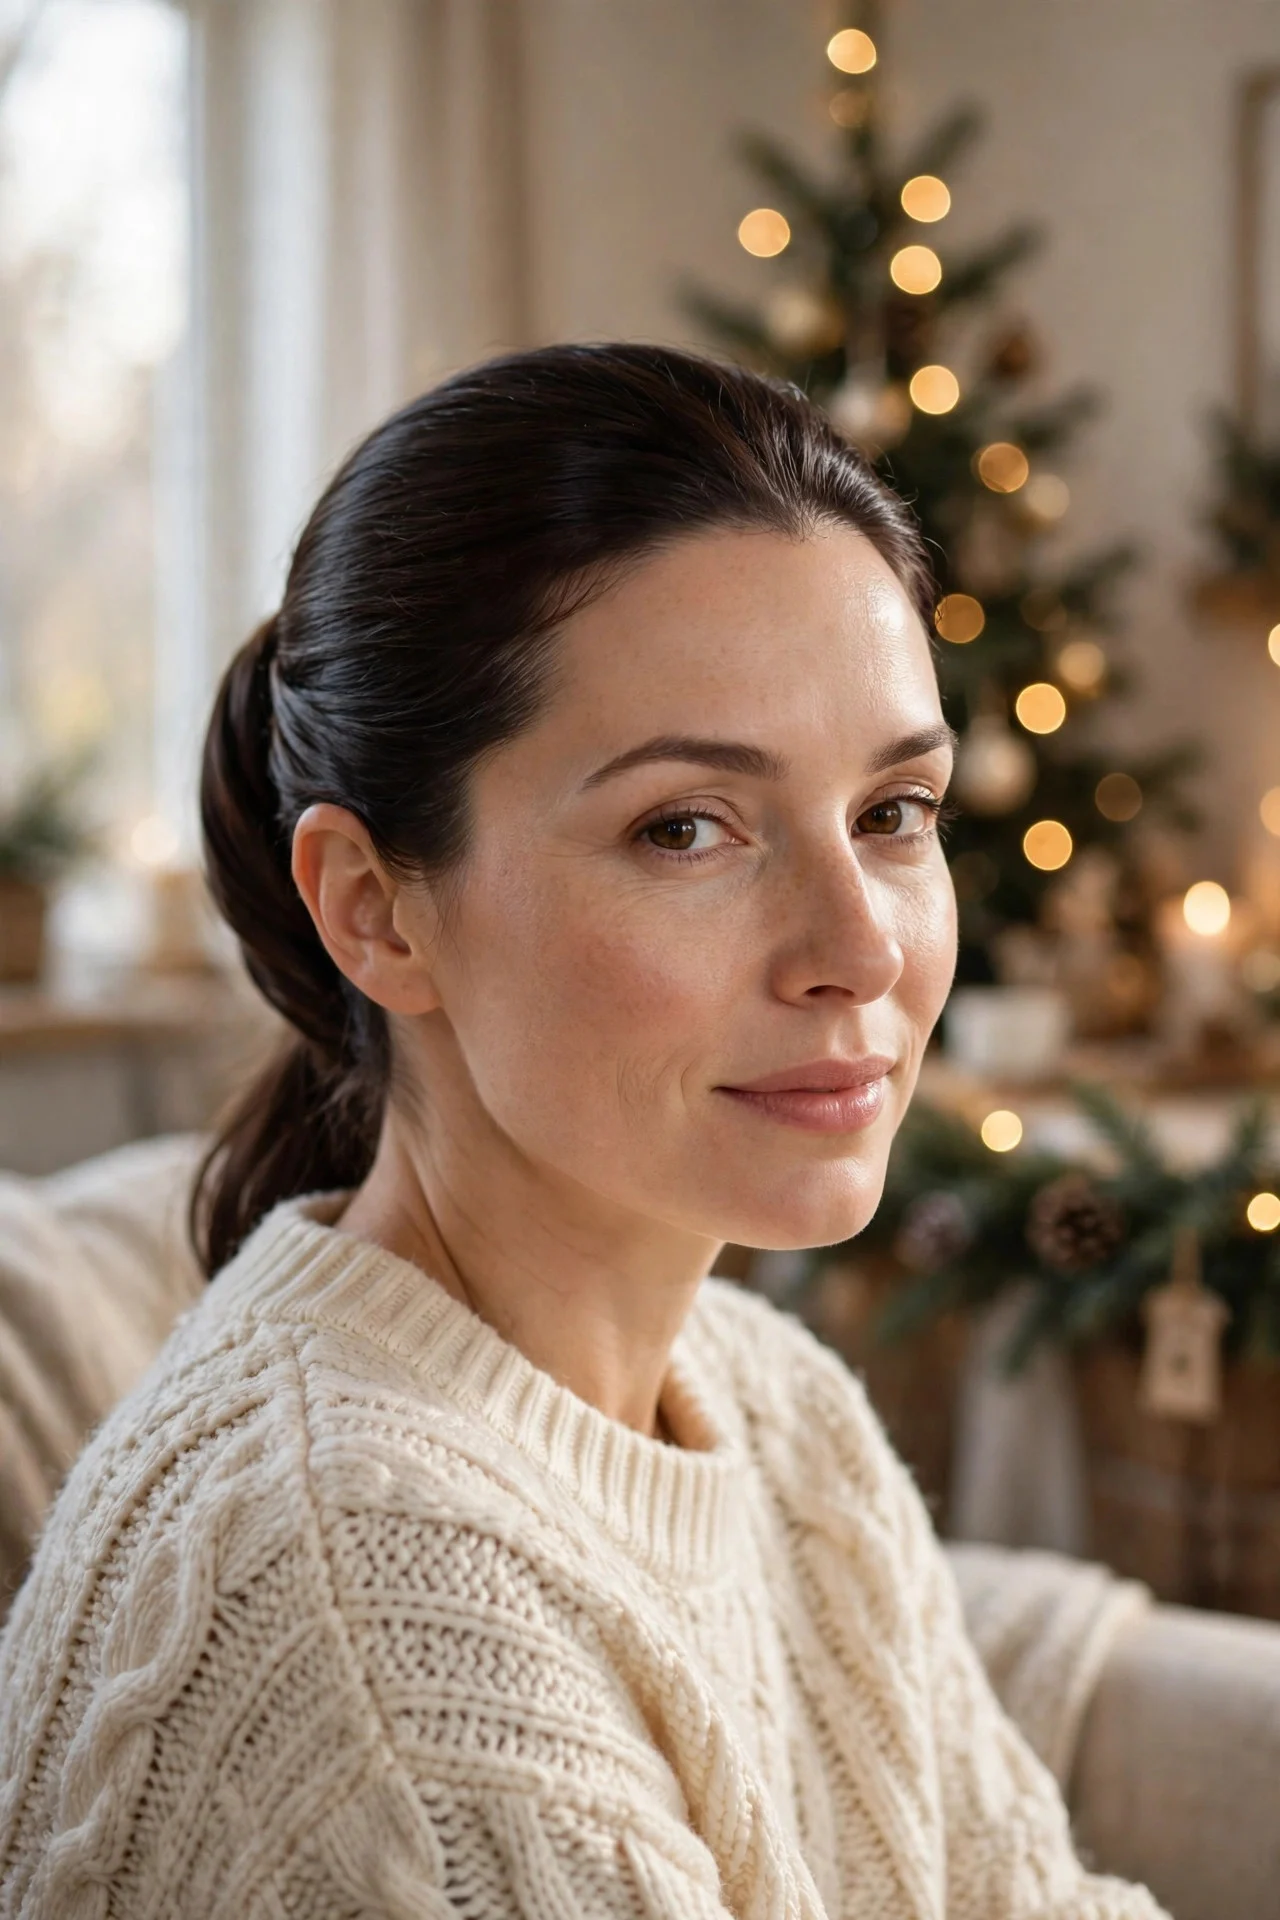
Brush everything back into a low ponytail at the nape and secure it with an elastic matching your hair color. Take a thin section from underneath, wrap it around the elastic a few times, and pin the end underneath. Smooth the top with a little serum or a dab of pomade on your palms. This looks polished without any heat, and it works beautifully on straight or slightly wavy hair. It takes about six minutes. The drawback is that flyaways show up fast on fine hair, so keep a small brush or a toothbrush sprayed with hairspray nearby for quick touch ups later.
3The Half Up Twisted Crown
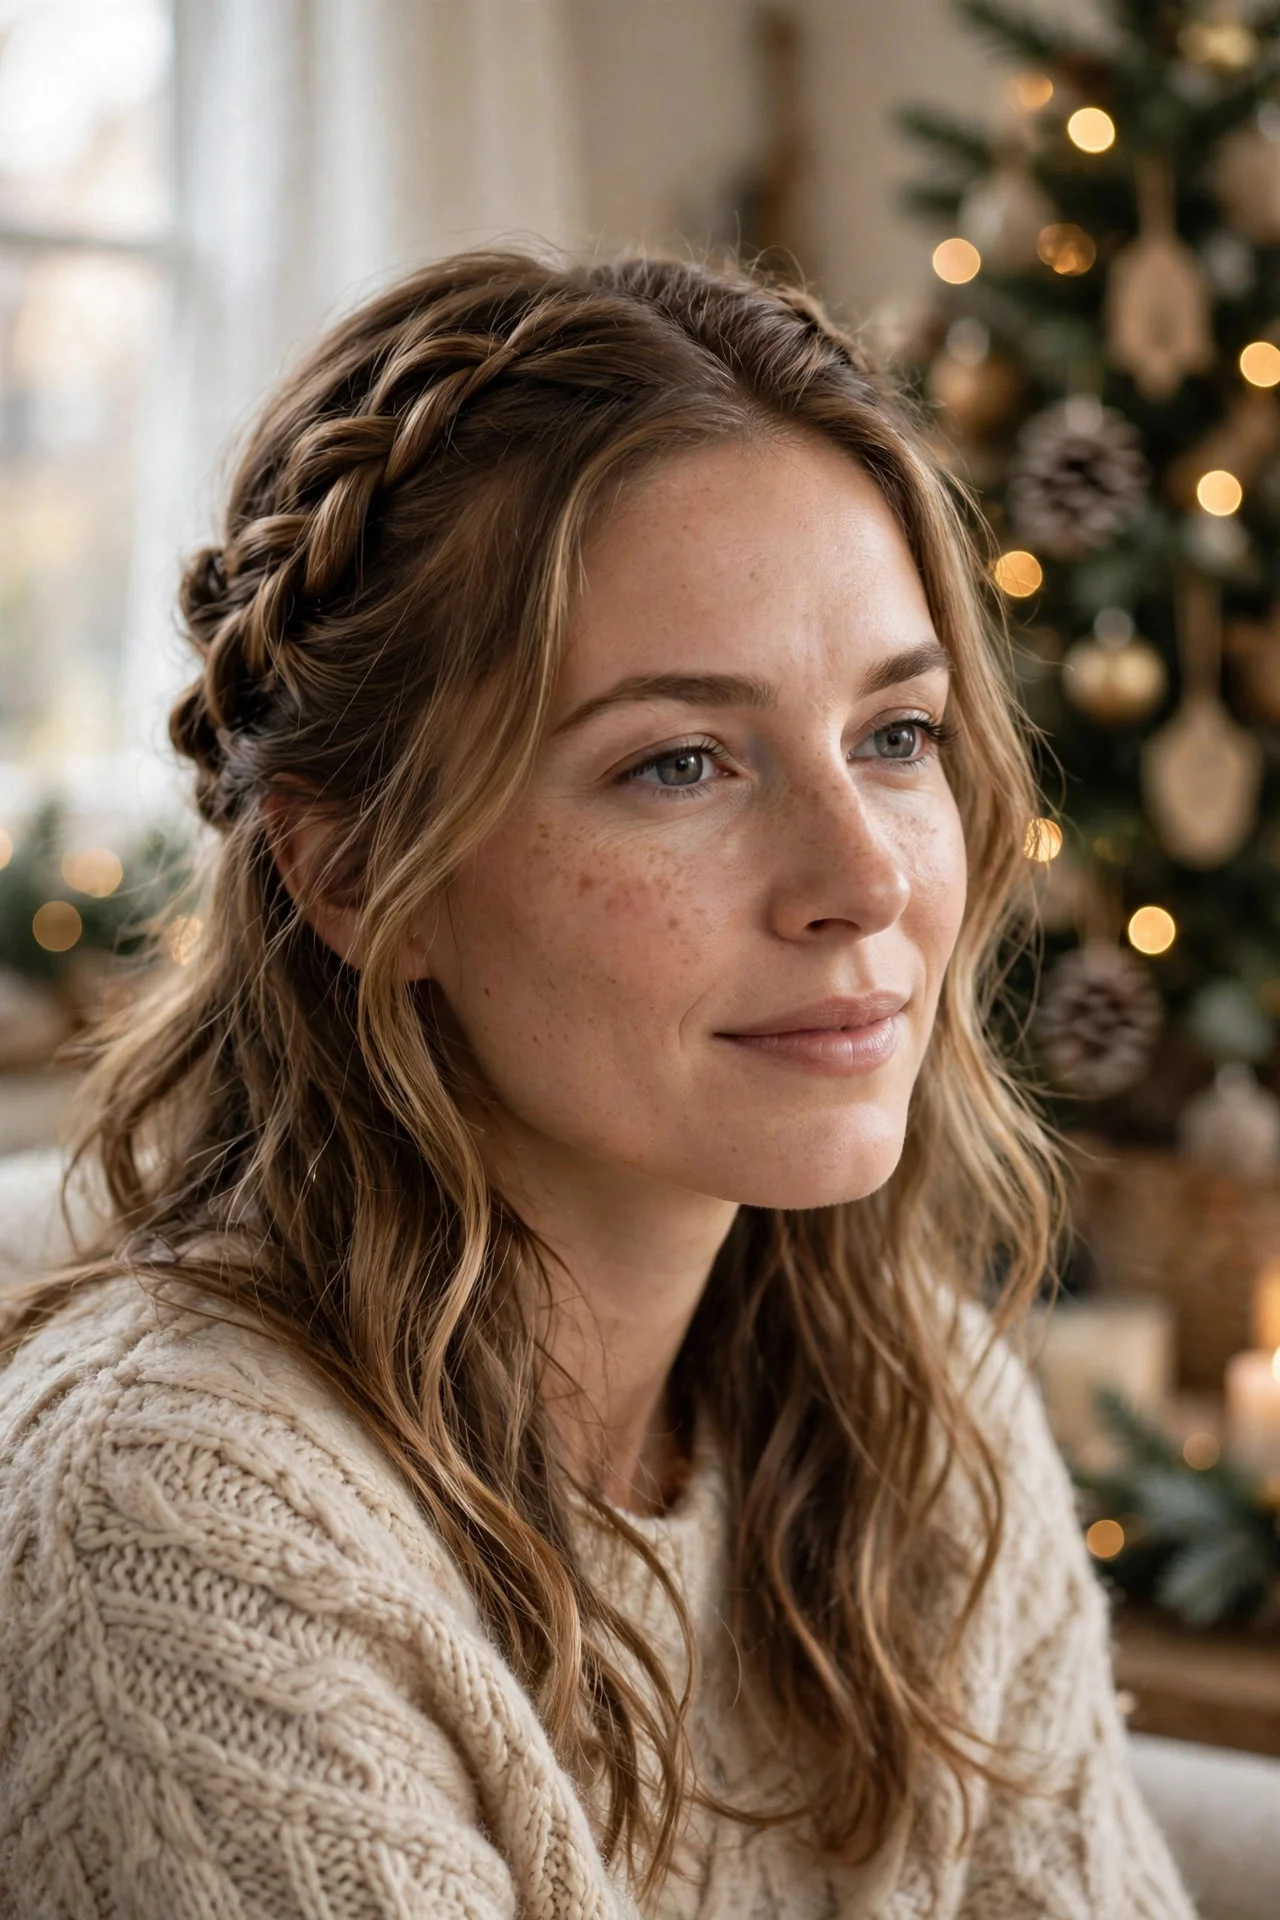
Take a section from each side of your part, twist each one back toward the crown, and pin them where they meet in the middle. Let the rest of your hair fall loose, curled or straight. This is a lovely choice if you want your hair out of your face while you cook but still want it to look finished in photos. It suits medium to long hair best and takes around eight minutes. The drawback is that the twists can loosen if your hair is very silky, so use small clear elastics at the ends of each twist before pinning for extra hold.
4Loose Waves With a Velvet Headband
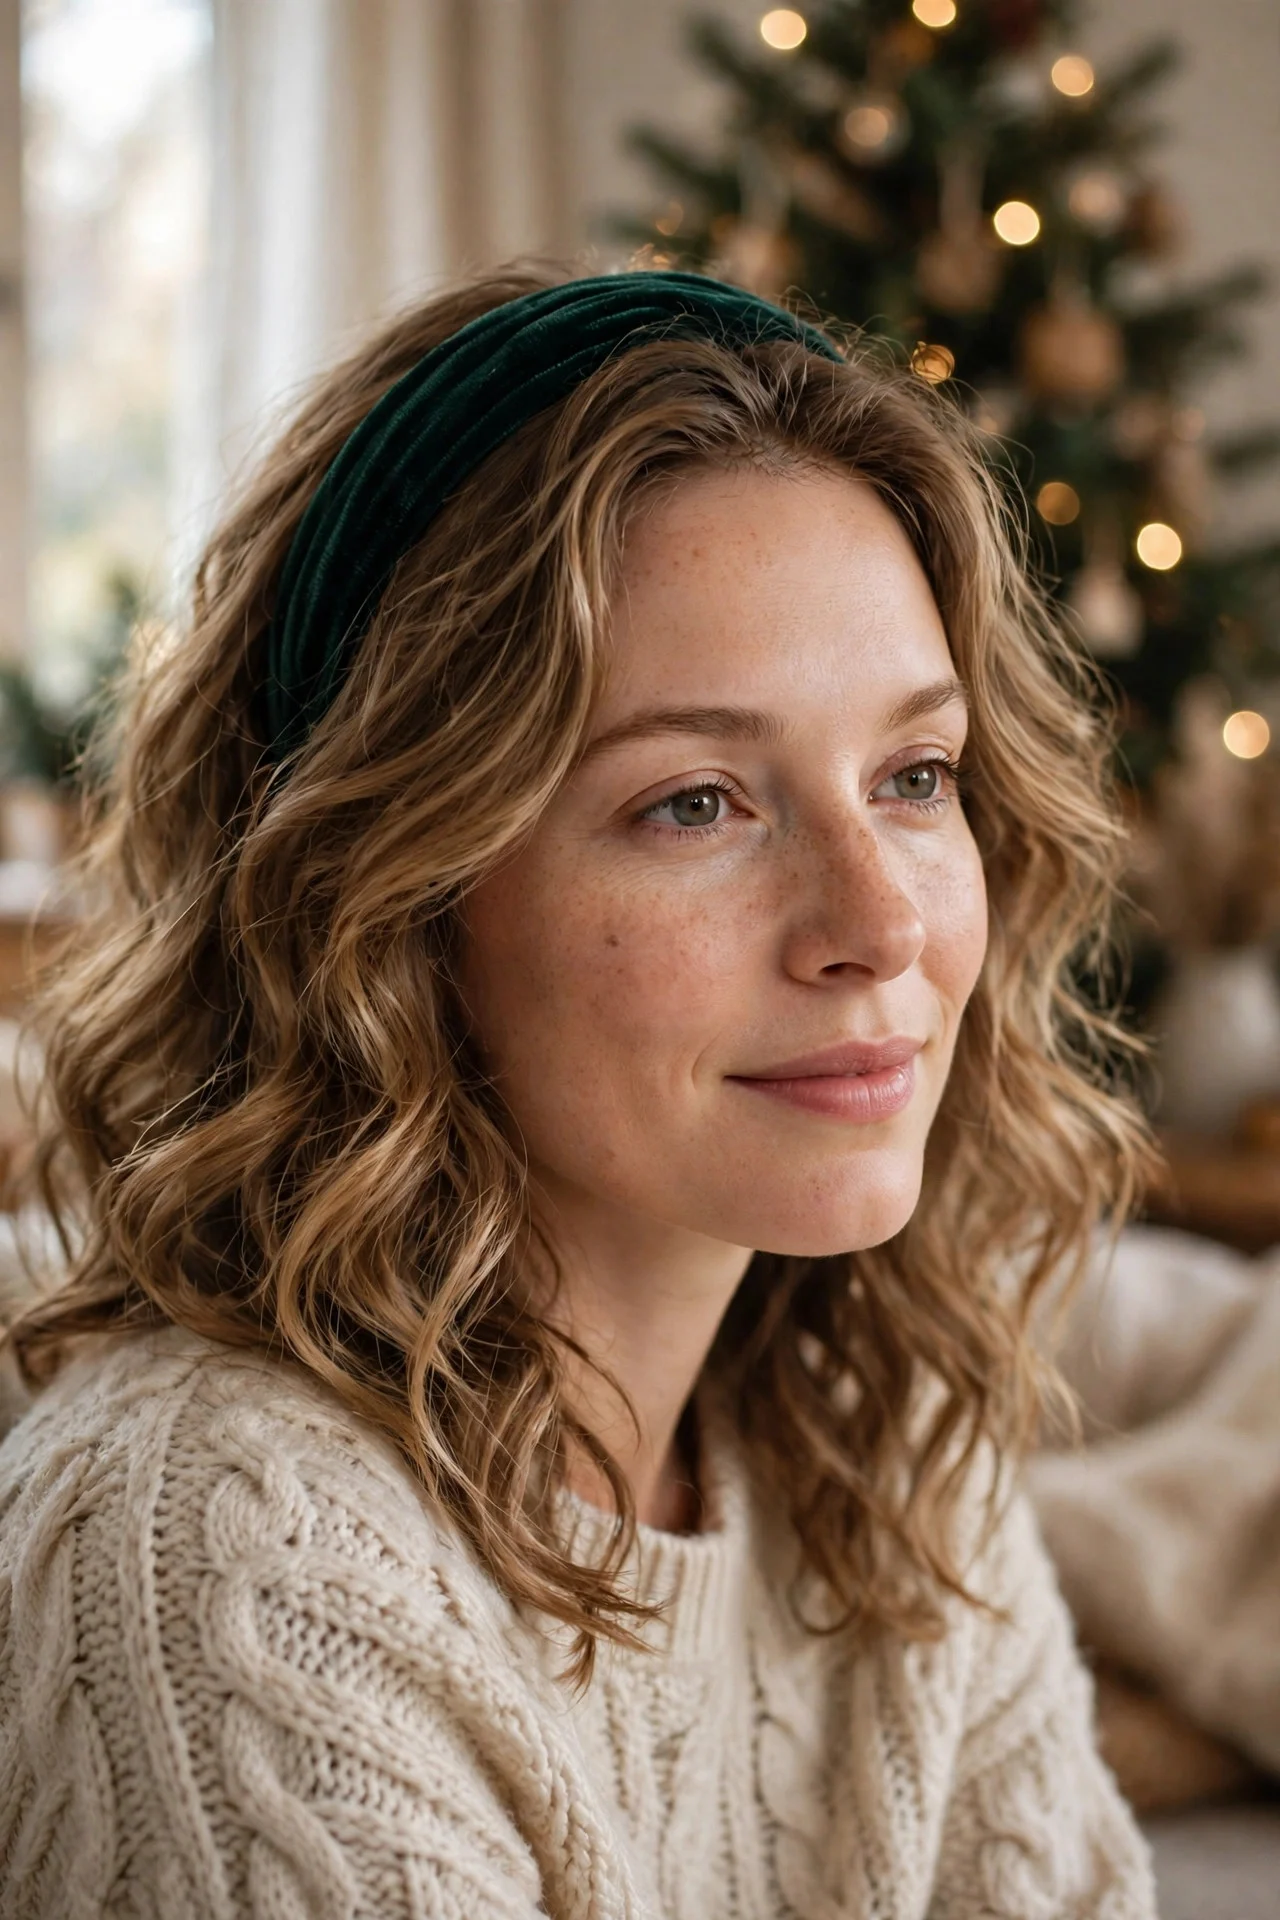
If you already have some wave from yesterday, refresh the top layers with a few passes of a curling wand. Then slide on a wide velvet headband in deep green or burgundy. The headband does most of the work, hiding a flat crown and adding instant Christmas feeling. This is perfect for anyone short on time on a busy morning. It takes about ten minutes with the wand, or two minutes if you skip the heat entirely. The drawback is that headbands can slip back or cause a headache, so pick one with grip inside and test it before the family photos.
5The Braided Side Ponytail
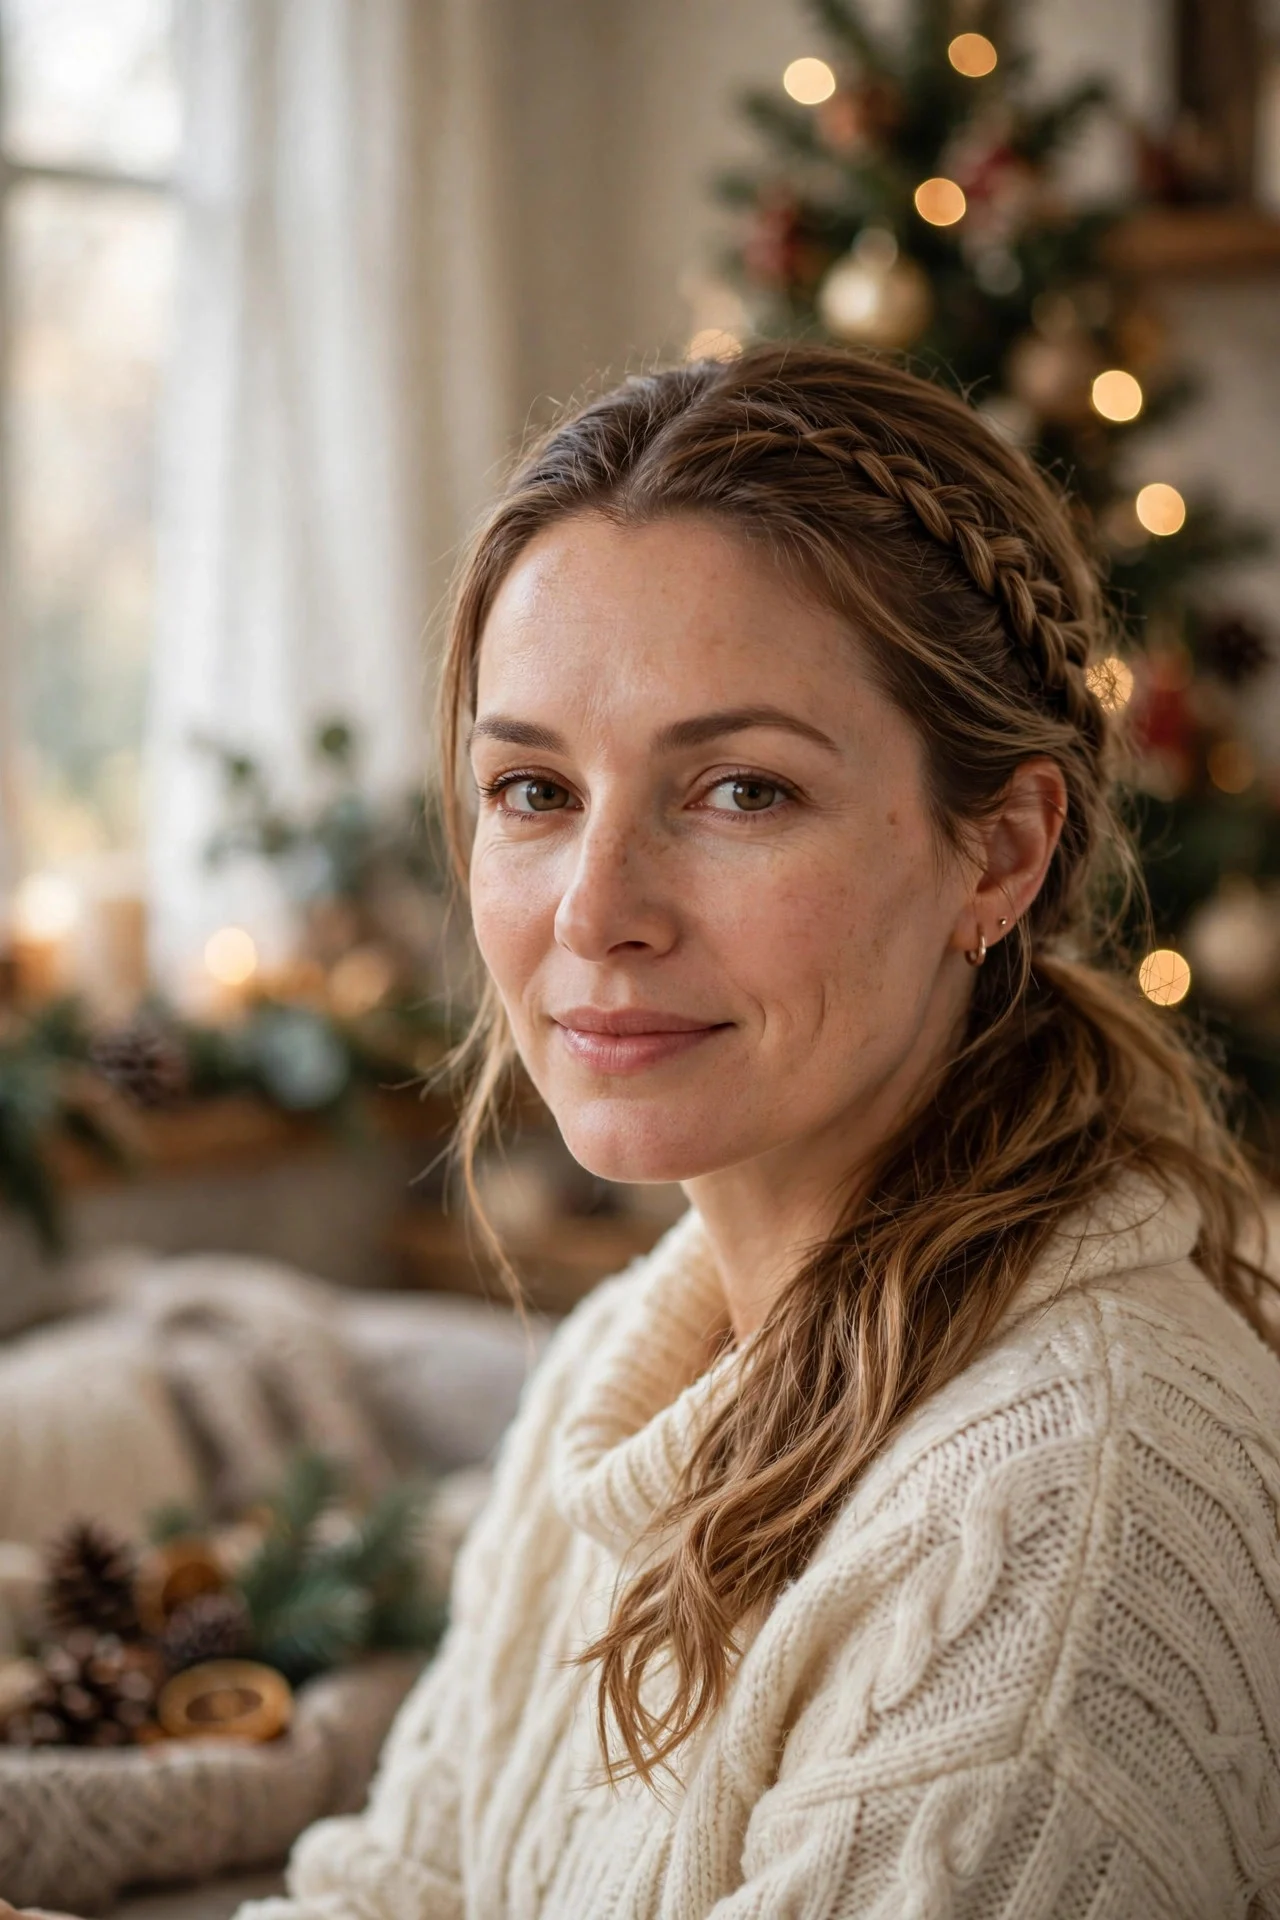
Make a loose three strand braid starting behind one ear, braid about halfway down, then gather everything into a low side ponytail. Gently pull the braid edges apart to make it look fuller, and wrap a small section around the elastic. This suits thick hair especially well, since the braid adds texture that a plain ponytail cannot. It takes about ten minutes once you have the rhythm down. The drawback is that it can look lopsided if you rush the braid, so stand in front of a mirror for the first few crosses and keep your tension even all the way down.
6The Sleek Low Bun With a Center Part
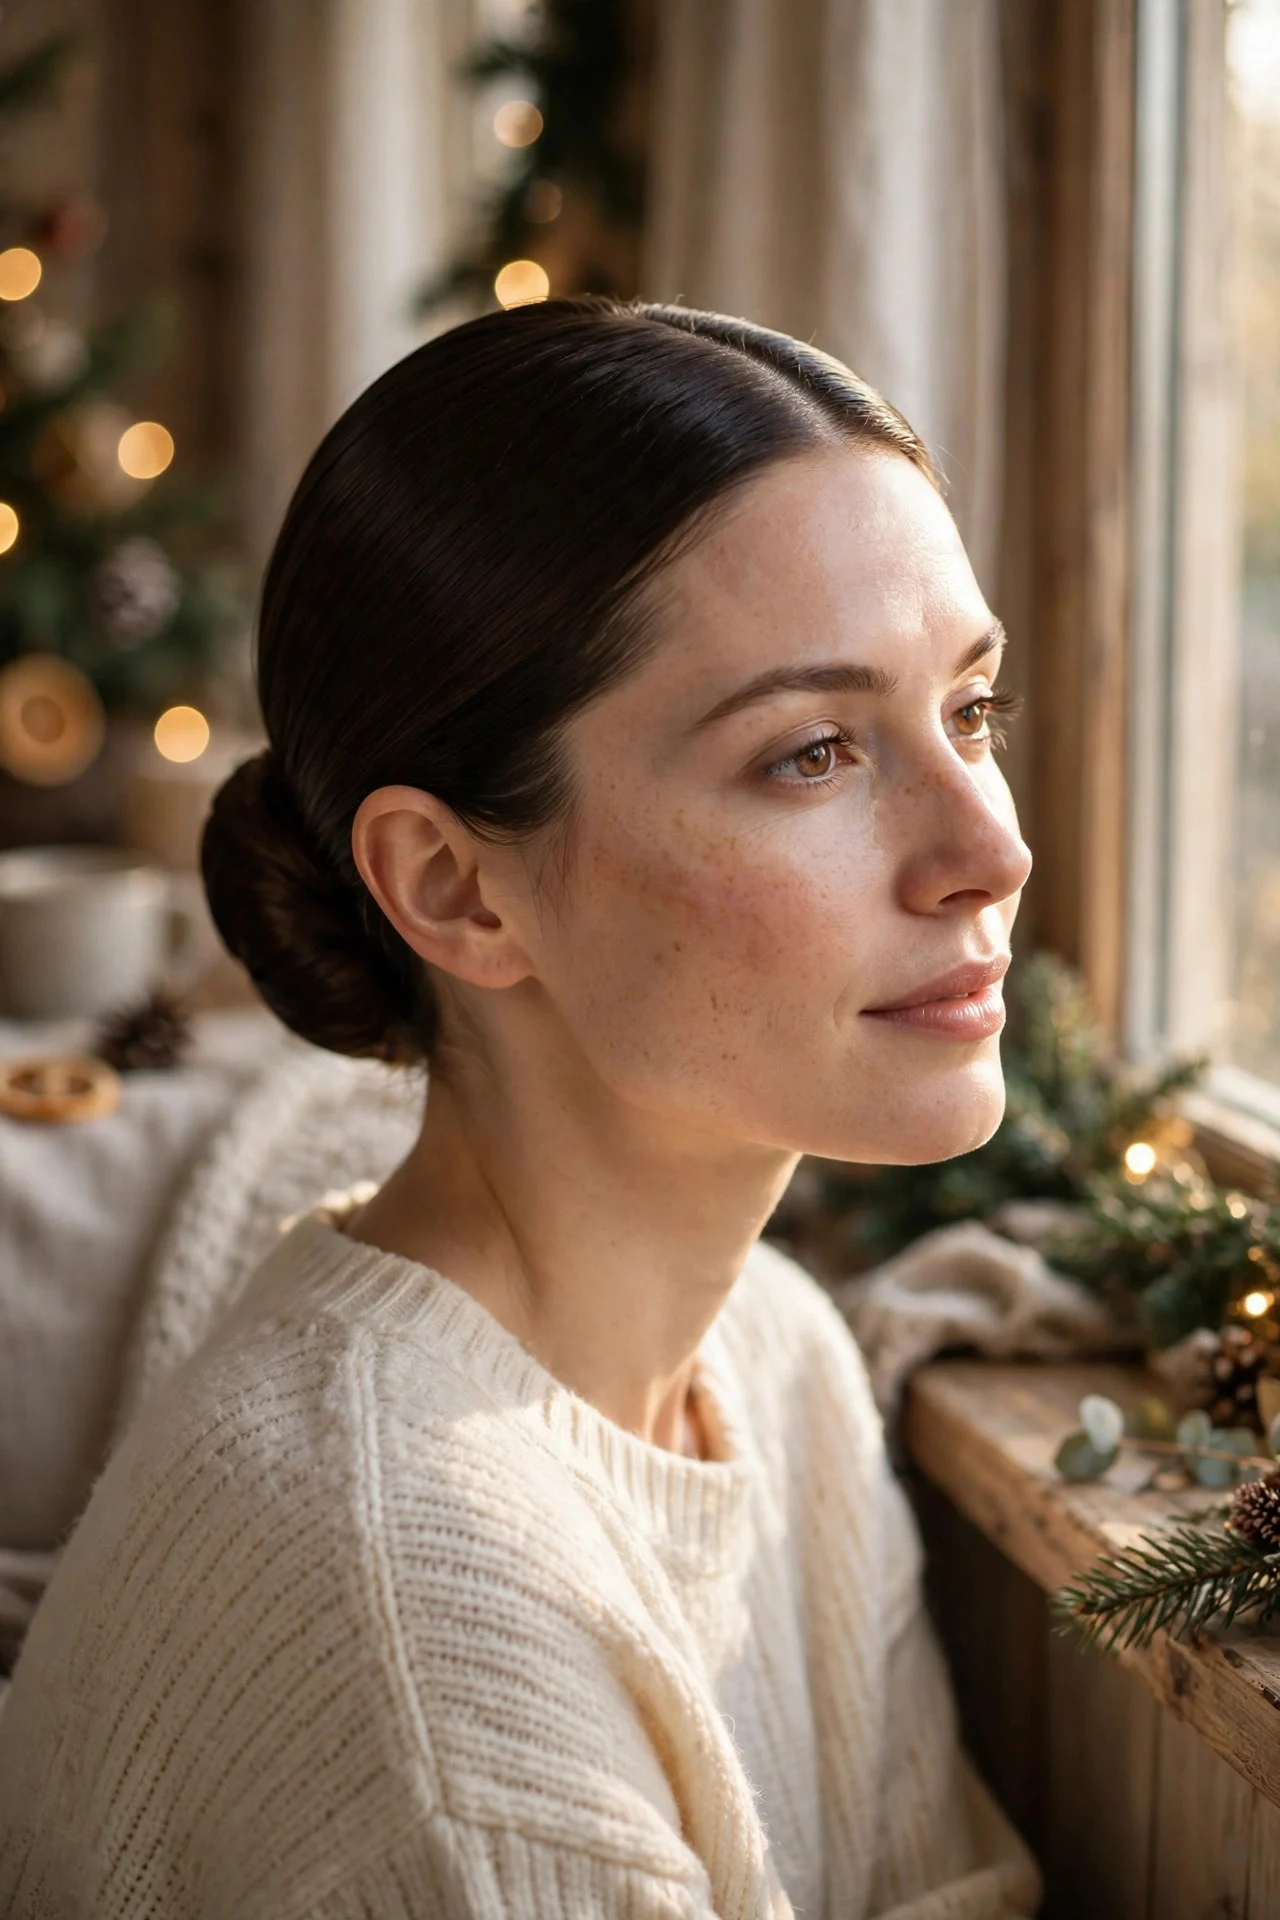
Part your hair down the middle, brush it smooth, and twist it into a low bun at the nape. Gel or smoothing cream on the top layer keeps everything neat, and simple gold pins add a festive touch. Choose this when you are wearing a fancier outfit or want to look put together in every photo. It takes about eight minutes and suits straight hair best, though wavy hair works if you smooth it first. The drawback is that a center part shows every cowlick, so dampen the front sections and blow dry them flat first.
7The Claw Clip Twist
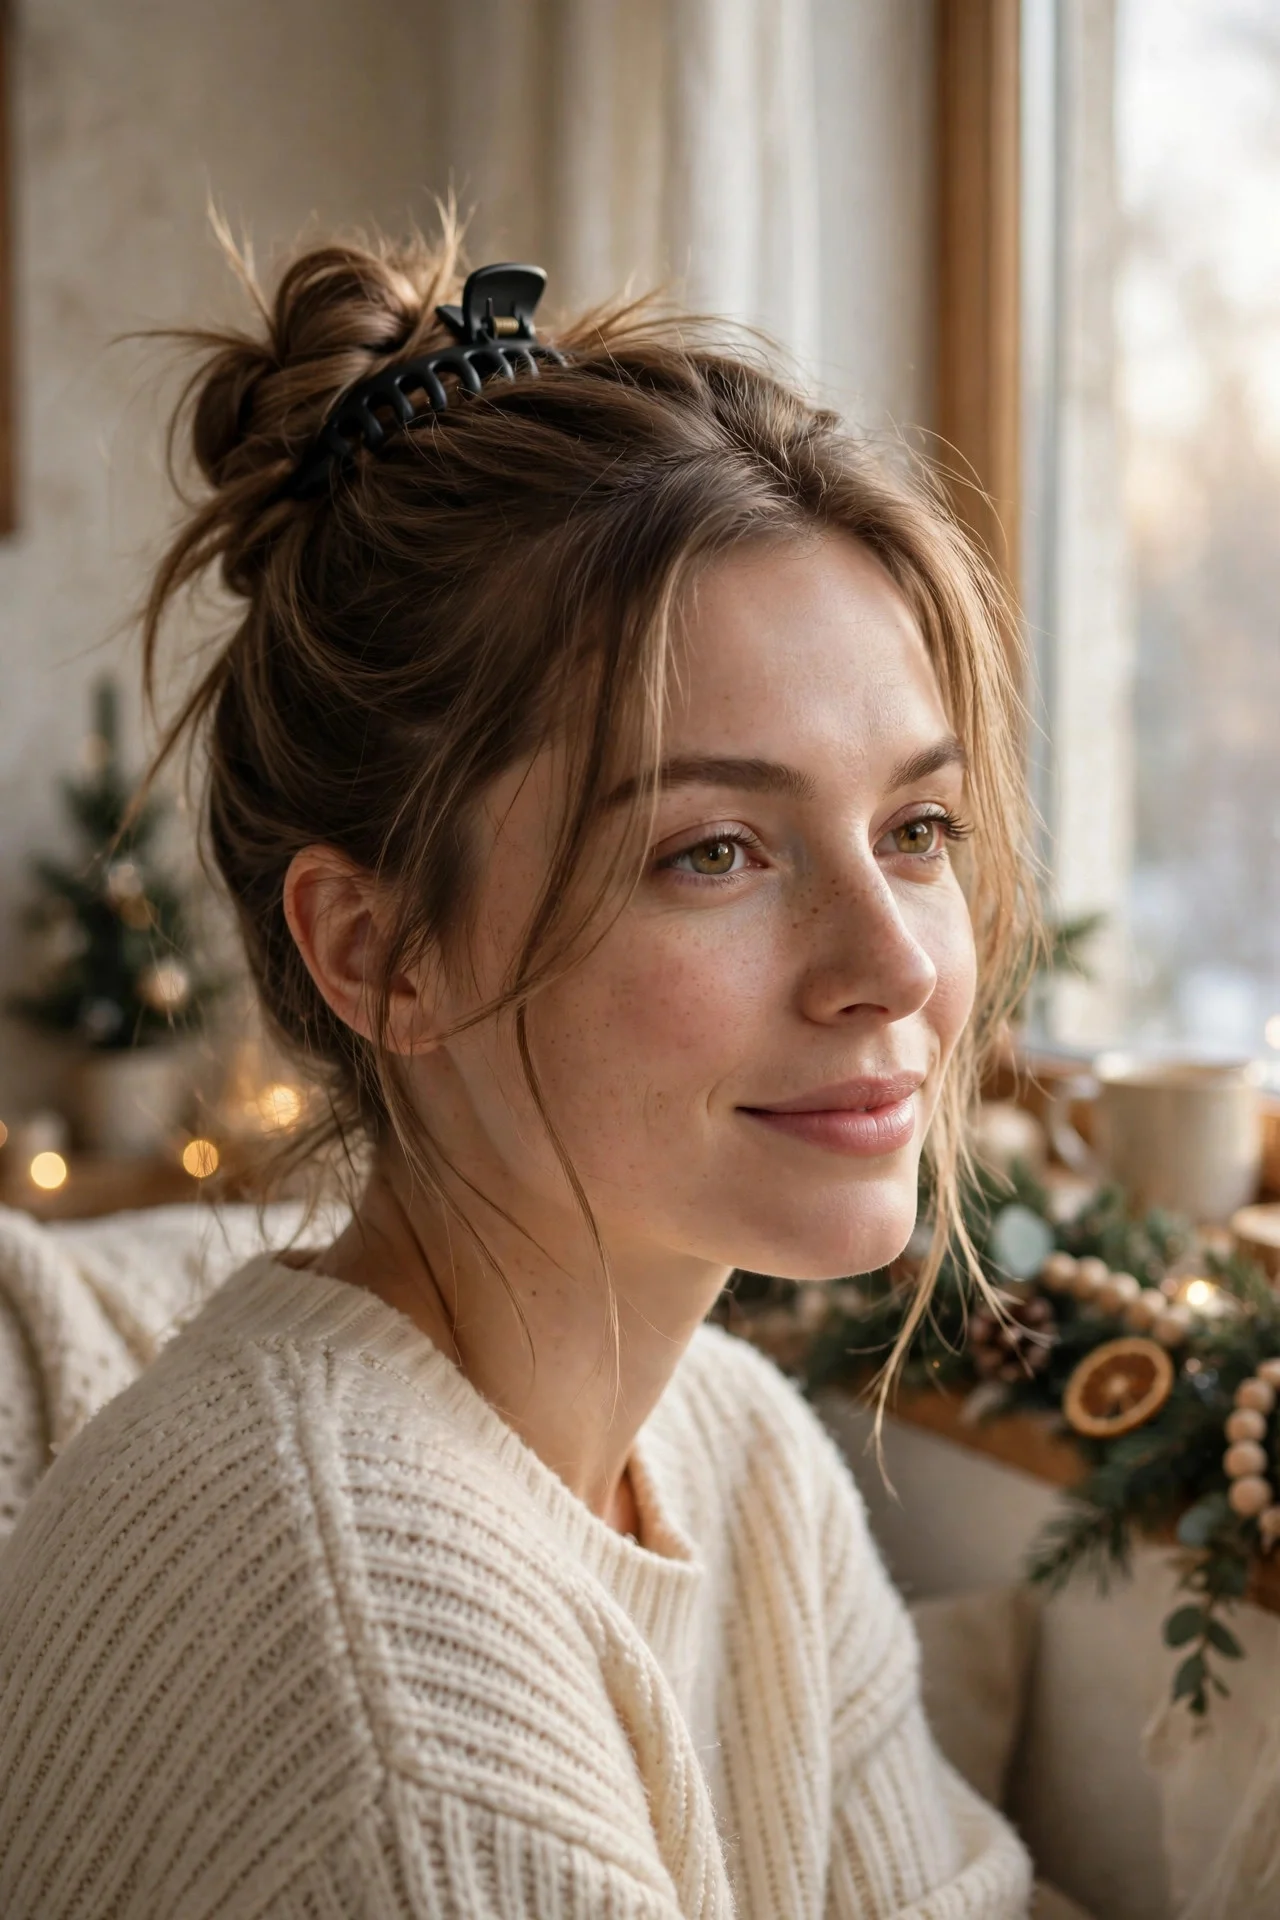
Gather your hair as if making a low ponytail, twist it upward, fold the ends over, and clamp a large claw clip over it. Let a few ends poke out at the top for a relaxed feel. This is the fastest style on this list and a lifesaver when you are running late for breakfast. It works best on medium to thick hair that can fill the clip. It takes about two minutes. The drawback is that cheap clips snap under heavy hair, so invest in one sturdy clip and carry a spare elastic in your pocket just in case it gives up mid morning.
8The Fishtail Braid Over One Shoulder
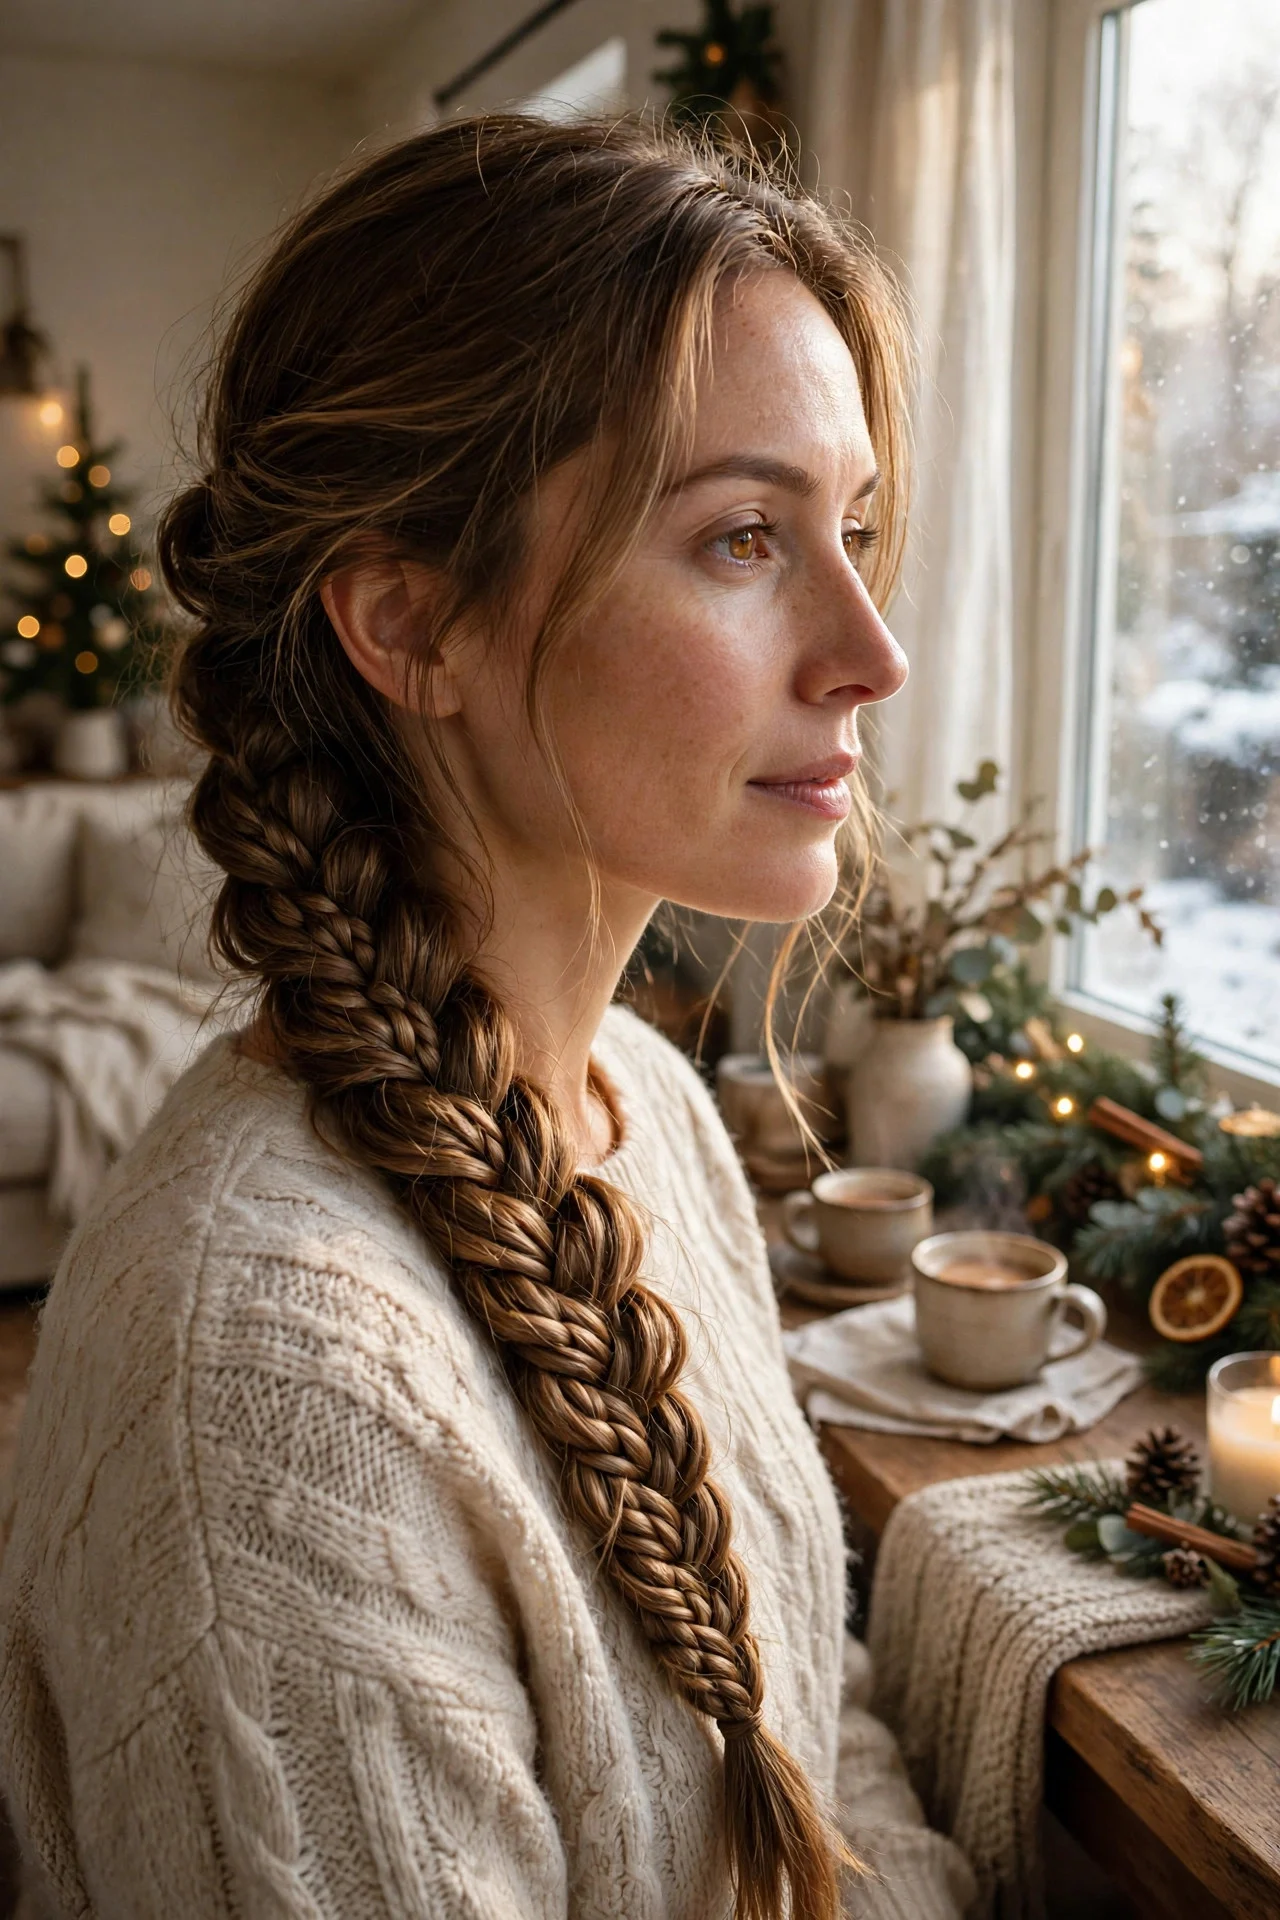
Sweep all your hair over one shoulder and split it into two sections. Take a thin piece from the outside of one section, cross it to the inside of the other, and repeat until you run out of hair. Secure with a small elastic and loosen the braid by tugging gently at the edges. This looks far more complicated than it is, which impresses relatives. It suits long hair best and takes about twelve minutes. The drawback is that thin hair can make a fishtail look sparse, so braid loosely from the start and add a little texturizing spray before you begin.
9The Voluminous Blowout With Curtain Bangs
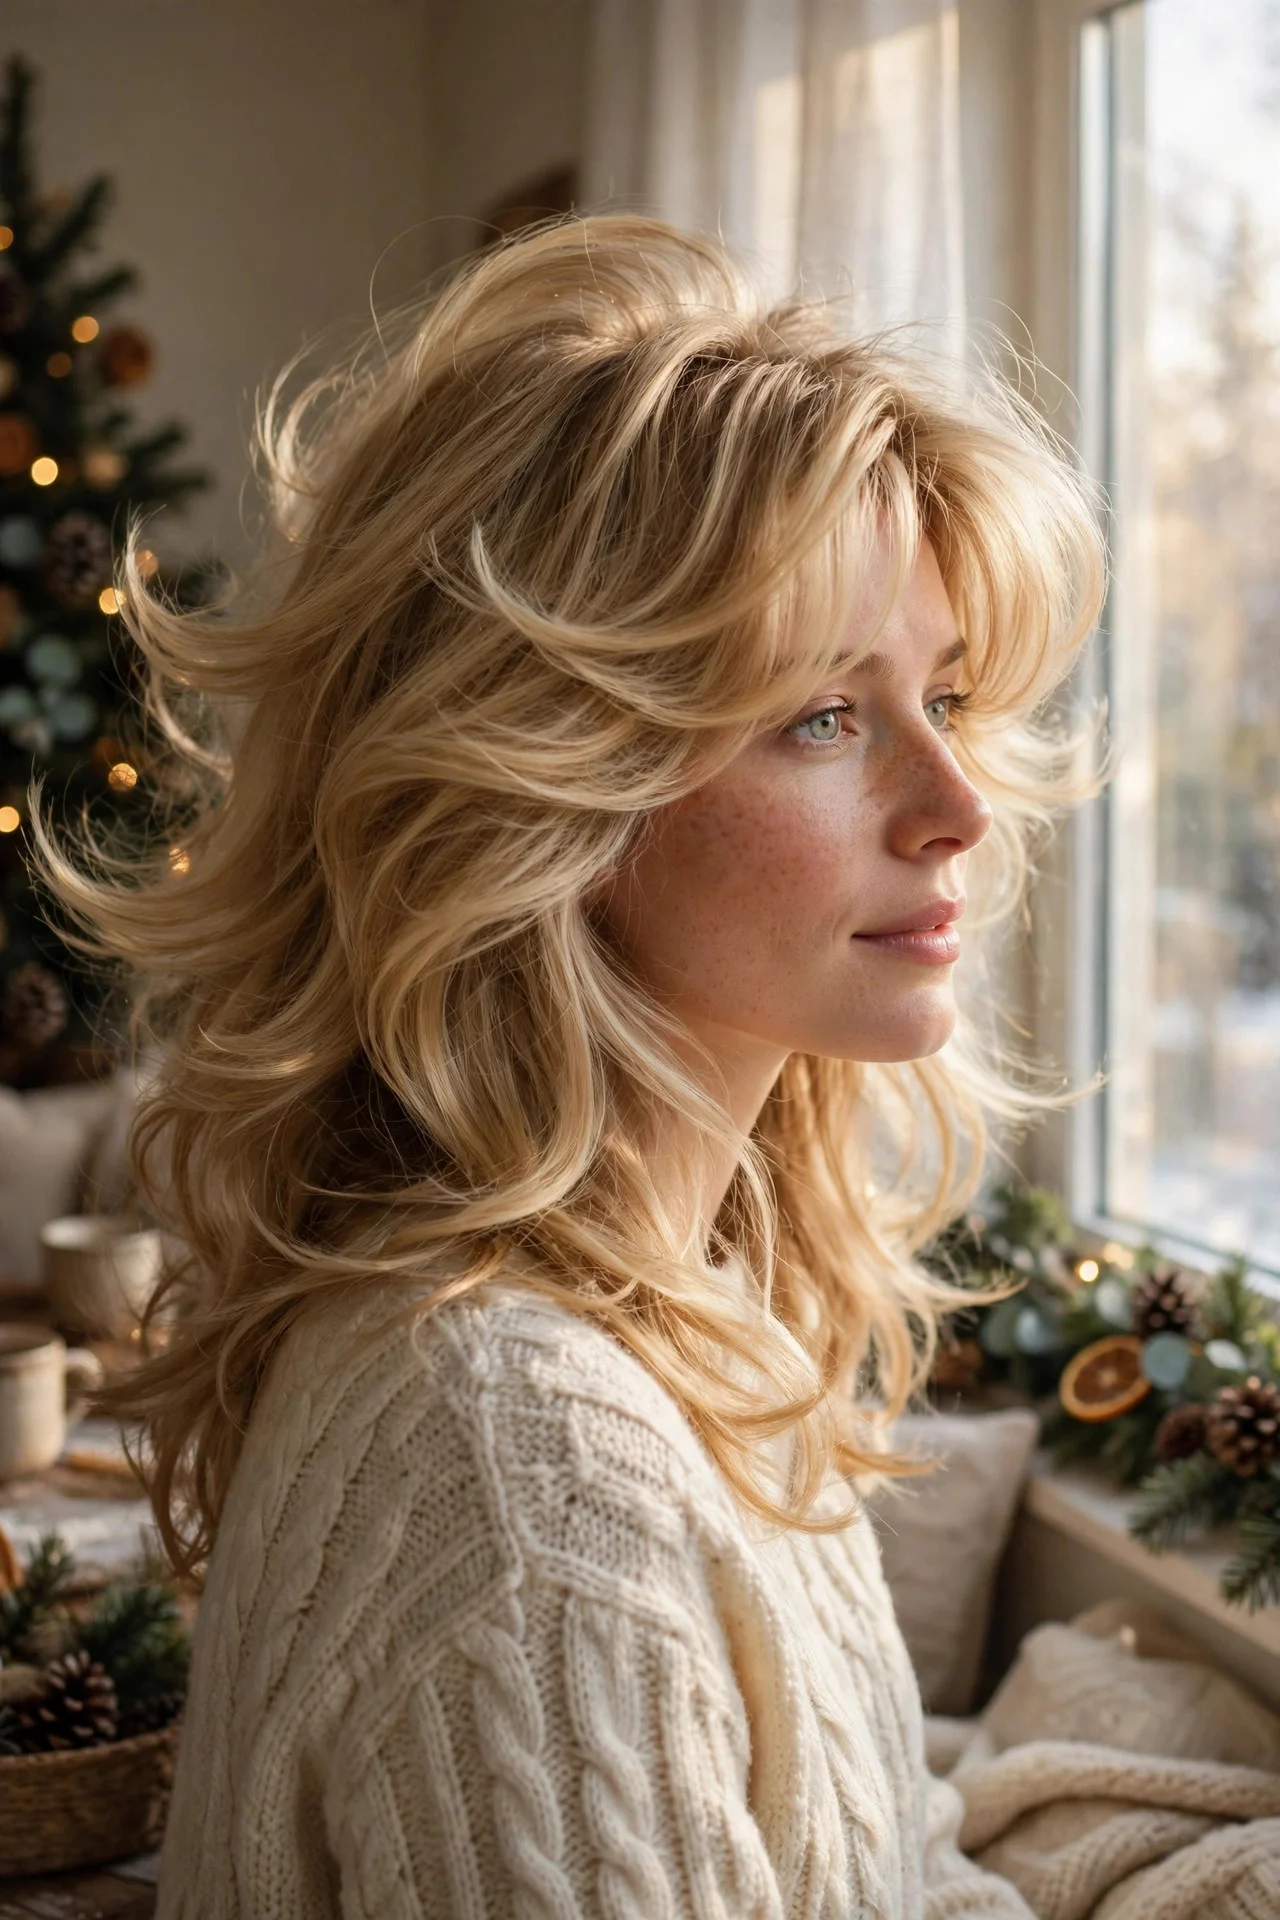
Blow dry your hair in sections with a round brush, rolling the front pieces away from your face. Flip your head upside down for the last minute of drying to add lift at the roots. This is the most glamorous option here and photographs beautifully, especially if you are hosting or dressing up. It suits medium to long hair and takes about eighteen minutes, so start it before the coffee finishes brewing. The drawback is that the volume drops in humid kitchens, so finish with a root lift spray and try not to stand over steaming pots for too long.
10Two Dutch Braids Into Low Buns
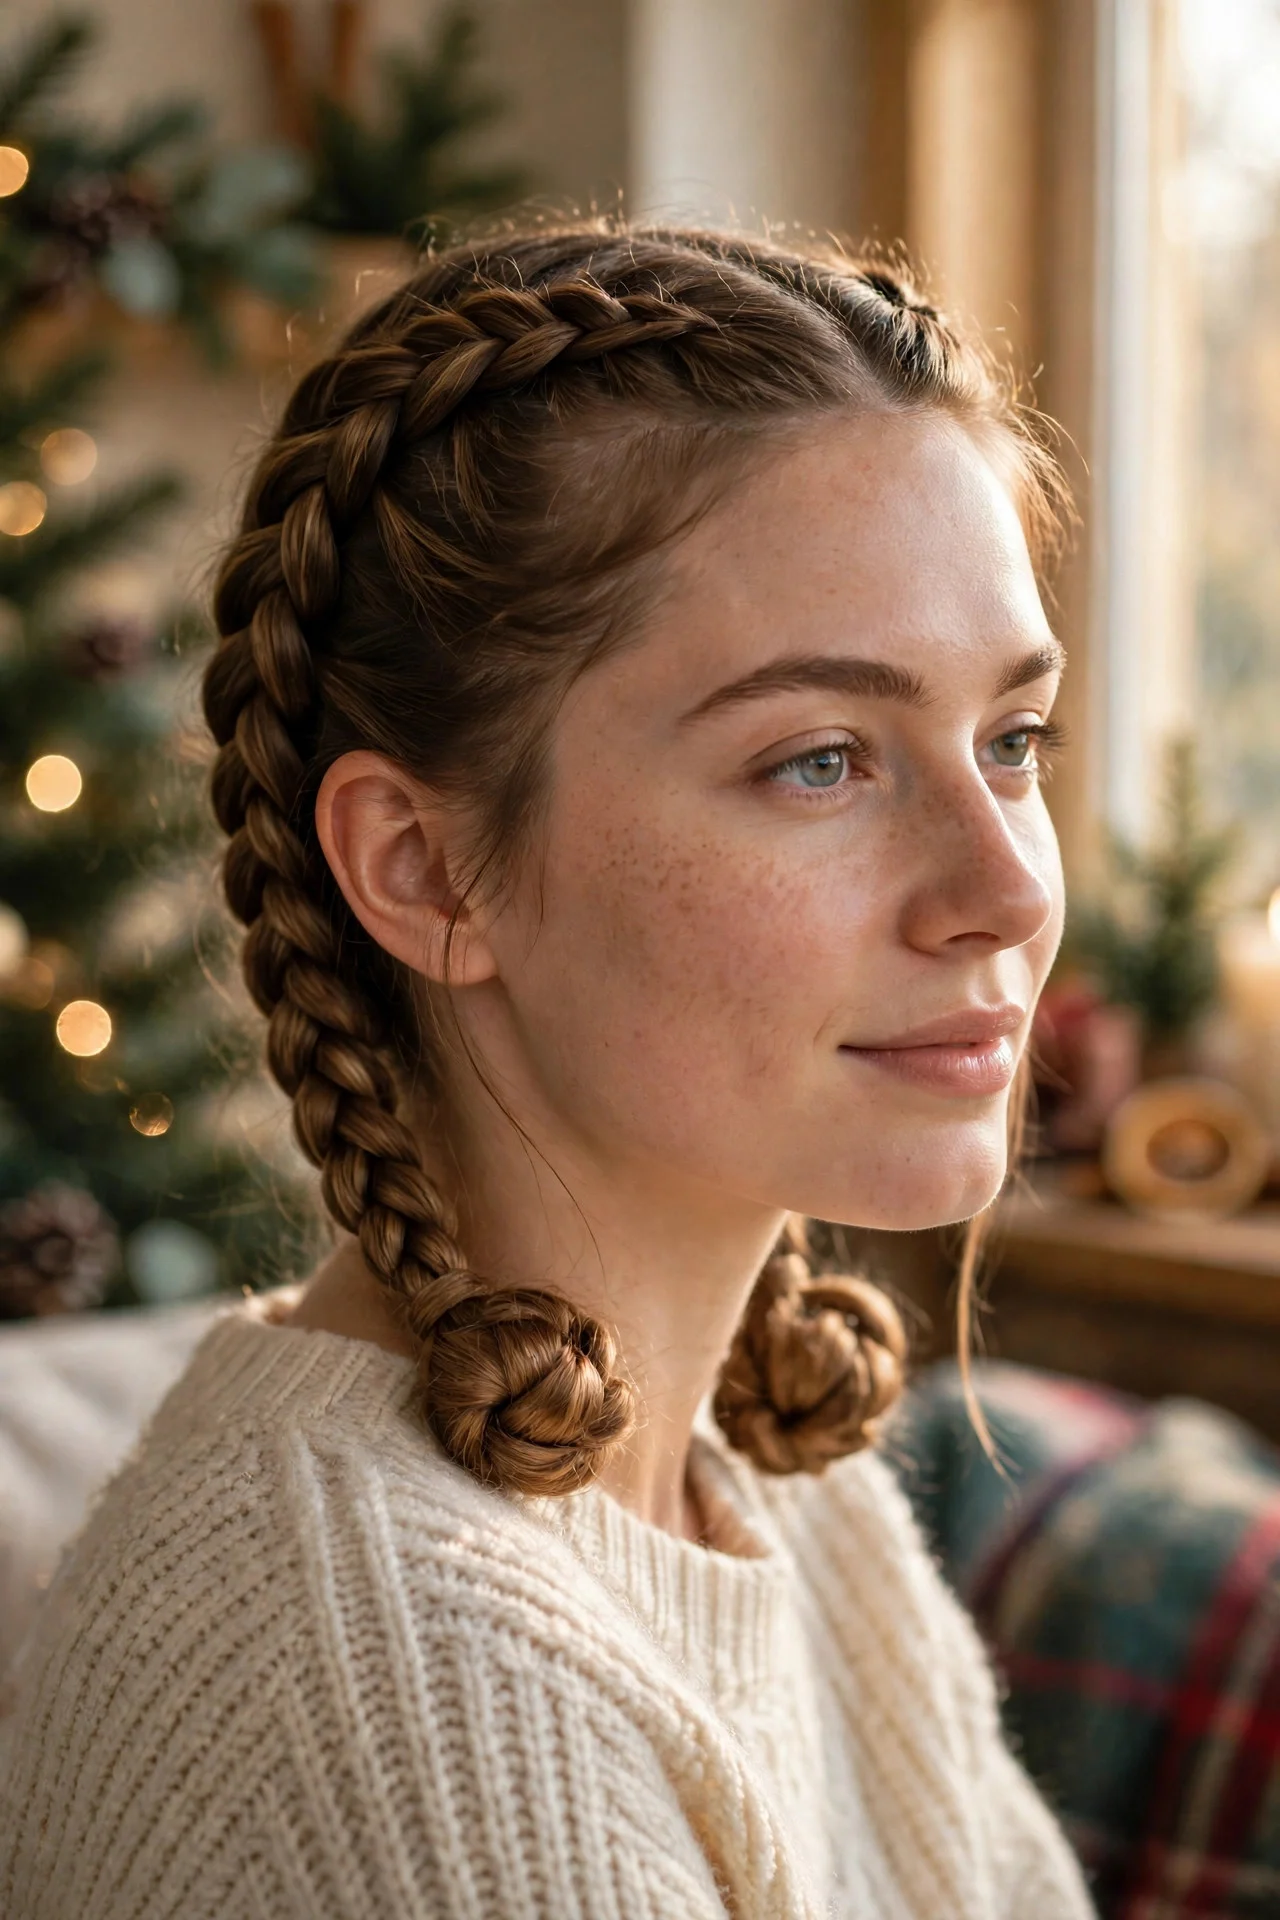
Part your hair down the middle and Dutch braid each side, crossing strands underneath instead of over the top, until you reach the nape. Then twist each braid into a small bun and pin it in place. This keeps every strand out of your face, which is ideal if you are cooking, wrapping last minute gifts, or chasing kids around. It suits thick or textured hair particularly well and takes about fifteen minutes. The drawback is that it takes practice to make both braids even, so if one side comes out tighter than the other, just loosen the tighter one a little before pinning.
11The Silk Scarf Ponytail
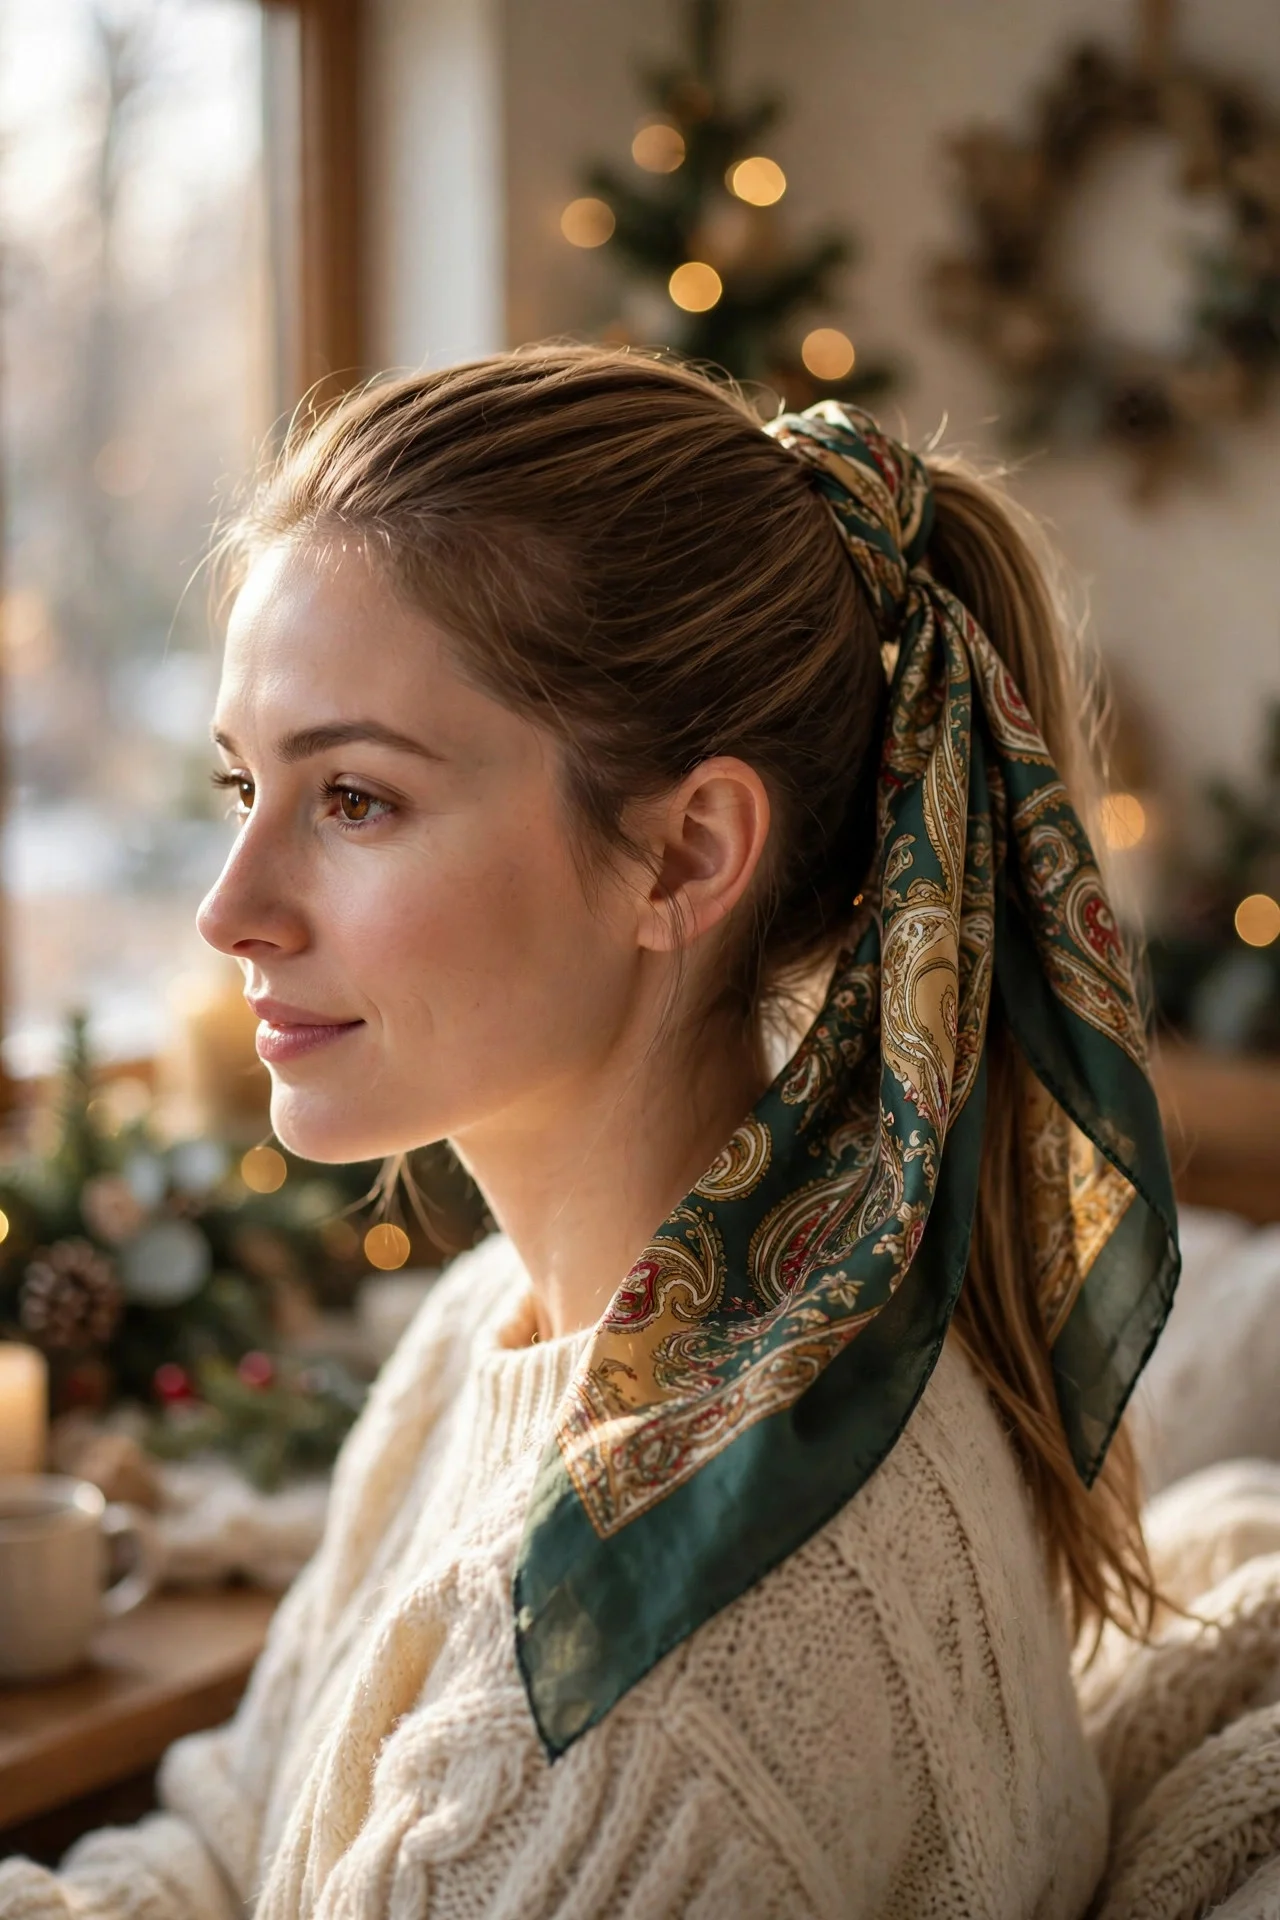
Tie your hair into a mid height ponytail, then wrap a small silk scarf around the base and tie it in a bow with the ends hanging loose. Choose a scarf in red, green, or a classic plaid print to nod to the season without trying too hard. This instantly dresses up an ordinary ponytail and hides an elastic that has seen better days. It works on most hair types and lengths and takes about five minutes. The drawback is that silk slips, so fold the scarf into a band, tie it twice, and pin the knot from underneath if it keeps sliding loose.
12Defined Curls Pinned Up at the Crown
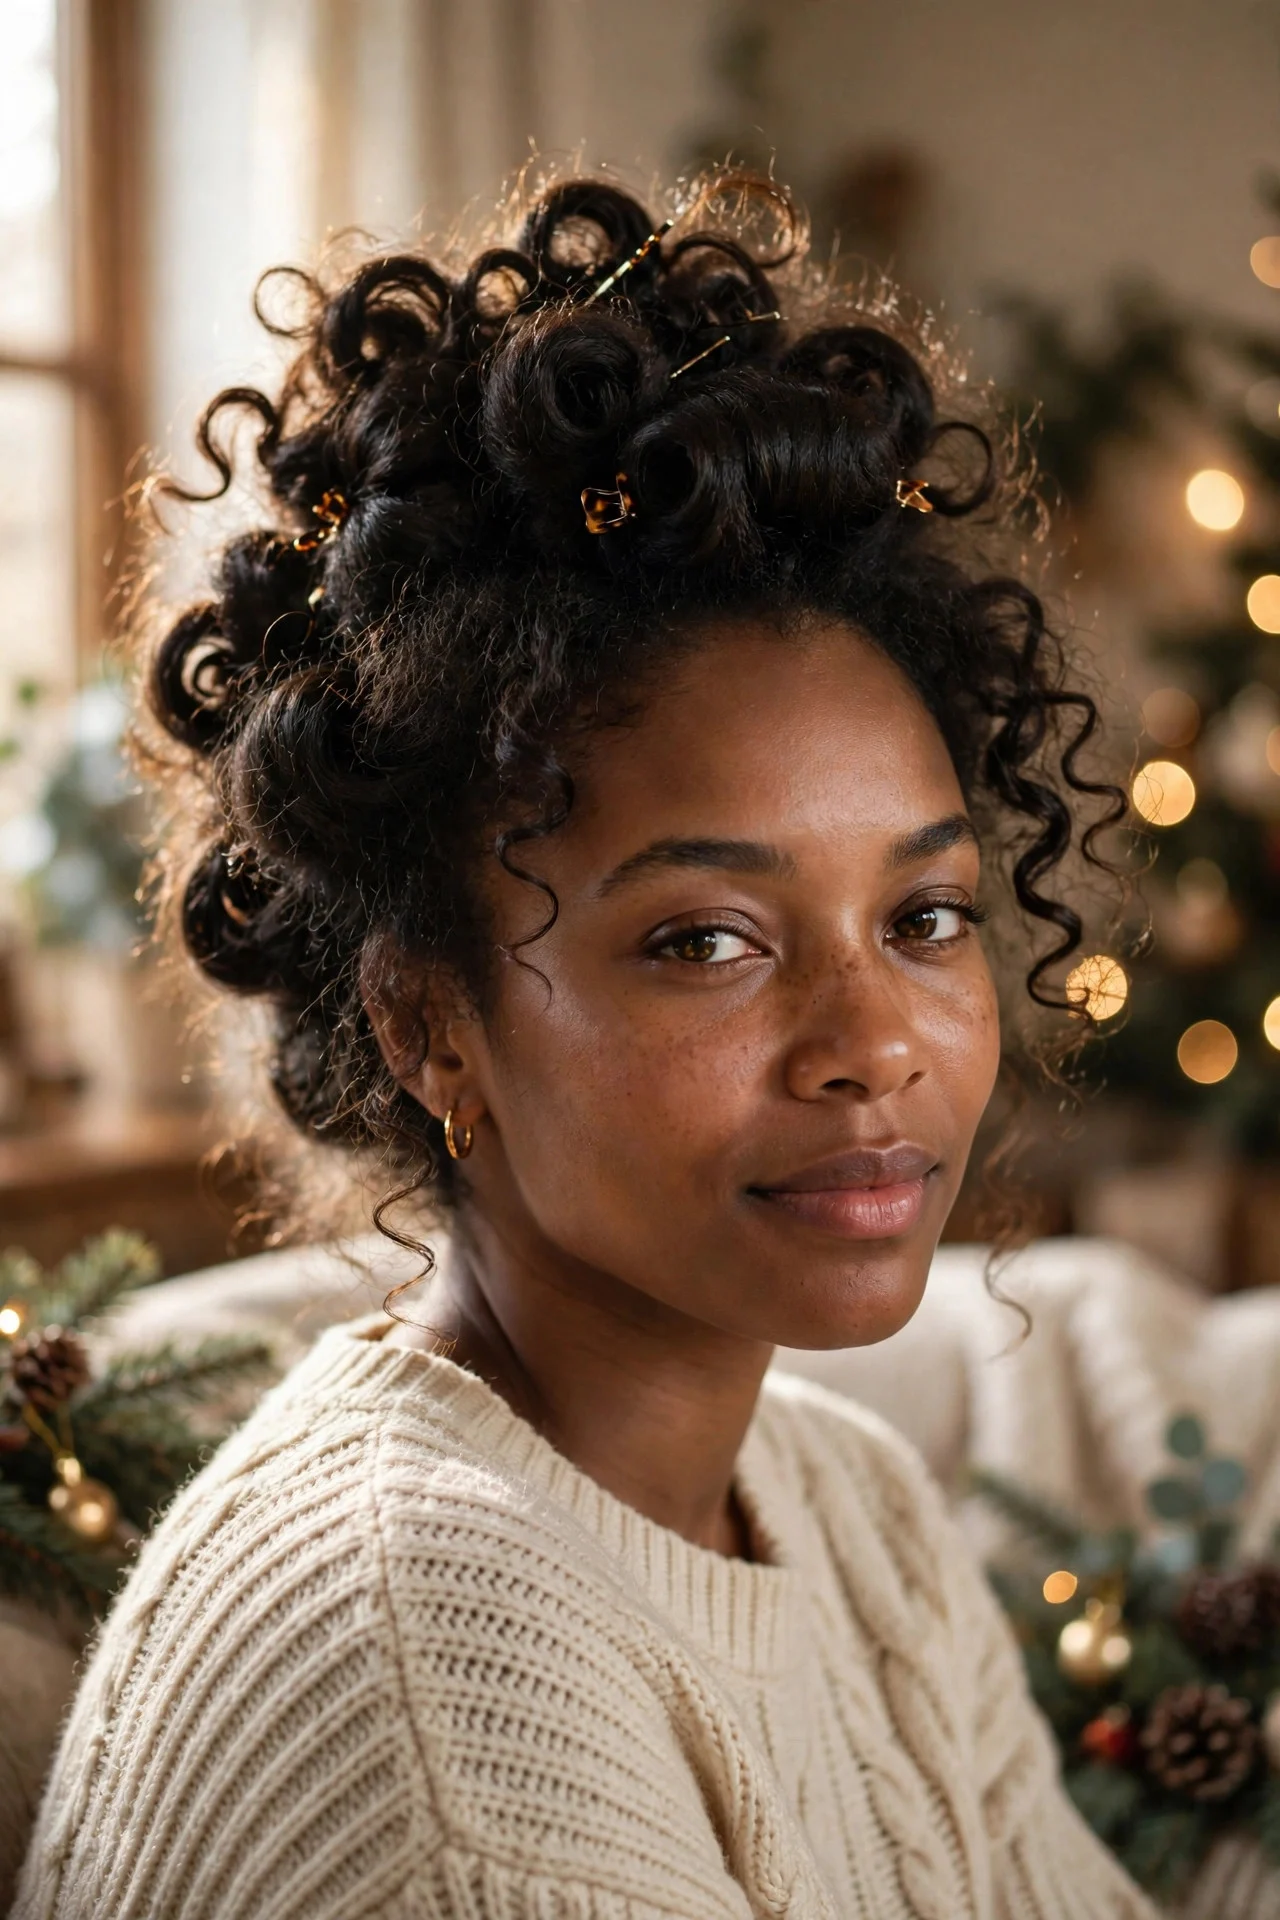
For naturally curly hair, refresh your curls with water and leave in conditioner, scrunching gently until the curl pattern wakes up. Gather the top section loosely at the crown and pin it with a decorative clip, letting the rest fall free around your shoulders. This celebrates your natural texture instead of fighting it, and looks wonderful in family photos. It takes about ten minutes, mostly waiting for the product to settle. The drawback is that curls can frizz once the house warms up, so use a light curl cream rather than a heavy gel and avoid touching your hair after it dries.
How to Make Any of These Last Until Dinner
Start with hair that is not squeaky clean. Second day hair holds styles better because it has natural texture and grip. If you washed this morning, work a little dry shampoo or texturizing spray through the roots before you style. Keep your tools simple: one brush, one comb for parting, elastics that match your hair, bobby pins, and one strong hold hairspray. Do your hair before you put on a high neckline or a fussy sweater, so you are not pulling clothes over a finished style.
If a style starts falling apart halfway through the day, do not rebuild it from scratch. A quick fix usually works better: re pin the loosest section, smooth the front with a damp hand, and add one more mist of spray. And keep a small kit in the bathroom, with pins, an elastic, and a mini hairspray, so you are not hunting through drawers when guests arrive.
How do I style my hair fast on Christmas morning?
Pick a style that uses your hair as it is, not one that needs a full wash and blow dry first. Claw clip twists, low ponytails, and messy buns all work on second day hair and take under ten minutes. Do your hair before you get dressed, and lay out your pins and elastics the night before so you are not searching for them half asleep.
What hairstyle looks good in Christmas photos?
Styles with softness around the face photograph best, like loose waves, a half up twist, or a messy bun with face framing pieces. Avoid anything pulled back so tightly that it flattens your features. A little volume at the crown and a few loose pieces make a big difference on camera, even in a quick phone photo.
Can I do these styles without heat?
Yes, most of them. The low ponytail, claw clip twist, braids, scarf ponytail, and defined curls need no heat at all. The headband style and the half up twist also work without heat if your natural texture cooperates. Only the blowout really depends on a dryer, and you can swap it for overnight braids that you unravel in the morning for a similar wave.
How do I keep my hairstyle from falling out all day?
Use the right anchors for your hair type. Fine, silky hair needs texturizing spray before styling and pins crossed in an X shape. Thick hair needs stronger elastics and larger clips. Finish every style with hairspray, and avoid touching it too much once it is set, since hands pull styles apart faster than anything else.
What if my hair is short?
Short hair works beautifully with several of these ideas. Try the velvet headband, a small claw clip twist, or a half up twist with the top layers pinned back. A scarf tied as a headband also looks lovely on a bob or a lob. Focus on texture and one festive accessory rather than length, and the result will look intentional, not improvised.
Keep exploring
If you liked these christmas morning hairstyles, check out easy Christmas updos, Christmas hairstyles for long hair, holiday party hairstyles for more ideas.